Category: Colleen Balija

  • You Are Loved | by Colleen Balija

    You Are Loved | by Colleen Balija

    Hi friends,

    I took a short break from the blog here, and now I’m happy to be back with you, sharing the love of Birch Press Designs! With Valentine’s Day around the corner, I wanted to share a lovely card using Banner Heart dies and You Are Loved Sugar Script die and hot foil plate. Also, I’ll be using Bevel Plate layering dies, Phlox Blooms & Leaves dies, Memory Box Vintage Pastel paper, and Flora Plate (A only). All of the products used will be listed at the end of my blog post!
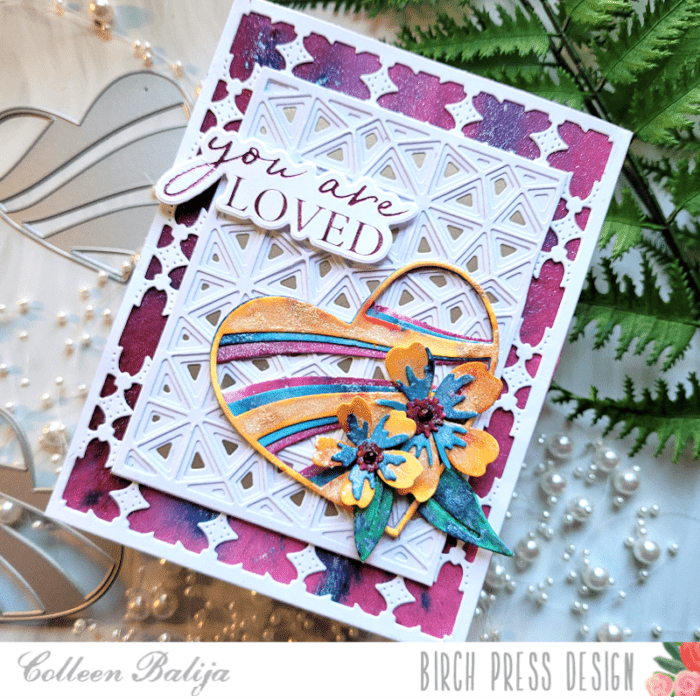
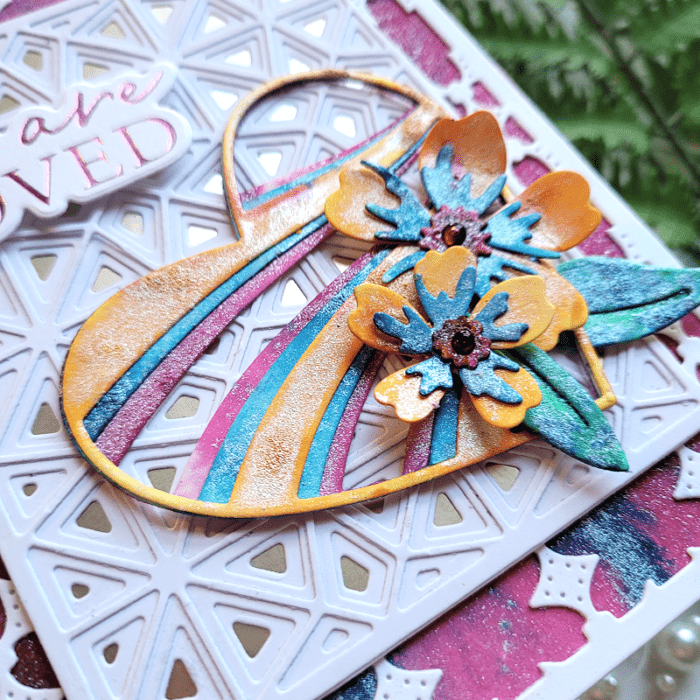
    First, I die cut the Heart Banner and Phlox Blooms & Leaves onto white watercolor paper. I planned to add a lot of color and water, and watercolor paper holds water well. I sprayed the heart and flowers with Lindy’s Magicals in shades of blue, yellow and pink. I love the shimmer these magicals add! I also created a background using pink, red, and blue magicals. Then I set everything aside to dry. When they were dried, I adhered the layers together. In the photo below, you can see a closer look at the heart die and flowers! These are PERFECT for Valentine’s Day!!!
    Next, I focused on adding the layering designs to my card, using Flora Plate Layer A and Bevel Plate layering dies. I die cut all of the dies onto white cardstock. I layered the Flora Plate A over the colorful background to soften the intense color just a bit. I adhered all the layers from the Bevel Plate and placed them over gold cardstock from Memory Box. Then I adhered that over the background panel. The touch of white to the card panel will help the colorful heart, flowers, and sentiment stand out! Plus, the Bevel and Flora dies add beautiful texture!
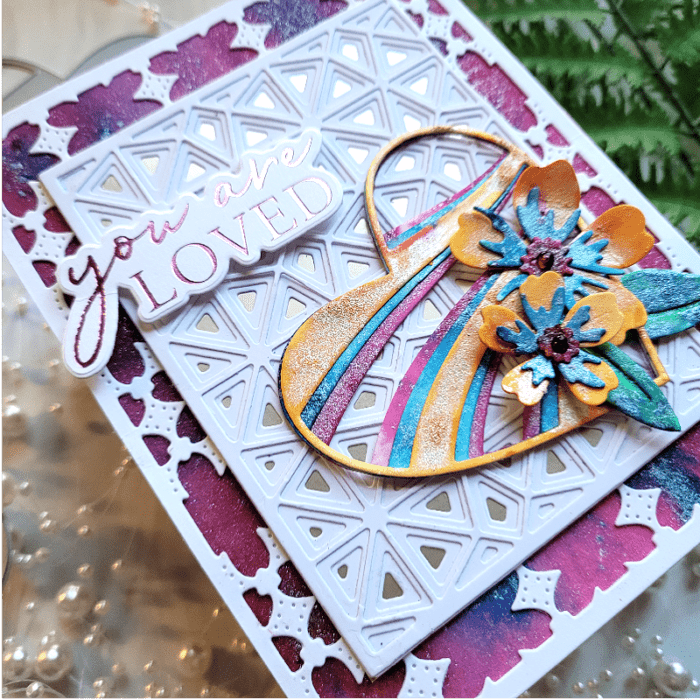
    The next step was to work on the sentiment using You Are Loved sugar script. I hot foiled the sentiment in pink foil over white to coordinate with the background, and then die cut the sentiment using the coordinating die. You can see the lovely, shiny sentiment in the photo above!
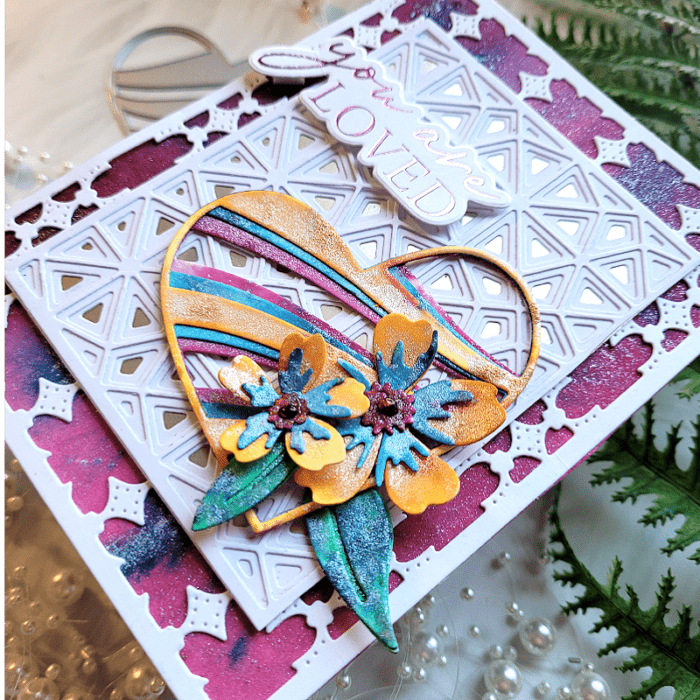
    Now I was ready to put it all together into a Valentine’s Day card! I adhered the Banner Heart layers over the Bevel Plate dies in the lower right corner. Then I added the flowers and coordinating leaves to the corner of the heart using foam tape for the smaller flower. I love how the colors blend so beautifully! Then I placed the sentiment to the upper left corner using foam tape. I finished with a couple of clear drops over the center of the flowers! Below is one more look at the finished product!
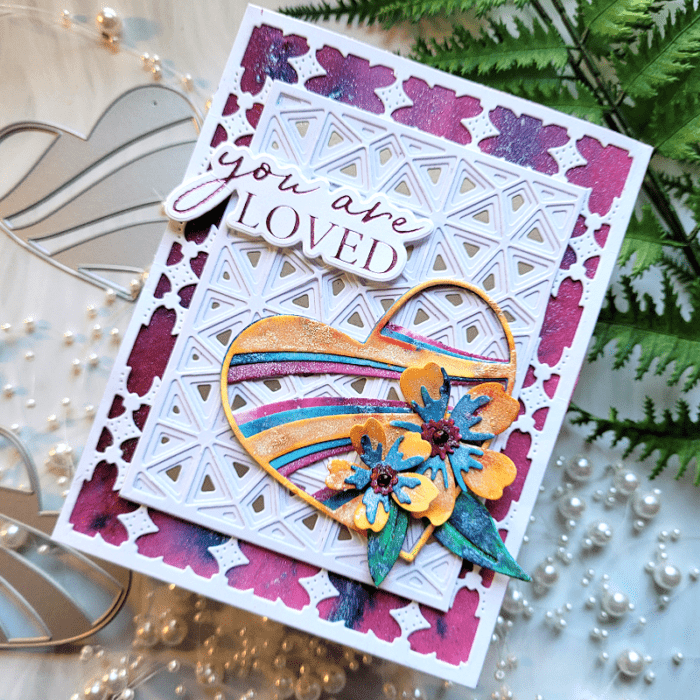
    I’m so happy you stopped by today!

     

    Supplies
     

  • Merry Christmas Wreath | by Colleen Balija

    Merry Christmas Wreath | by Colleen Balija

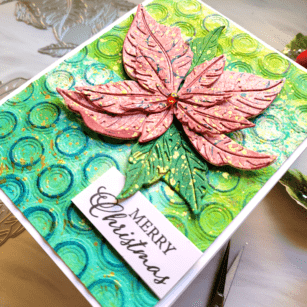
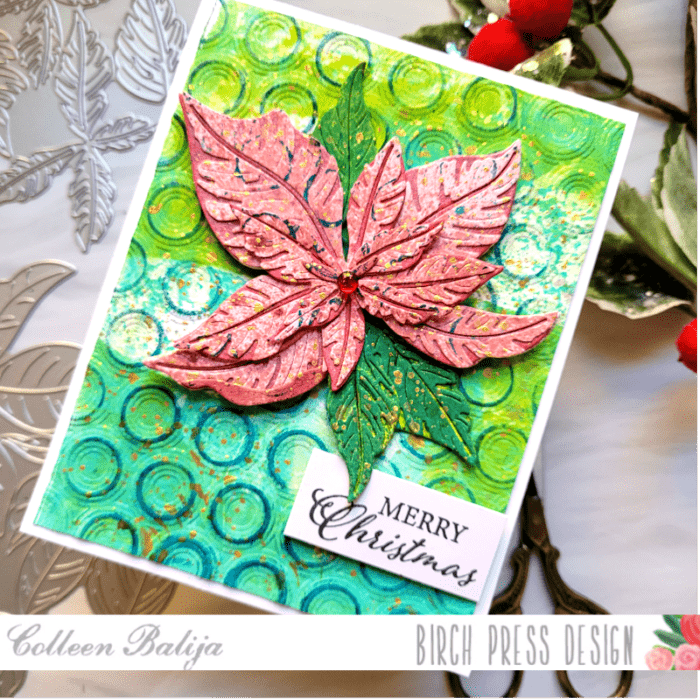
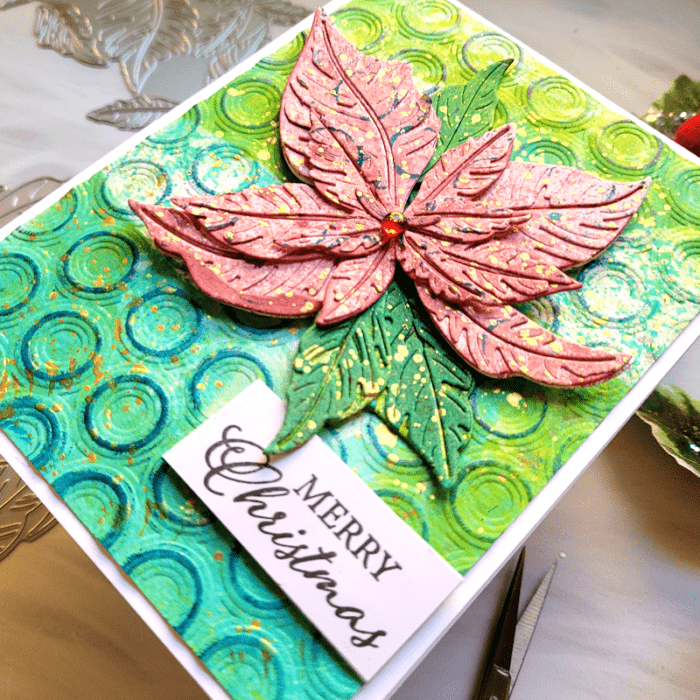
    Hi there friends! I’m back this month sharing another holiday card using the new Splendid Poinsettia Contour Layers! This is a lovely poinsettia that you’ll want in your stash for your holiday cards! You could say I’m getting a head start on my holiday cards! I’ll also be using Memory Box Glad Tidings Stamp and Fairy Crystals, and Memory Box RingaDings embossing folder! All of the links to supplies I’ve used will be shared at the end of my post!

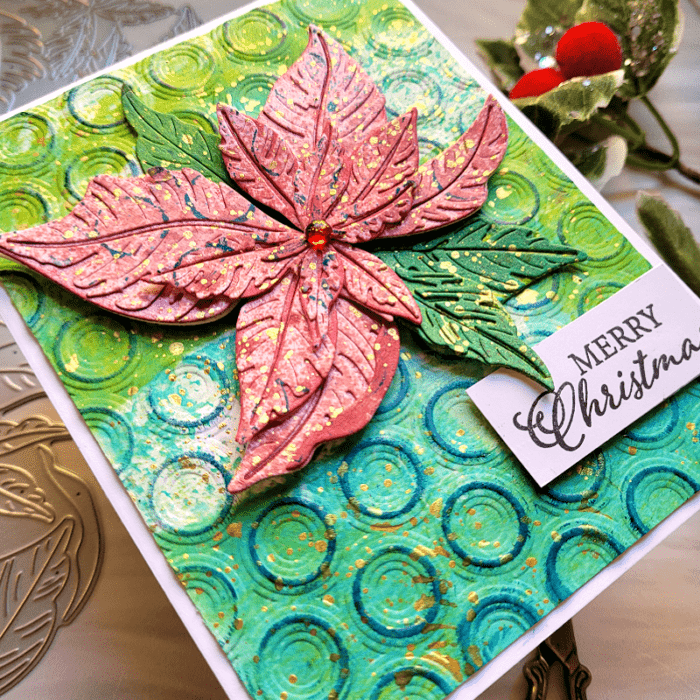
    I started with a colorful background, choosing a pre-made colored card panel, and embossing over it using RingaDings embossing folder. This is a favorite embossing folder of mine! Then I applied dark blue ink over the raised areas on the card panel to add depth and interest, trimmed it down, and set it aside. Below you can see a good visual of that bold and busy background!

    TIMESAVER TIP: I like to take a craft day and just create background card panels with different ink medias such as acrylic paint, distress oxides or sprays, or dye inks. That way I can just grab a background panel when I need it and just add more details to coordinate with my focal point!

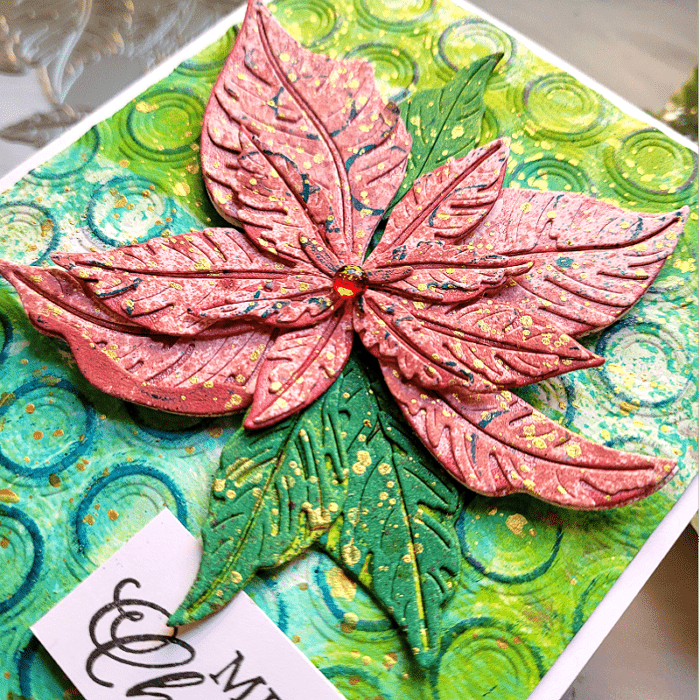
    Next, I focused on the lovely poinsettia and leaves! The Poinsettia has a few layers, so I die cut each layer onto heavy white cardstock (or you could use watercolor paper) and then sprayed the layers with shades of red. The bottom layers are darker than the top layers (I find that doing this adds more depth). I also splattered the same dark blue ink from the background over the poinsettia to bring the blue from the background to the foreground. I repeated this process for the leaves, only in shades of teal. Then I adhered the layers together. I placed the poinsettia in the upper 3rd of the card panel and tucked the leaves in behind it. Then I splattered the entire panel with gold ink. You can see a close up of all those glorious details in that beautiful poinsettia! Birch Press Designs does an amazing job with the details in their dies!

    When the splatters were dried, I adhered the card panel to a 5.5×4.25 white card base and then finished with a red Fairy Crystal on the poinsettia and the sentiment Merry Christmas from Glad Tidings stamp by Memory Box. This card was so easy to put together!

    I’m so glad you joined me today, and I hope that you’re getting some great ideas for your holiday cards!

    Supplies

  • Holiday Hugs | by Colleen Balija

    Holiday Hugs | by Colleen Balija

    Hi friends,

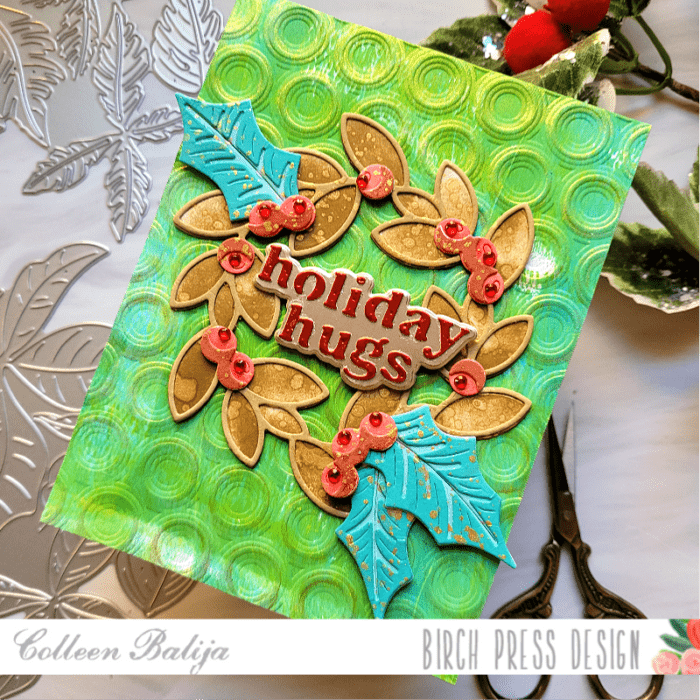
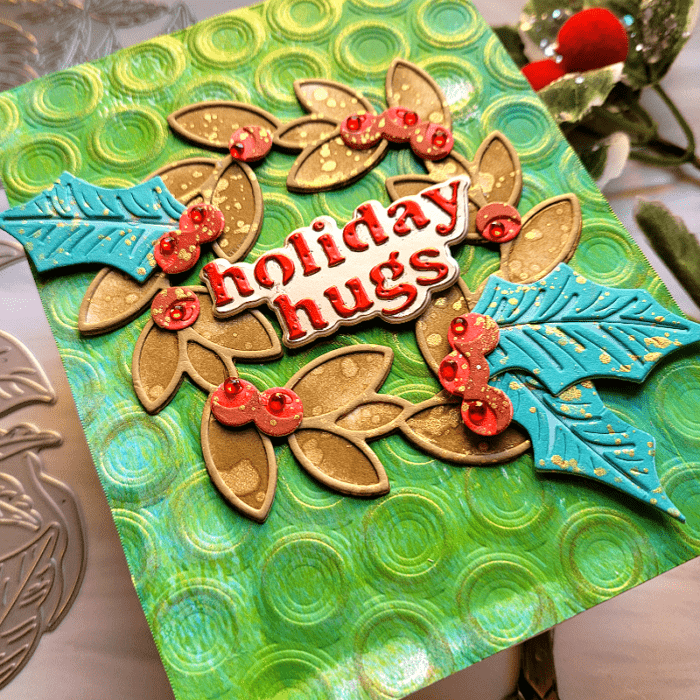
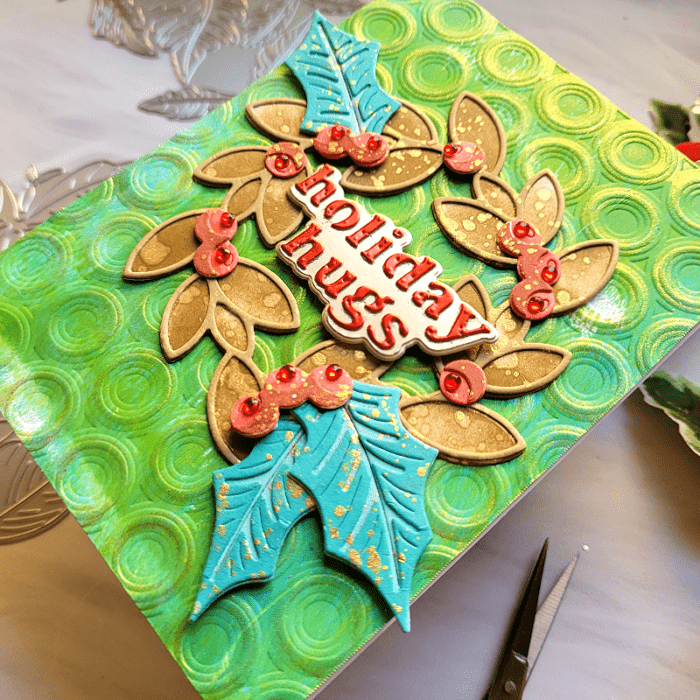
    With the holidays upon us, I wanted to share a festive card using the new Holiday Hugs die and Adornment Wreath die! This layered wreath can be used all year long just by changing up the colors and foliage!!! I will also be using Memory Box RingaDings embossing folder, Jolly Holly Contour Die, and Memory Box paper. All supply links for this card will be listed at the bottom of my post!

    First step was to prep my dies, so I die cut the 2 layers of the Adornment Wreath onto white cardstock along with the Jolly Holly Contour die (leaves and berries). Then I ink blended the wreath in 2 shades of brown, the leaves in 2 shades of teal, and the berries in 2 shades of red. I use 2 shades of color to bring the designs to life! Then I adhered the layers together and splattered gold ink over all of it. The gold ink adds a classy touch of glimmer! Below is a close up of the finished wreath and foliage!

    Once my focal point was completed, it was time to focus on the background. Starting with a pre-colored piece of cardstock in shades of teal and green, I embossed over it with RingaDings embossing folder and applied gold ink over the raised edges. The gold in the background helps the gold on the focal point to pop! I love the distressed look of teh background! The picture below is a good visual of it!

    TIP: Although I die cut everything in white and then added color, you could easily do the opposite by applying color to a card panel and then die cutting 2nd!

    Last step was to adhere the focal point centered over the background, placing a few of the leaves onto foam tape for added dimension. I added Memory Box red sequins over the berries for added shine! The Holiday Hugs sentiment was die cut using Memory Box’s gold and red mirrored cardstock and then placed onto foam tape in the middle of the wreath!

    I’m so glad you joined me today! Below is the full supply list!

    Supplies

  • Autumn Foliage Delight | by Colleen Balija

    Autumn Foliage Delight | by Colleen Balija

    Hi friends!

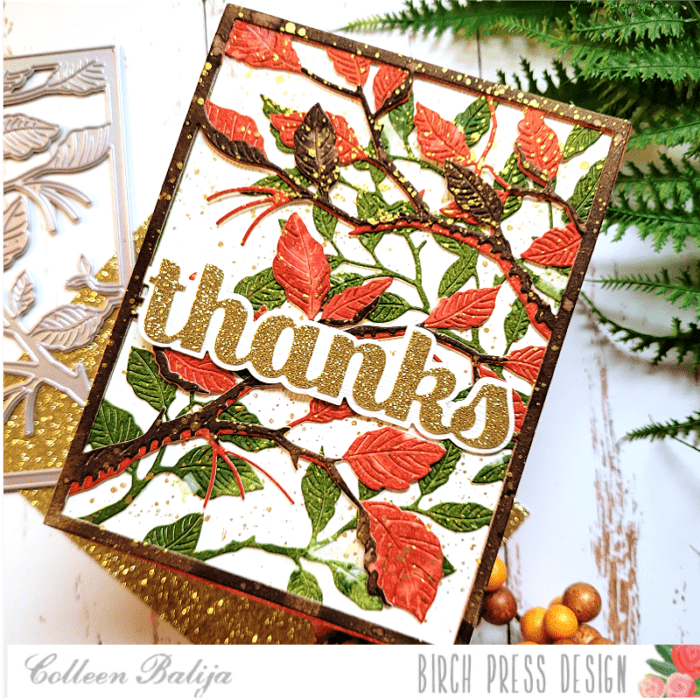
    I’m back this month with another fall card, because well….I just can’t get enough of fall! Next month will be holiday cards, but this month I just want to embrace the beauty that is fall! I live in the Midwest of the United States, and we get some breathtaking colors and scents of fall! So, here is my fall card using Forest Canopy Layering dies and Thanks Sugar Script and Memory Box Cream Woodgrain paper! I will list the links to products used on my card at the end of this post!

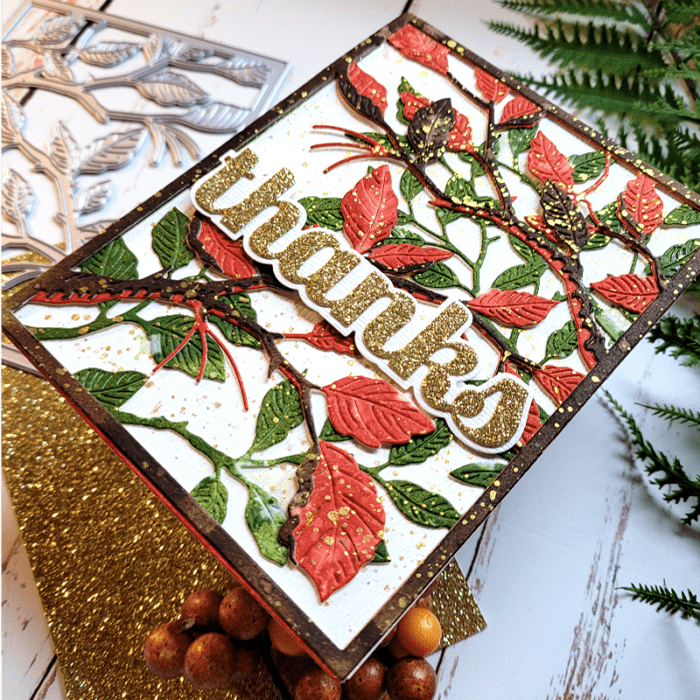
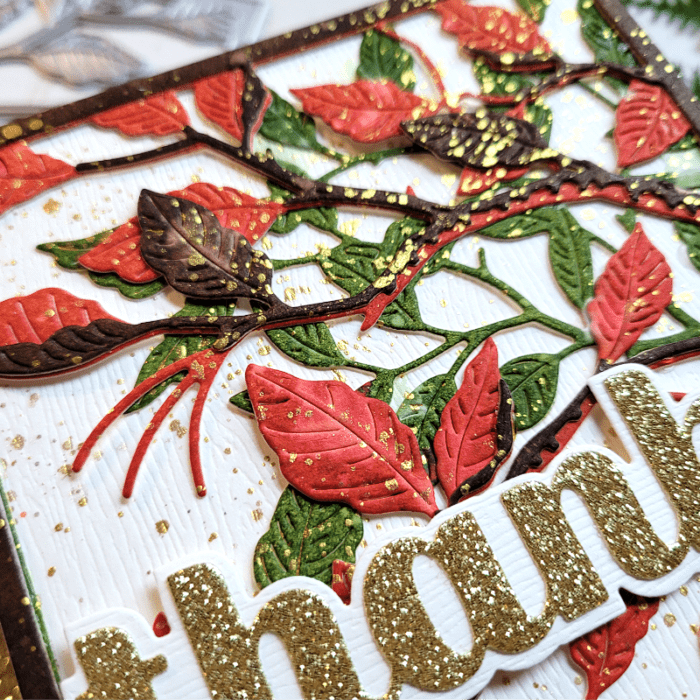
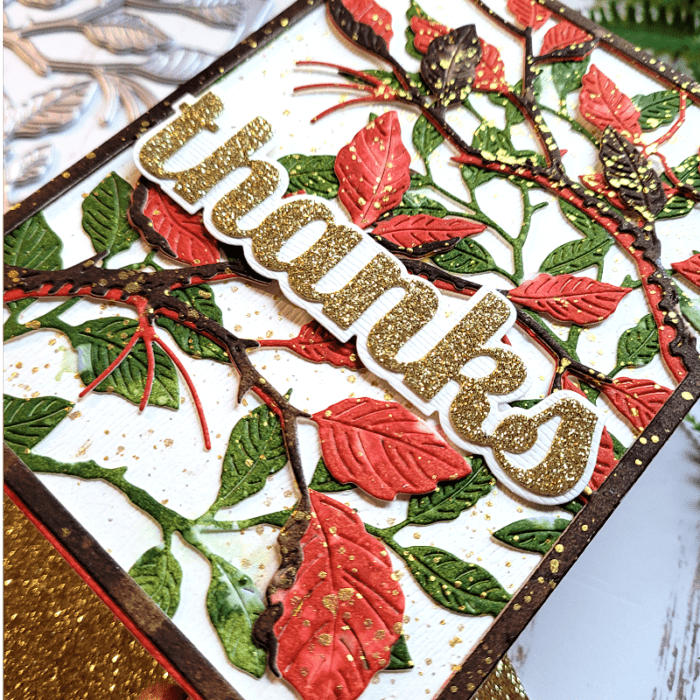
    This card may look detailed, but it was quite easy! I started by inking up 3 watercolor card panels in my favorite fall colors using reactive inks, and then die cut the 3 layers from Forest Canopy Layering die over each of the colors. I LOVE this die set because it is just so detailed with embossed images over each of the leaves! I adhered the layered leaves together and placed them over Memory Box’s Cream Woodgrain cardstock. Then I sprayed a bit of water over the leaves to get the ink to react. I love the result! You get this really cool, distressed look that adds another level of detail to your card! You can find reactive inks just about anywhere. My favorites are Catherine Pooler and Hero Arts! I added gold splatter over the entire panel. Look closely in the photo below to see all the detail in the leaves and how the ink reacts to water!

    I originally planned to add a pumpkin over the leaves, but after seeing how beautiful the leaves turned out, I decided not to cover it up! So, now I just needed a bold sentiment that would stand out from all that glorious detail, and Thanks Sugar die was up for the challenge! Below is a good photo of that sentiment! It’s large and bold and the PERFECT touch if all you want to add over your design is a sentiment!

    For the Thanks sentiment, I die cut the bottom layer in Cream Woodgrain paper and the top layer in Festive Glitter in gold, adhered them together, and placed it over the background with foam tape. The entire panel rests on a white 5.5×4.25 card base. I love how the gold from the sentiment makes the gold splatter pop a bit more!

    Birch Press dies are so detailed that you really don’t need to add much to have a beautifully detailed card! Just a little ink, splatter, and a large bold sentiment and you’re done! Keep in mind that the Forest Canopy Layering dies can also be used for your holiday colors – just change up the color scheme! Thanks for stopping by!

    Supplies


  • Warm Autumn Wishes with Adornment Pumpkin Die | by Colleen Balija

    Warm Autumn Wishes with Adornment Pumpkin Die | by Colleen Balija

    Hi friends!

    With fall upon us in full swing, I wanted to make a festive autumn card using Adornment Pumpkin die set! I’ll also be using Warm Wishes layering die, Hillside Branch & Contour Layers, Adornment Oak Leaf die, Splendor Bevel Plate (Layer A only), Memory Box Cream Woodgrain paper, Memory Box Vintage Pastel Mirror paper, and Memory Box Ringadings embossing folder! All of the product links will be listed at the end of my post!

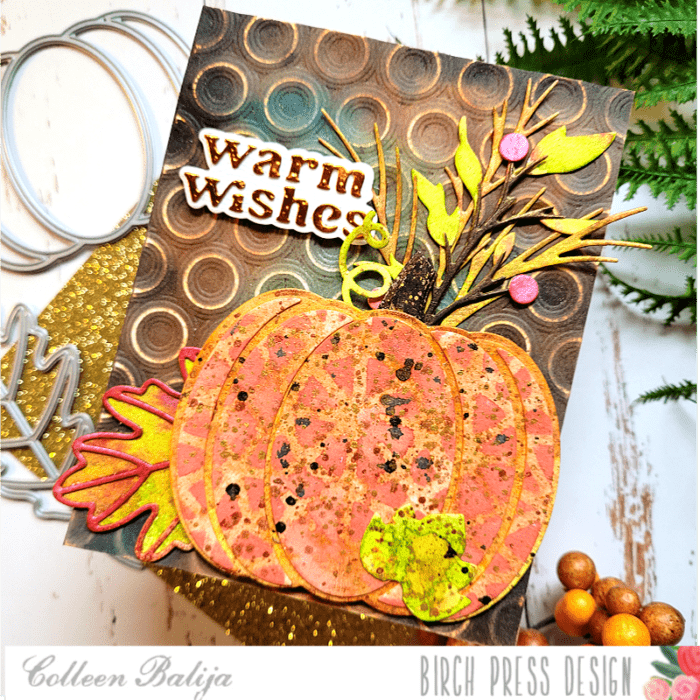
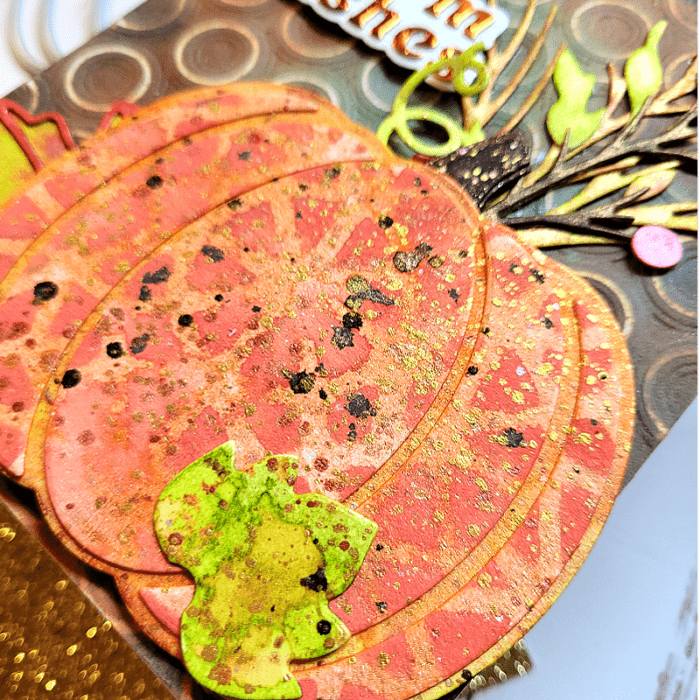
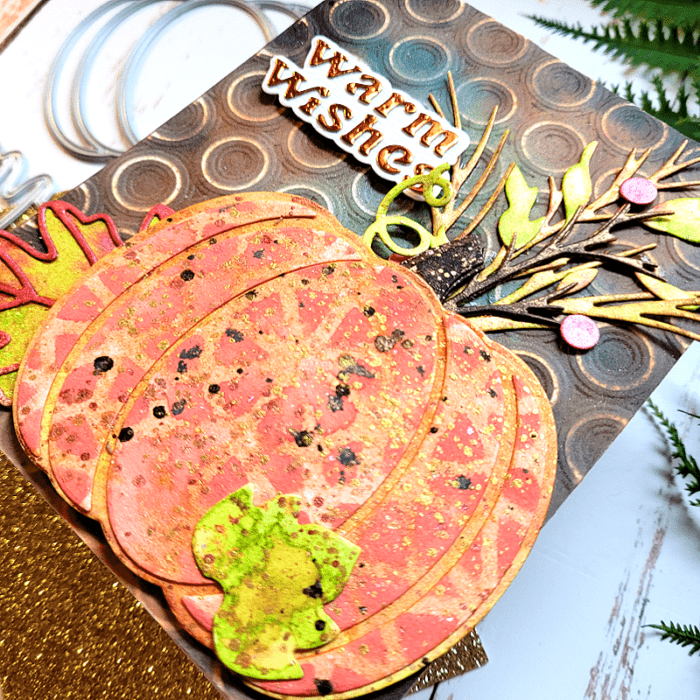
    I’ve been seeing pumpkin cards where the pumpkins have been stamped with a design, so I decided to do that with the Adornment Pumpkin! I die cut the layers on watercolor paper and sprayed them with Hero Arts Orange and Bright Yellow shimmer sprays. These sprays add a really cool shimmer that I wanted to get with my pumpkin! Next, I grabbed Splendor Bevel Plate Layer A and used it as a stencil, applying color through the die onto the top layer of the pumpkin using a darker orange ink. I applied green spray over the leaf and brown over the stem. Then I adhered the layers together and splattered gold and dark brown inks over the top. Then I set my festively decorated pumpkin aside for later! Below is a close up of the details on my pumpkin, I love it!!!!!

    Next step was to work on the foliage that I wanted to place around the pumpkin. I die cut Hillside Branch & Contour Layers and Adornment Leaf die on watercolor paper and then sprayed those the same way I sprayed my pumpkin. Then I adhered the layers together.

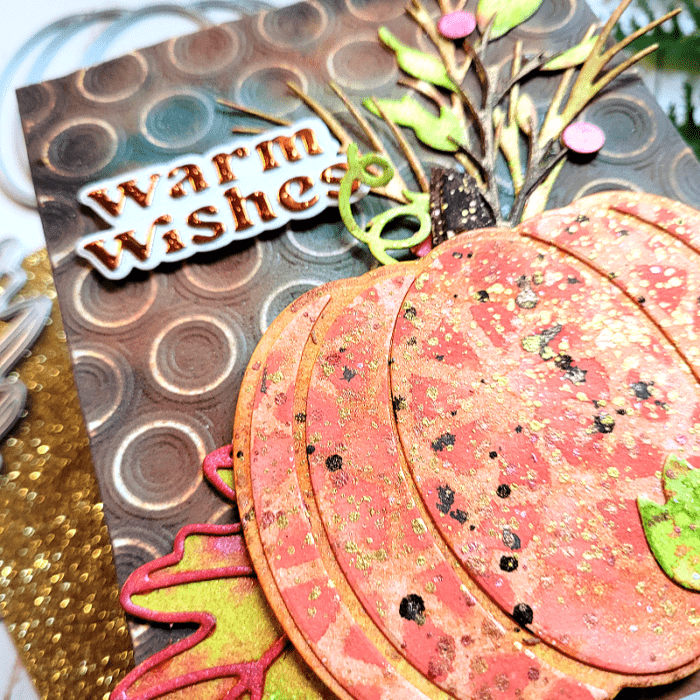
    Now for the background! I grabbed a colored card panel that I had in my stash (I occasionally create several background panels to be used when needed – it’s really handy!). Then I embossed the panel with Ringadings embossing folder. This folder is AWESOME! Next, I used a sanding tool to remove a layer of ink from the raised areas of the embossed image. You can see how the circles are almost white! This is an easy technique that adds another element of detail and is amazing for mixed media! I adhered the panel to a white 5.5×4.25 card base. Also, I die cut the layers of Warm Wishes using Memory Box Cream Woodgrain paper and a bronze shade from the Vintage Pastel Mirror paper. I adhered the pumpkin and tucked the foliage in behind it, and then finished with the sentiment.

    TIP: To place the letters of your sentiment in the exact position, I place the outer portion (negative) of the die over the base layer (which was the Woodgrain Cream color) but don’t adhere it! Then I add glue to the letters and tuck them inside the positive part of the die. I gently pull the negative portion off using a pick to ensure the letters stay in place and don’t lift with the outer die! Easy peasy!

    I love how the background is quite dark compared to the colorful pumpkin and foliage. That really helps the focal point to pop! Thanks for stopping by today!

    Supplies


  • Fall Adornment Oak Leaves | by Colleen Balija

    Fall Adornment Oak Leaves | by Colleen Balija

    Hey friends,

    It’s getting to that time of year when the leaves turn on the trees and we begin to crave hot cocoa and Pumpkin Spice Lattes! Yummm! Fall time of year can be messy and yet it can also take your breath away with the sights and smells! So today’s card is a tribute to all that is fall! I will be using the NEW Adornment Oak Leaf die, Membory Box Ringading embossing folder, and Memory Box Gracious Gloral stamp set.

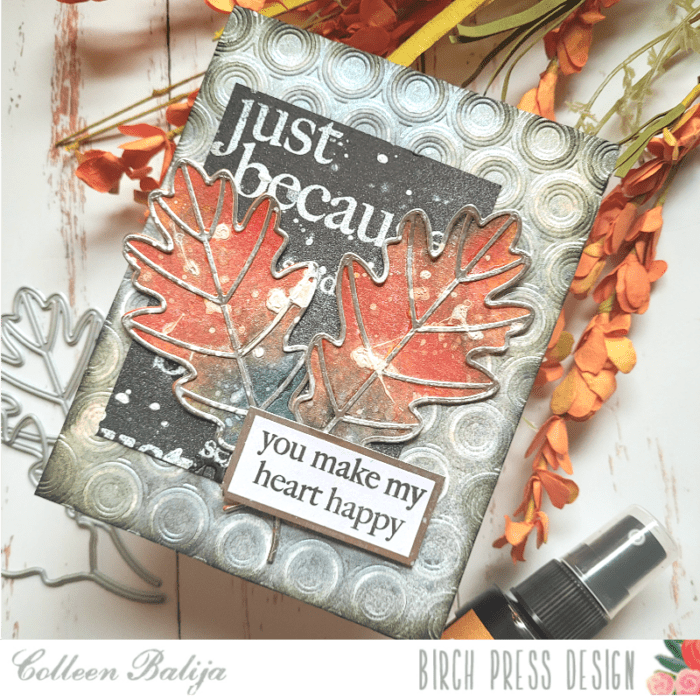
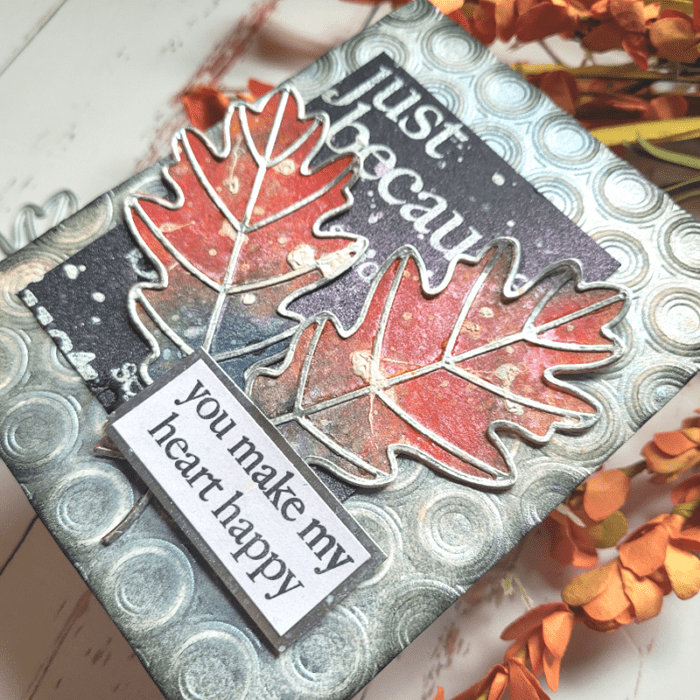
    I started with the Adornment Oak Leaves by die cutting two of the base layers onto a card panel that I had sprayed in various autumn colors. Next, I die cut the 2nd layer using silver cardstock. I splattered white ink over the leaves to finish and set them aside to dry.

    Next, I worked on the black backdrop that would sit behind the leaves and the background. I trimmed a piece of black cardstock and then heat embossed 2 sentiments from Memory Box Gracious Floral stamp in white embossing powder. Then I added some white splatters and set it aside to dry. This technique of randomly stamping a sentiment is a great mixed media tool that is easy to do and very effective! It takes a piece of plain black cardstock and adds subtle detail and interest!

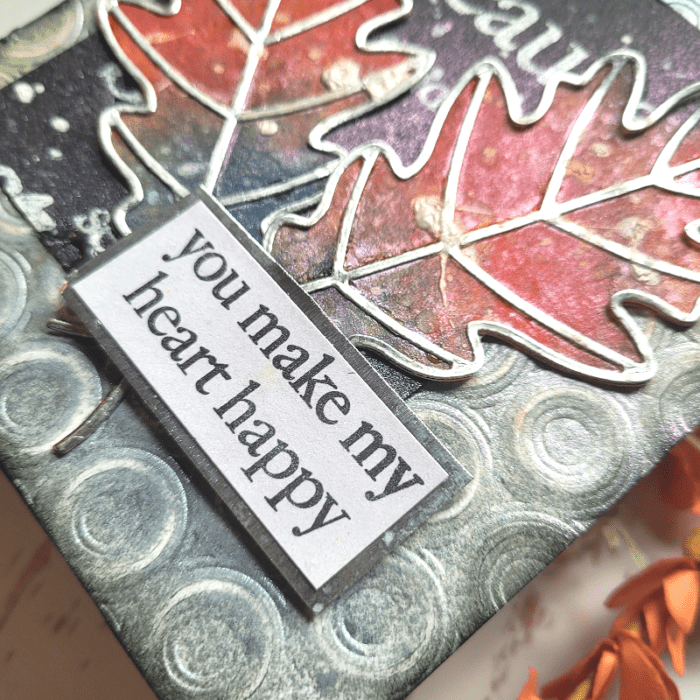
    The background panel was created using Memory Box Ringadings embossing folder, which I embossed over a card panel that was sprayed in shades of grey and tan Mica. The Mica adds texture and shine, another great mixed media tool! If you don’t have sprays, not to worry! Just use your inks and you’ll achieve a similar look.

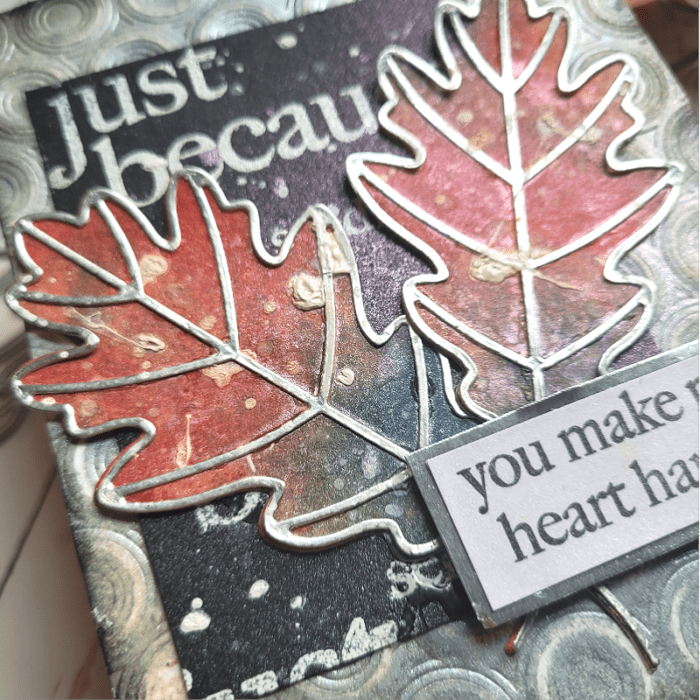
    After I embossed the image, I went over the raised parts of it with a sander and removed some of the color. You can see in the photo below the distressed look this technique provides! And it’s so simple to do!!! By the way, you can find sanders at just about any craft store! It’s a great tool to keep in your stash!

    The last step was to put everything together. I adhered the embossed panel over a 5.5×4.25 white card base, and then adhered the black panel over it, slightly off center to the left. Then I added the 2 Adornment Leaves and a sentiment from Memory Box Gracious Floral!

    This card may look complicated, but it was so easy to create, and you can do it with your own stash! Thanks so much for stopping by today!

    Supplies
     

  • Colorful Adornment Pumpkin | by Colleen Balija

    Colorful Adornment Pumpkin | by Colleen Balija

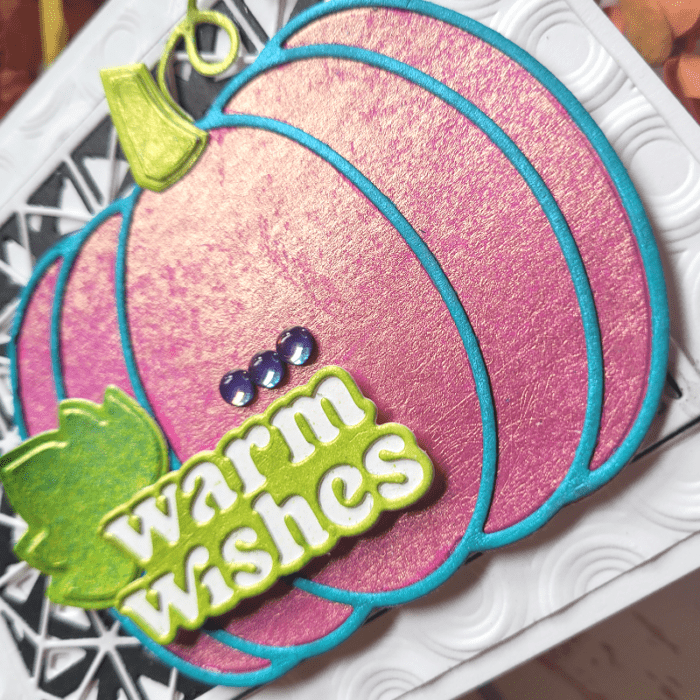
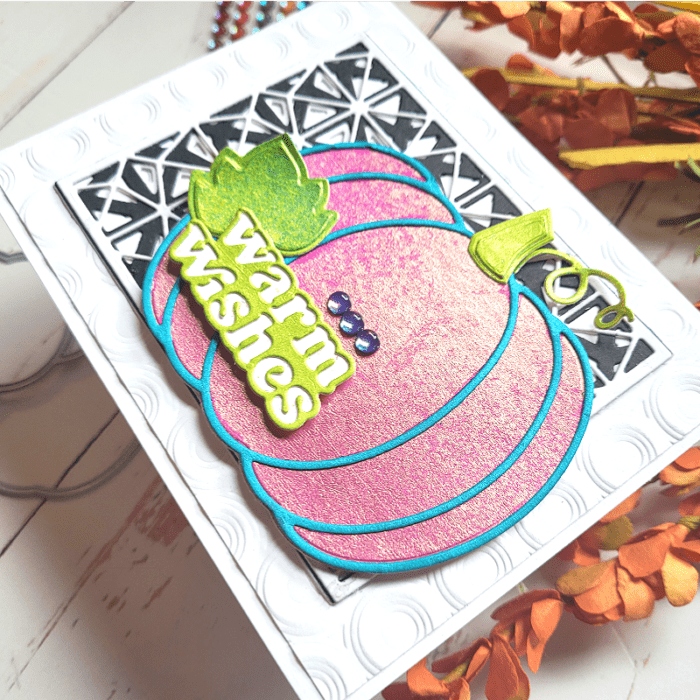
    Hi friends! As we near the end of summer and welcome fall into (most of) our lives, I wanted to share a card using the NEW Adornment Pumpkin. But…I am adding a playful twist by experimenting with color! So today I will share my version of the ideal pumpkin using Adornment Pumpkin die set, Splendor Bevel Plates, Memory Box Ringadings embossing folder, and Warm Wishes sentiment die!

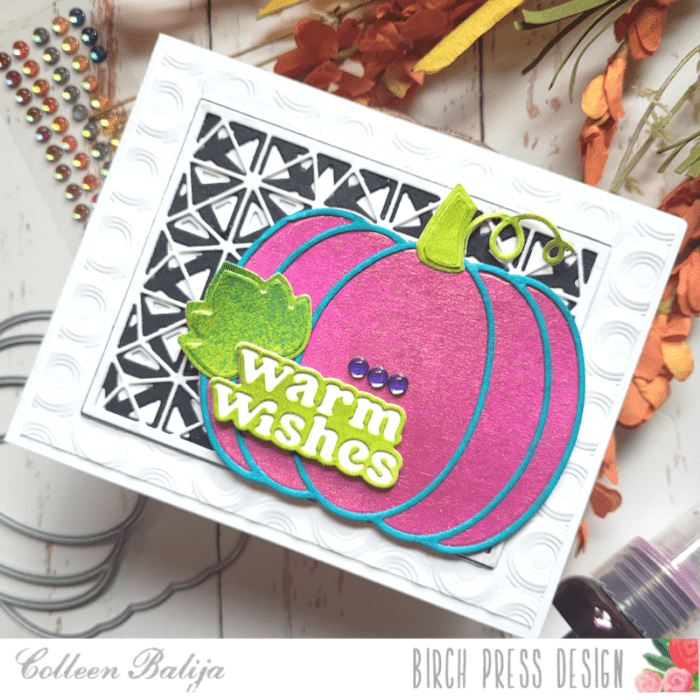
    The first step was to decide on the color of my pumpkin. Using my Hero Arts shimmer sprays as inspiration, I created a fuchsia and aqua pumpkin with shimmery green foliage! To achieve that fun pop of color, I die cut the pumpkin layers onto white watercolor paper, placed them in a box that I use solely for my sprays (keeps the mess down!), and sprayed the pumpkin layers with the fuchsia and aqua sprays. When they dried, I adhered the layers together. Also, to give the pumpkin more depth and support, I die cut the base layer 2 more times and adhered them all together. Here is a closer look at the shimmer and shine of that pumpkin!!!

    Isn’t she a beauty? Next, I created the sentiment using the new Warm Wishes layered die. The base layer of the sentiment is white, and the 2nd layer is done with the green spray. I used only the negative part of “Warm Wishes”. But you could also pop the in the positive portion as well and use a different color!

    Now I was ready to work on a complimentary background!

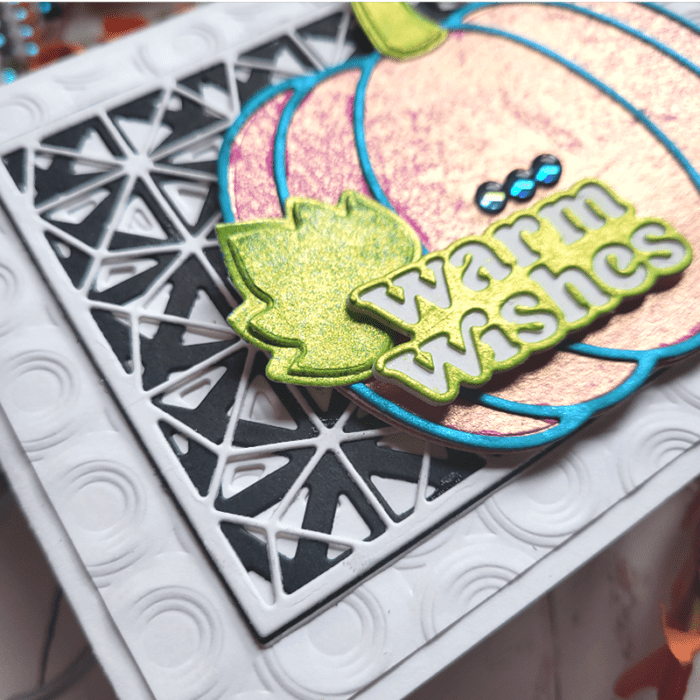
    The background needed to be neutral since the pumpkin was so bright that you need sunglasses to look at it, ha ha! I dry embossed a piece of white cardstock with Memory Box Ringadings embossing folder, trimmed the panel to 5.25×4, and placed it over a 5.5×4.25 white card base. Then I created a geometric frame over the embossed image using Splendor Bevel Plates on black and white cardstock. I love the geometric look and the texture that both the embossing folder and dies added!!!

    The last step was to place the pumpkin and sentiment over the background that I had just created. I offset the pumpkin to the right of the Splendor Bevel Plates just for interest, and added the green stem with foam tape so it was in alignment with the pumpkin. I placed the sentiment and the leaf together at the bottom left of the pumpkin and finished with Memory Box Treasury Chest Fairy Gemstones over the sentiment.

    Next time I make a card using this pumpkin, I may play with color once again! Who says a pumpkin has to be limited to orange, right? Thanks so much for stopping by today!

    Supplies


  • Sending a Caring Thoughts Card | by Colleen Balija

    Sending a Caring Thoughts Card | by Colleen Balija

    Hi friends!

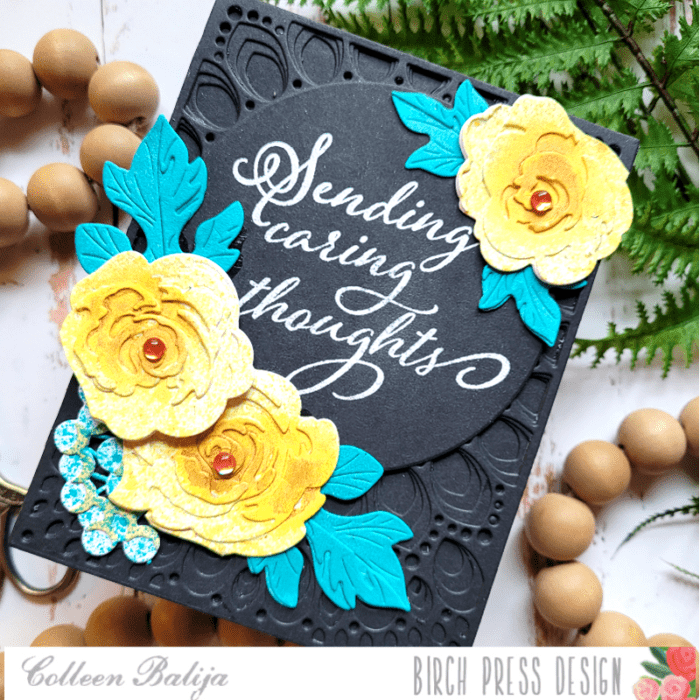
    I don’t know about you, but I never seem to have enough sympathy or thinking of you cards for my friends who may be struggling in life, so I wanted to create one with you today! Colors play a huge role in the message you send in a card, and I’ll be sharing more about that in my post. I’ll be using Grace Contour Layering dies, Kind Hearts stamp, Forest Leaf & Berries Contour Layering die, Rose Bunch Contour Layering die, and Fairy Gemstones. All of these products will be linked at the end of my post.

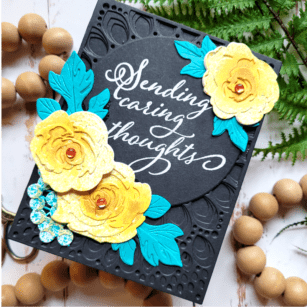
    I knew right away that I wanted to use the bold and beautiful Sending Caring Thoughts sentiment from Kind Hearts stamp, so the next step would be to determine my color scheme to coordinate with that sentiment. As I mentioned earlier, color plays a huge role in the message you convey to the recipient of your card. You wouldn’t want to send a sympathy card in bright red or a congrats card in all black, right? What kind of message would that convey? So, color is important to coordinate with the sentiment of your choosing. Here, I’ve got yellow, teal, and black. The yellow conveys a happy and hopeful message, while teal and black are more subdued. I felt that the balance of yellow with the more subdued colors would convey a thoughtful message of caring and hope that coordinates with my sentiment. If this was a sympathy card, I would likely use flowers in shades of blue rather than yellow.

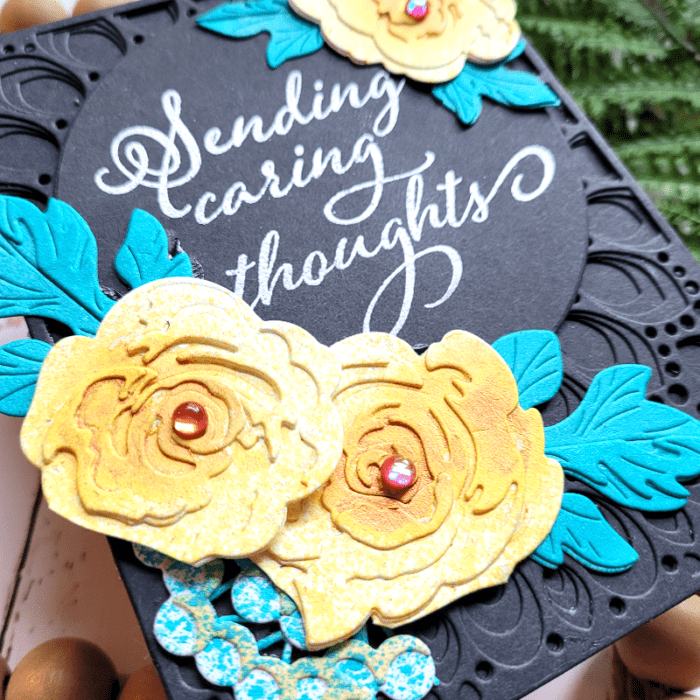
    Now that colors and sentiment have been chosen, it was time to create the background and stamp the sentiment. In the photo above, you can see all the detail in the black background with the white sentiment that seems to pop off the page! Using Grace Contour Layering dies, I die cut each layer in black and adhered them together over a black card base. I die cut just the circle outline from the set, stamped the sentiment using embossing ink, and then embossed it in bright white powder. The sentiment was added with foam tape.

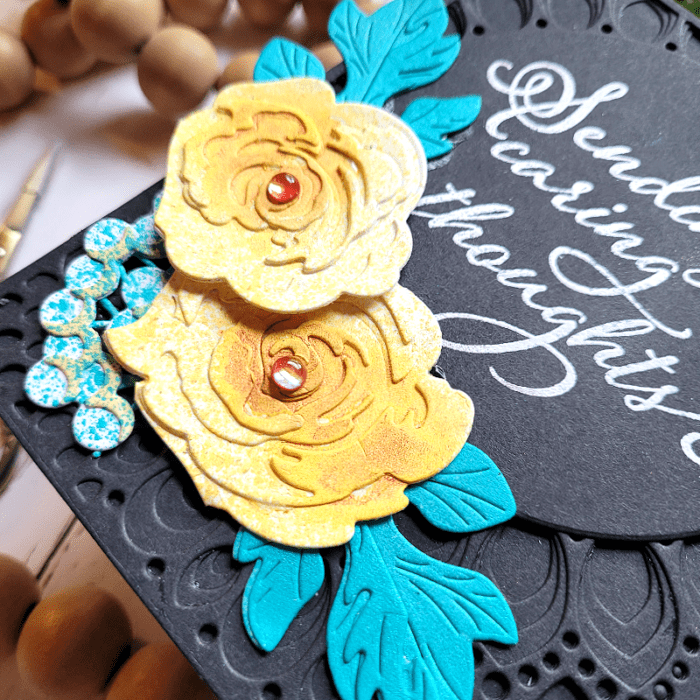
    Next, I worked on the flowers and leaves. I wanted ones that would frame the sentiment, so I chose the Rose Bunch Contour Layering dies and the NEW Forest Leaf & Berries Contour Layering dies to tuck in behind the roses! These leafy dies will be PERFECT in your stash!!! I die cut everything and adhered the layers together. Then I used Hero Arts Metallic spray over the flowers and leaves to give a shimmery, bold effect! You can see how vibrant the colors are in the photo below, as well as the details in the BPD dies! Their dies are hands down the best!!!

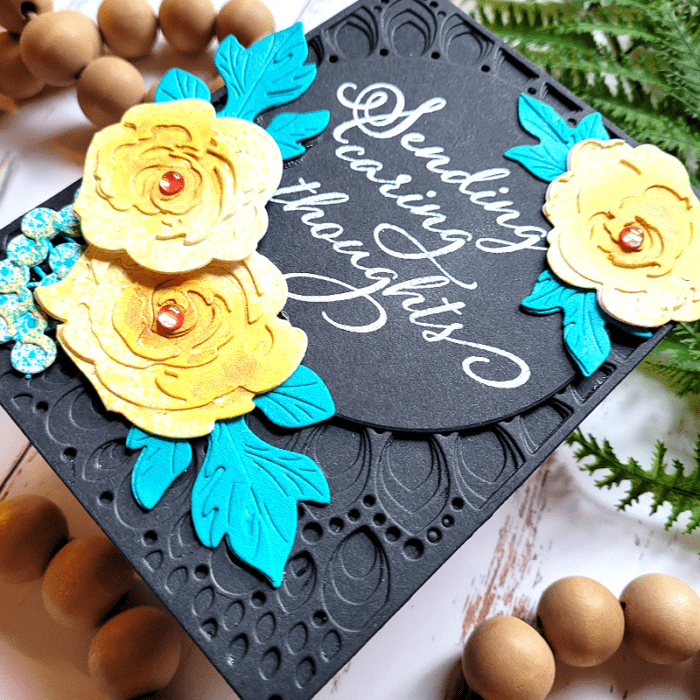
    Once I completed the flowers and leaves, I staged them around the sentiment on the background panel and adhered everything once I was satisfied with placement. One of the flowers was put on foam tape to add a little dimension. I finished with Gemstones over each of the flowers!

    I love how much the flowers and leaves pop against that gorgeous black. And the details in the background stand out despite the fact that they are done in one color! I think this card will provide a hug to someone that needs it. Thanks so much for stopping by!


    Supplies
     

  • Using Neutral Colors on Flowers and Leaves | by Colleen Balija

    Using Neutral Colors on Flowers and Leaves | by Colleen Balija

    Hi friends,

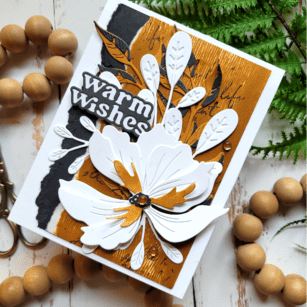
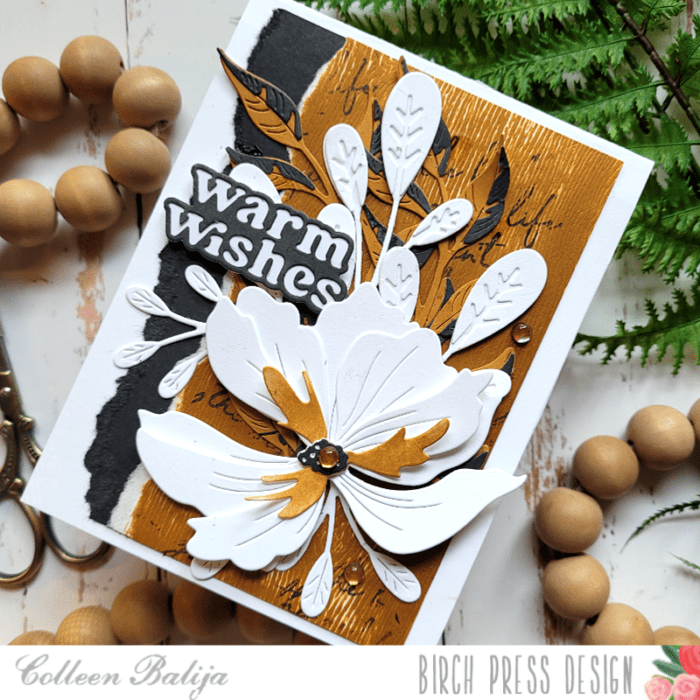
    I like to get really playful with color palettes on my cards, and I’m always on the search for new inspiration! Recently I found a card on Instagram that used neutral colors and the end result was just so cool! So, I decided to test those colors out on my next BPD card, and today I want to share with you how I brought my card to life using neutral colors! I’ll be using Large Cosmos Contour Layer die, NEW Curved Leaf Branch Contour Layers die, NEW Oval Leaf Branches Contour Layer die, Memory Box Woodgrain paper, Warm Wishes die, and NEW Fairy Gemstones! You will find a link to these products at the end of this post.

    Generally, my first step in creating a card is to choose the color palette. In this case, I went with a wheat color along with black and white! I searched for an ink color that was closest to the Wheat color I wanted. Next, I die cut the BPD flowers and leaves and adhered the layers together. I love how BPD embosses each layer, making it easy for you to build your layered dies!

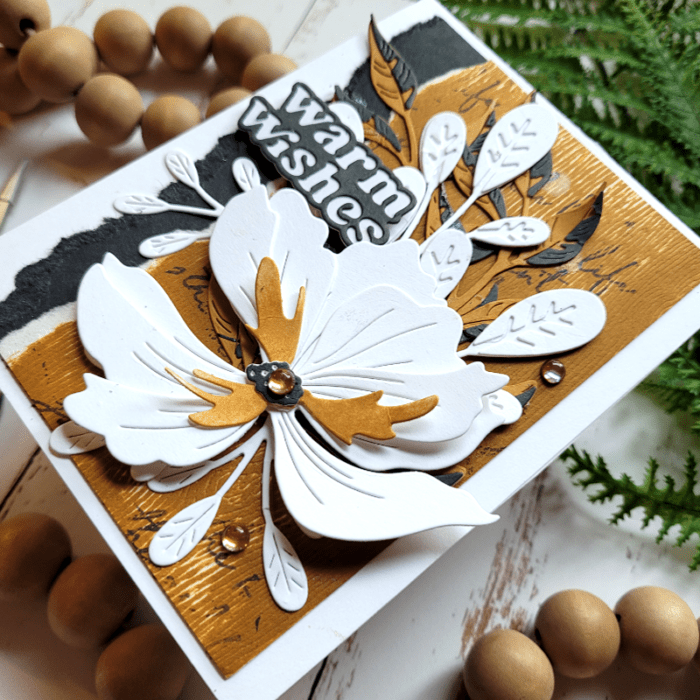
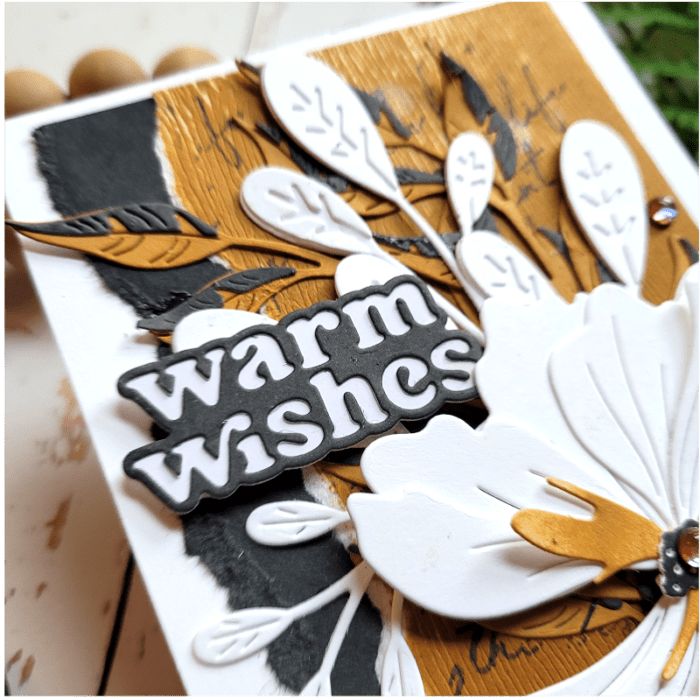
    Most of my leaves and the Cosmos flower were done in white with exception to the center of the flower and the Curved Leaf Branches. Those were inked up in Mustard Brown and black ink. You can get a good visual of them in the photo below!

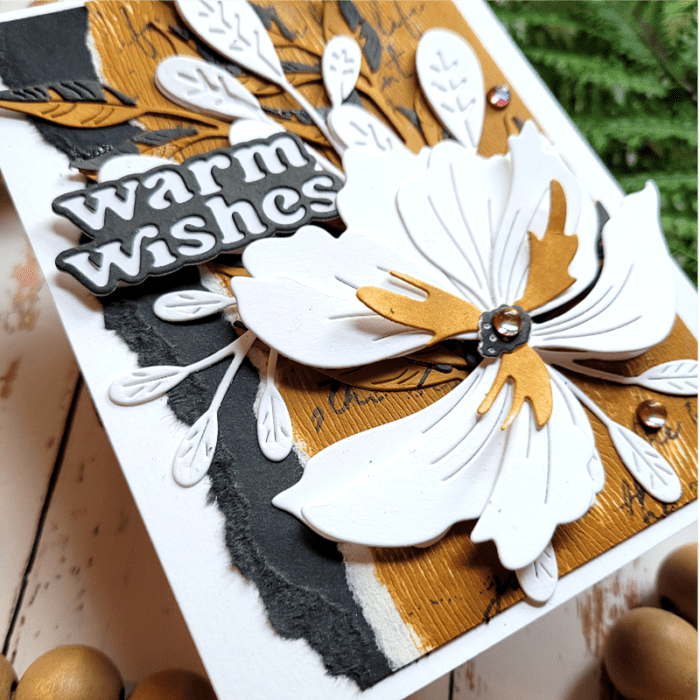
    Next, I created a background to compliment the foliage. I trimmed a piece of Woodgrain paper by Memory Box to 5.25×4.00 and then ran the Mustard Brown ink directly over the card panel quite generously. The woodgrain gives it a cool texture! I also trimmed a piece of black card to the same size. I tore the left edge on both panels, making the brown layer slightly smaller than the black, and adhered them together. I also stamped a sentiment randomly in black ink over the Woodgrain panel to add interest and give the card a mixed media vibe. You can see the stamping, the texture from the woodgrain, and the torn edges in the photo below.

    Next, I adhered both layers to a 5.5×4.25 white card panel. Then I created a sentiment using the new Warm Wishes layering die in black and white. Now it was time to finish my card! I like to play with placement of my flowers and leaves before I adhere them down so that they are exactly where I want them! I adhered the Curved Leaf Branch (the ones in black and brown) first, then the Cosmos flower (popped up on foam tape), and then placed several white leaves around the flower. I was careful to leave a bit of the stamping peek through on the Mustard Brown card panel! Then I finished with the Warm Wishes sentiment, propped up on foam tape. Below is a closer look at that lovely new sentiment die! It’s the perfect size!

    What makes this card pop is the amount of detail, from stamping onto the Mustard Brown ink to tearing the edges of the panels. The BPD dies are so detailed that die cutting them in white is beautiful! Also, there is a good balance of color between the white, black, and brown, going from lightest to darkest.

    Next time you create a card, pull out your neutrals and see what you come up with! This is the perfect time of year as we head into fall to create a card in these colors! Thanks for stopping by!

    Supplies Used: 
     

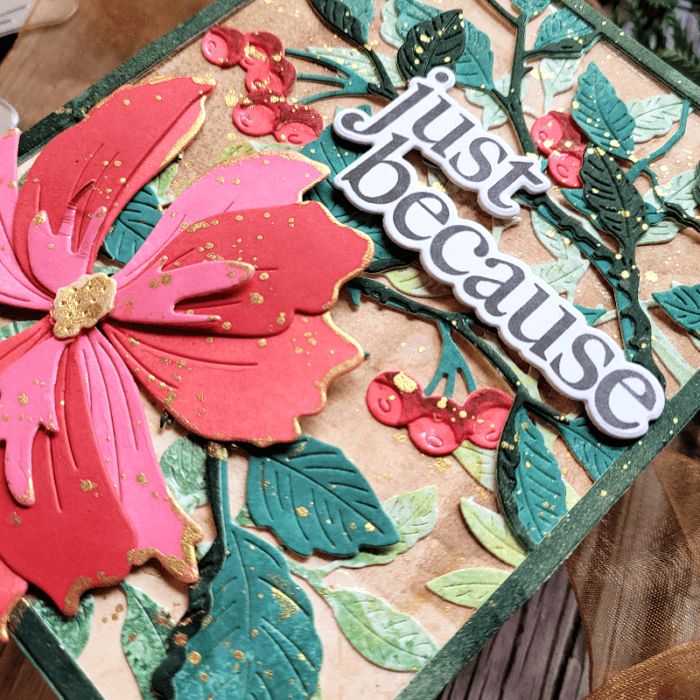
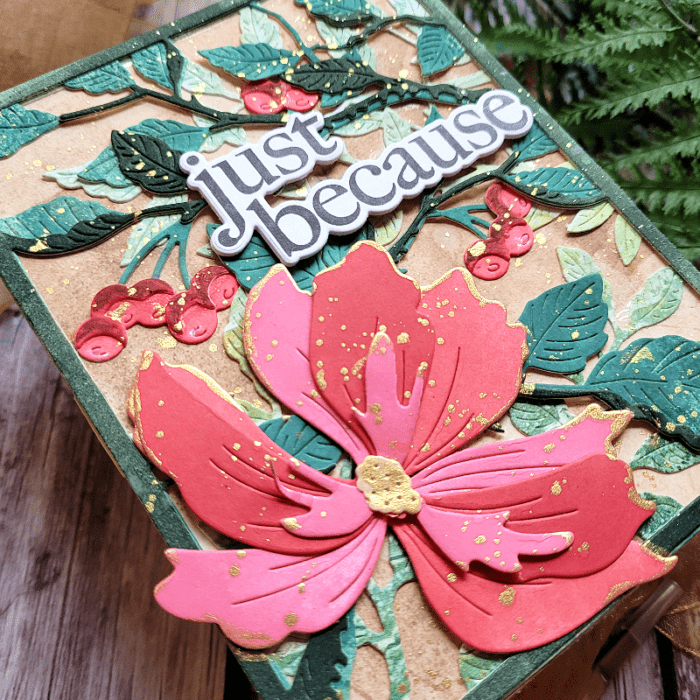
  • Christmas in July with Forest Canopy and Large Cosmos | by Colleen Balija

    Christmas in July with Forest Canopy and Large Cosmos | by Colleen Balija

    Hi there! Today I’ve got a card for you that reminds me of Christmas -only in July! This wasn’t intended to be a Christmas card, but after seeing the finished product, I will definitely be creating similar cards for the holidays using these new products! I’ll be using the new Large Cosmos Contour Layers die and Forest Canopy Layering dies. As usual, I will share the product links at the end of my post!

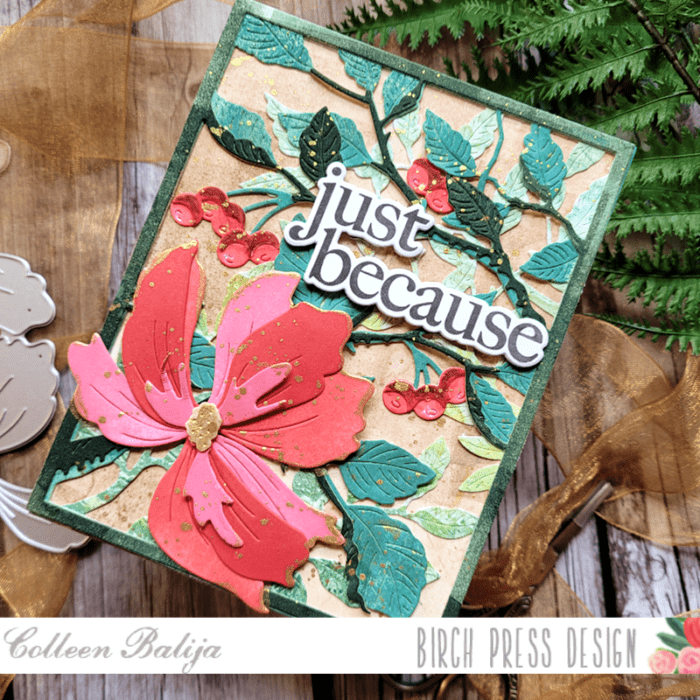
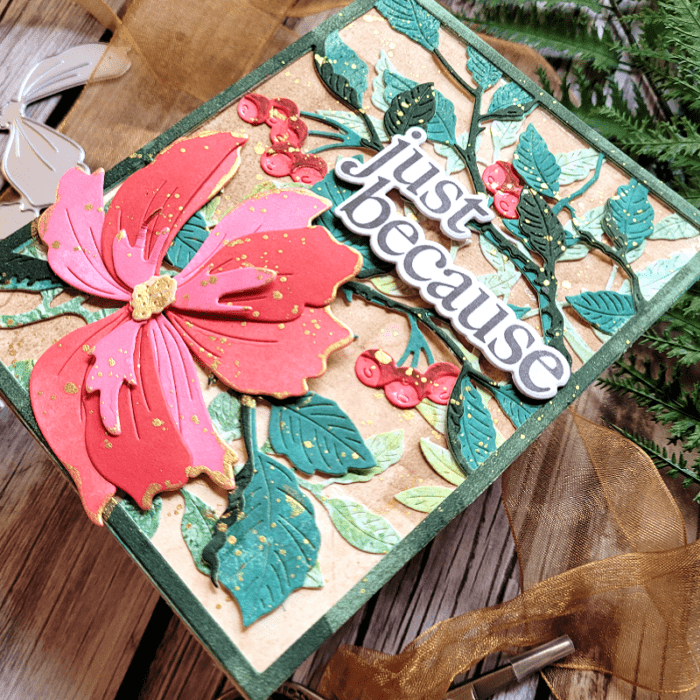
    I chose to use shades of brown, green, and coral for this card (very similar to the card I shared in my post a couple weeks ago). Step one was to create the background. The Forest Canopy is a layering die set, which Birch Press Designs is known for creating in great detail! I die cut each of the layers using heavy white cardstock. Then I applied shades of green color, going from light to dark, by ink schmooshing to create a variegated, natural look to the leaves. This set comes with berries as well, and I inked those up in shades of coral.
    TIP: To ink schmoosh, apply the ink onto a glass media matt, spray with a bit of water, and then place the card panel directly onto the ink and “schmoosh” around over the ink to apply color to the card panel. Repeat this step until you’ve achieved the desired look that you want. If you notice in the photo below, this technique achieves more depth as opposed to basic ink blending.

    Once the inking was complete, I adhered the layers together and applied them over a card panel that was inked in shades of brown. I am in love with how earthy and beautiful the colors are coming along!

    Next I focused on the Large Cosmos Flower die. Did you know that Birch Press Designs embosses the layers on the flower so that you know exactly where to place each layer? I think that’s genius! They also emboss highlighted areas that add interest and depth to the flowers!

    I die cut each layer of the flower onto white cardstock and then ink blended the layers in shades of coral. Then I went around the edges of the flower and the stamin with gold embossing powder for added shine and interest. I adhered my layeres and placed the Cosmos Flower onto the lower left corner over the Forest Canopy leaves, and then added gold metallic splatters over the entire panel. I finished with a sentiment from the Memory Box Gracious Florals stamp and die set!

    Next time I may change up the color scheme and create a few holiday cards using these new dies! I’ll be sure to share them with you! Thanks for stopping by today!


    Supplies