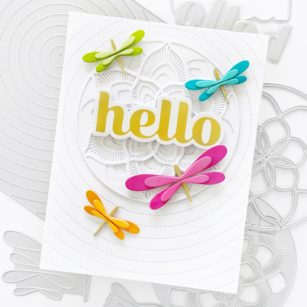
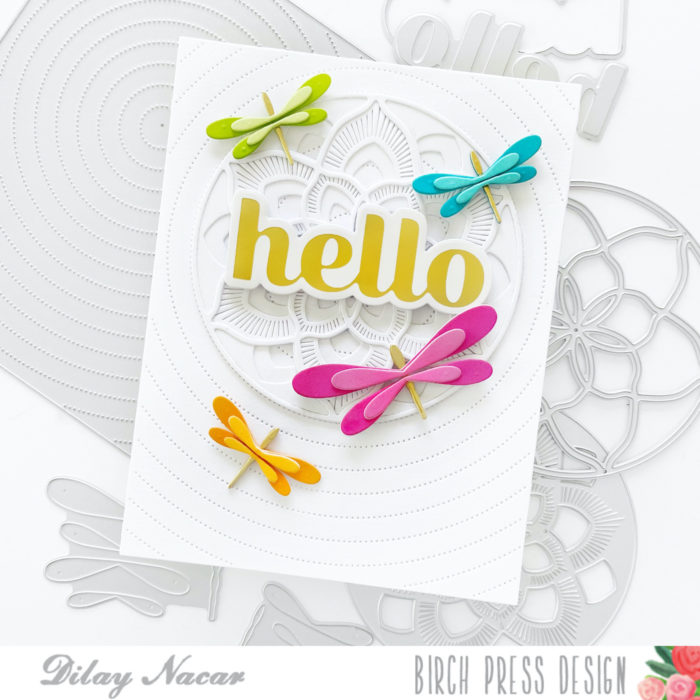
Hello and welcome, crafty friends! Dee here today with another clean and simple card that I created using scraps and a few dies! To begin, I cut the Arista Layer die, A, B, and C and adhered them onto the center of a base made by cutting a piece of white cardstock with the Pinpoint Radial Plate die.
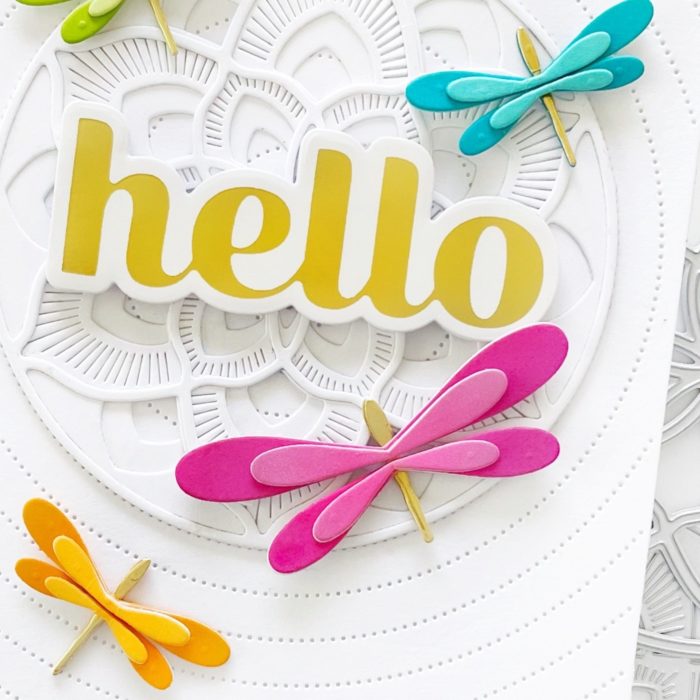
Next, I hot foiled the Big Sugar Script Hello foil plate in matte gold and cut it with the coordinating die, then cut it twice more in white to stack and add dimension. I then adhered it to the center of the Arista layers.
To finish, I cut the Simple Dragonfly Contour Layers in gold, pink, orange, green, and teal, then assembled and adhered them to the card.
I hope you enjoyed today’s card and are inspired to create something new! Thank you so much for stopping by, friends!
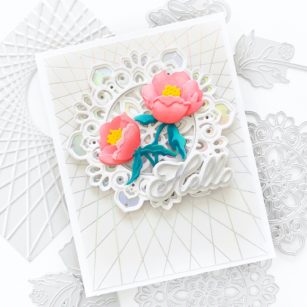
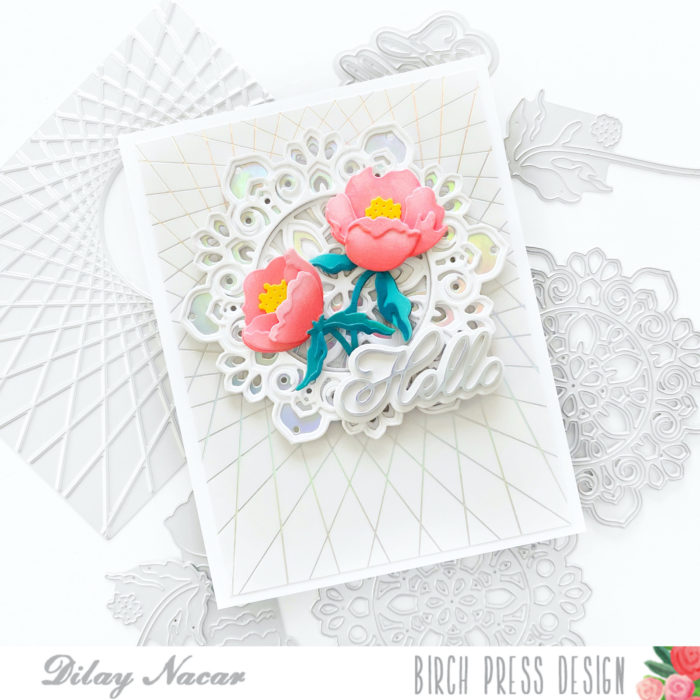
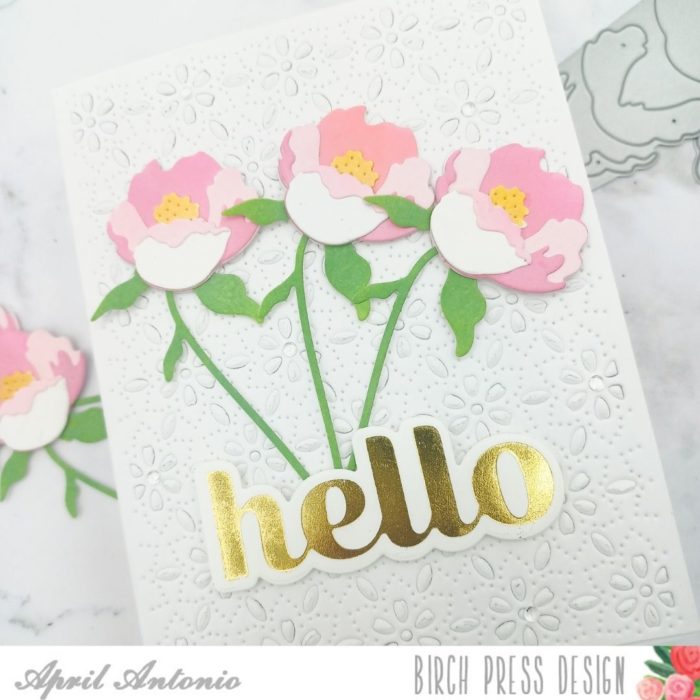
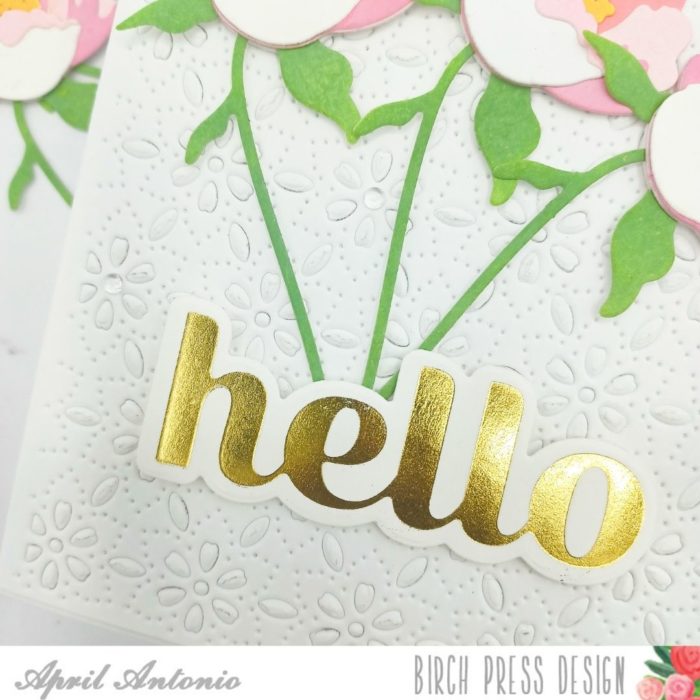
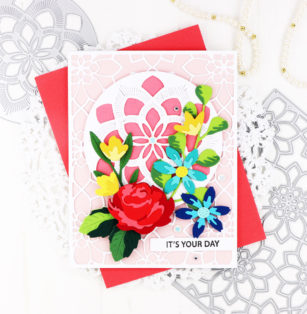
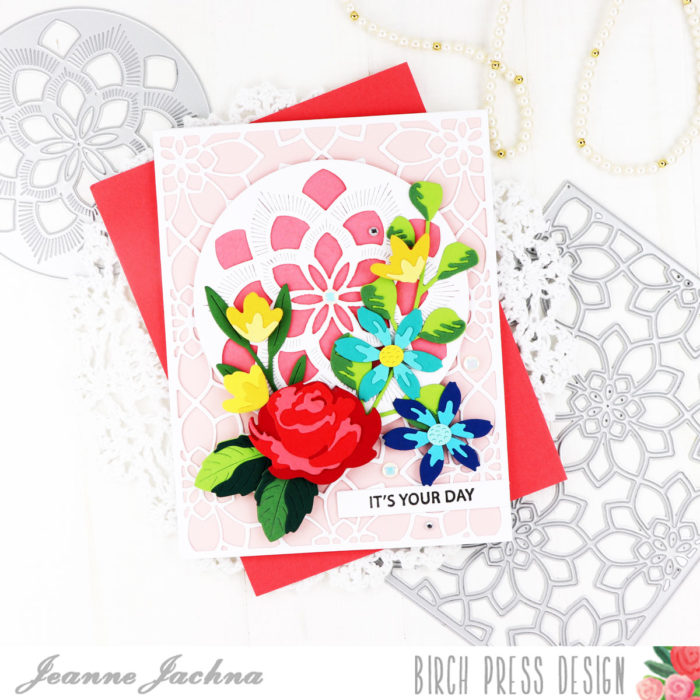
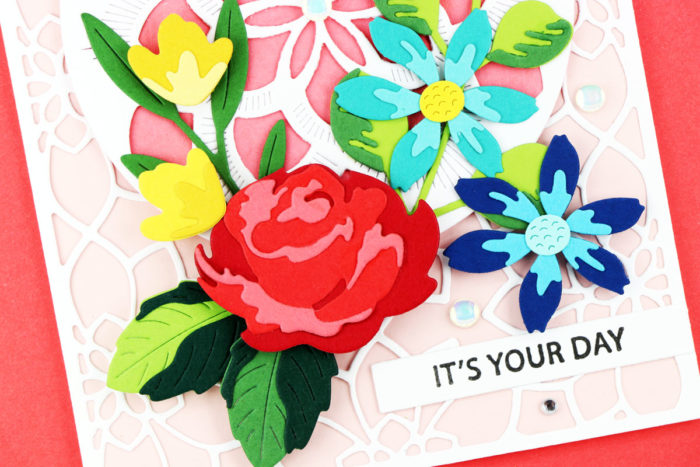
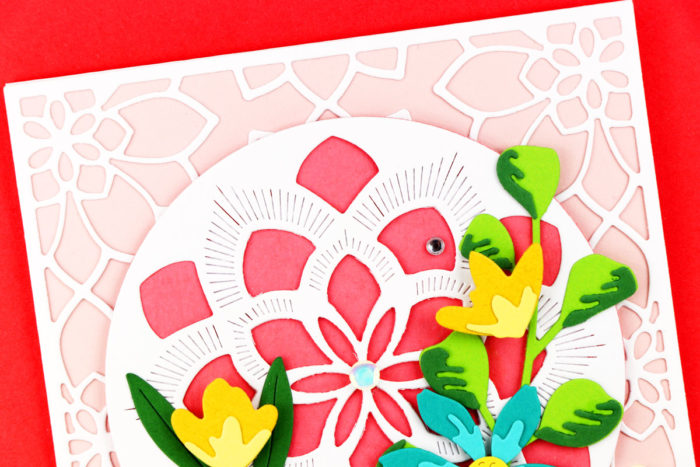
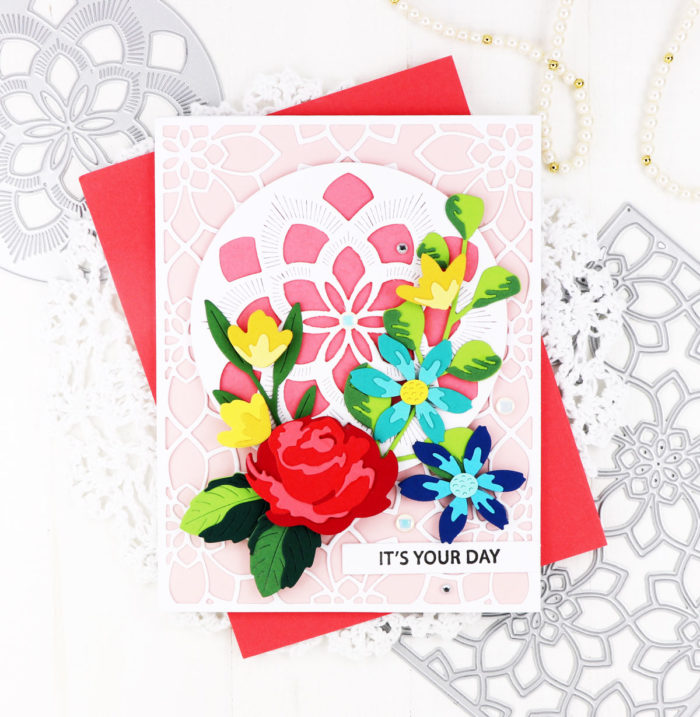
Hello and welcome back, friends! Dee here today sharing a foiled floral card created using beautiful new products from the latest release! This card showcases the String Art Hot Foil Plate and Prime Peony Duo Contour Layers.
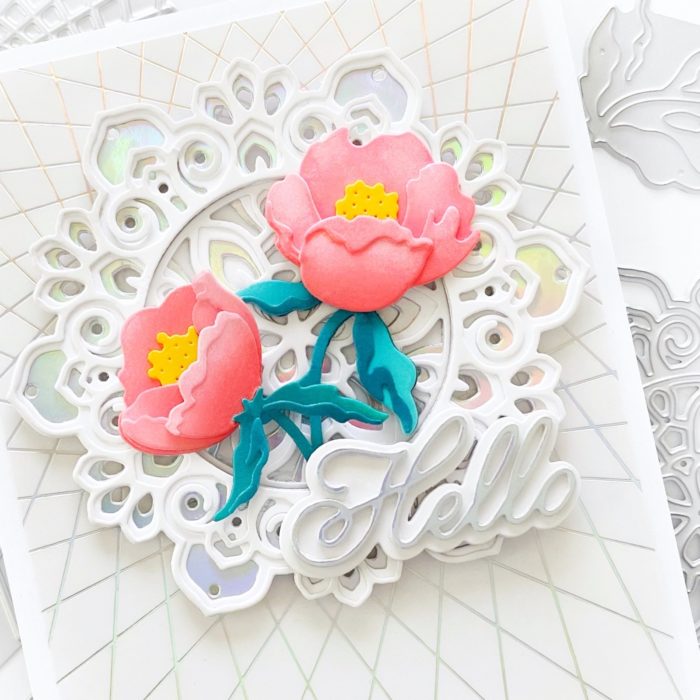
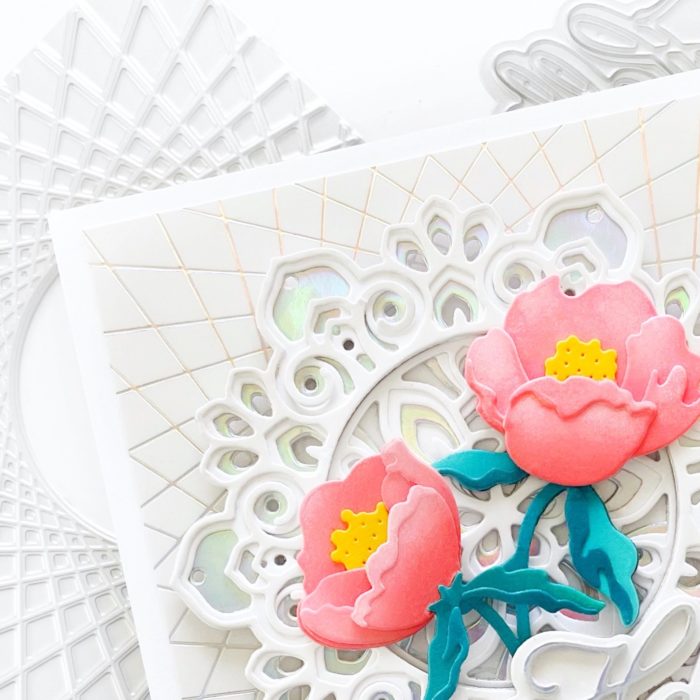
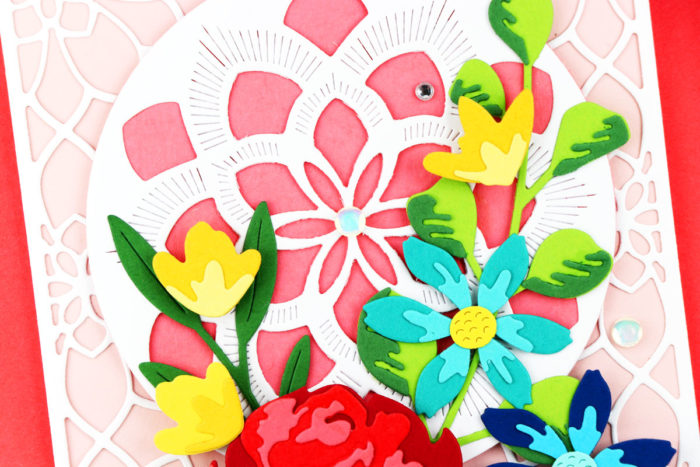
To start, I hot foiled a 4” x 5.25” piece of white cardstock with the String Art Frame foil plate. Next, I cut the Tranquility layers A and B in white cardstock and C in Holographic cardstock, then adhered them together. I cut the Prime Peony Duo Contour Layers in colored cardstock from the 6×6 paper packs and ink blended them — using corals for the blooms and teals for the stems and leaves, then adhered them together.
Next, I adhered the Tranquillity layers onto the foiled String Frame, then adhered the Tranquility layers to the center using foam adhesive. I then tucked the peonies into the circle and trimmed the excess stems. I cut the Handwritten Hello in holographic cardstock and the shadow in white and adhered it to the frame. To finish, I mounted the card onto a top-folding card base!
Thanks so much for joining me today! I hope this card inspires you to get creative and try something new!
Hi Crafty friends! I am excited to be back today sharing a colorful thank you card using the beautiful Star Flowers Contour Layers die set!!!!! So let’s get started!
I started today’s card with the beautiful Star Flowers Contour Layers die set! I love these beautiful flowers! I started by die cutting my flowers using 2 shades of blue card stock from the Memory Box Fresh Aqua Collection paper pad. I chose a lighter blue and a darker blue. I love these paper pads as all the colors coordinate so beautifully together! I die cut enough to make 8 flowers. I then chose a yellow shade for the floral center using the Sunny Orange paper pad from Memory Box. Once everything was die cut I added a bit of shading to each floral layer using distress oxide inks. I then adhered the layers together using liquid glue. I then added embossing powder to each flower for added texture and dimension. I pressed the flower into my embossing ink, sprinkled with embossing powder, and then heat set. I then set my flowers aside.
Next I started to work on my background. To create my background I used the Viola Plate layering dies. I used both layer B and C. I die cut each layer on white card stock. Next I wanted to add color to Layer B. I used a yellow shade of dye ink and ink blended on my panel using a blending tool. Next I added 2 colors of sprays for added shine and texture. I allowed this to dry and once dry, I added gold and silver metallic watercolor splatters for added texture. Once everything was dry, I adhered layer B and C of the Viola die cuts together using liquid glue.
Next I used my distress tool to add texture to the edge of the die cut panel. I added texture to various sections. Then I used an archival ink in brown around the outer section of my Viola panel. I then adhered the Viola panel to an A2 card base with liquid glue.
I then adhered my flowers to the front of my card panel. I used a combination of liquid glue and foam adhesive. To complete my card I added the Handwritten Thanks and Outline die. I die cut the shadow using white card stock and the script thanks using the Rainbow Reflections Mirror Pad card stock. I then adhered the sentiment together with liquid glue and added foam tape to the back and added this to my card front.
Thank you for stopping by today! I had a lot of fun today and I will be back soon!
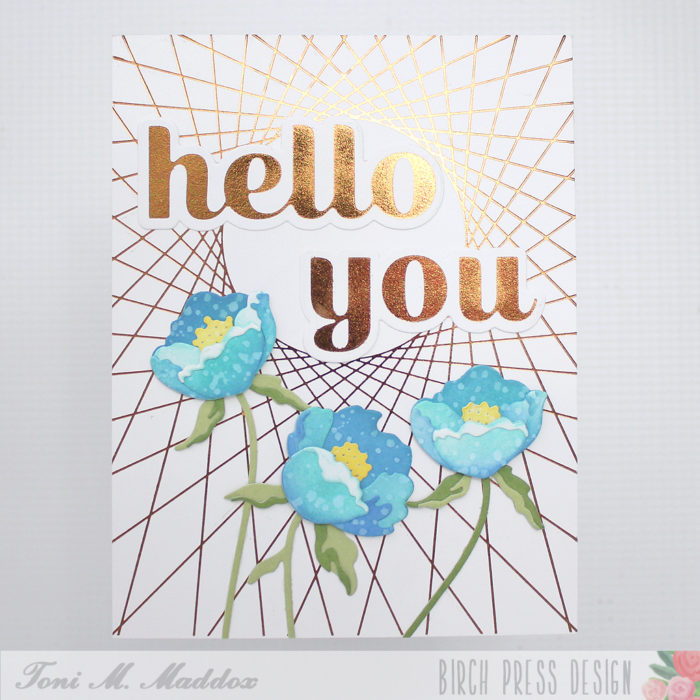
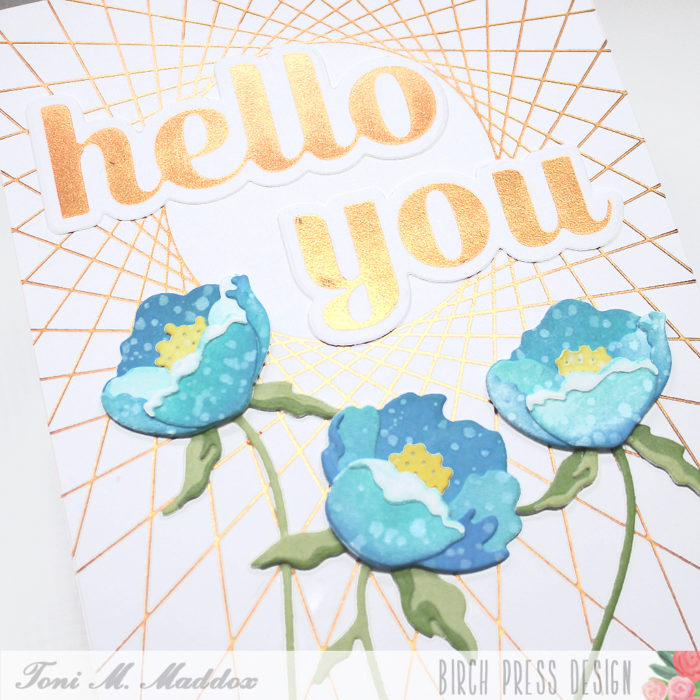
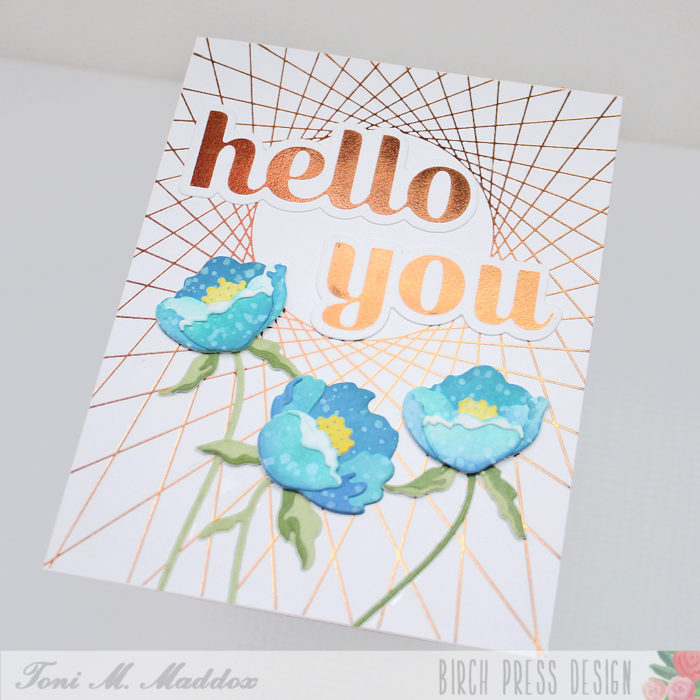
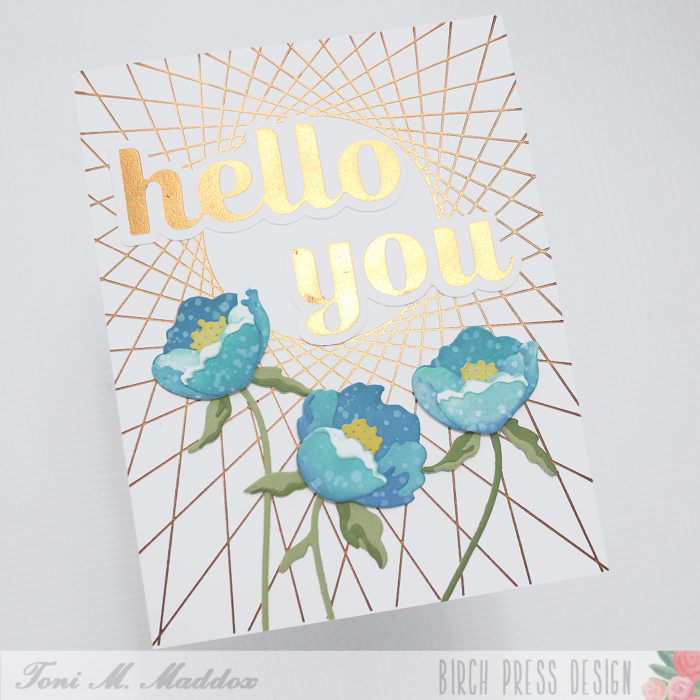
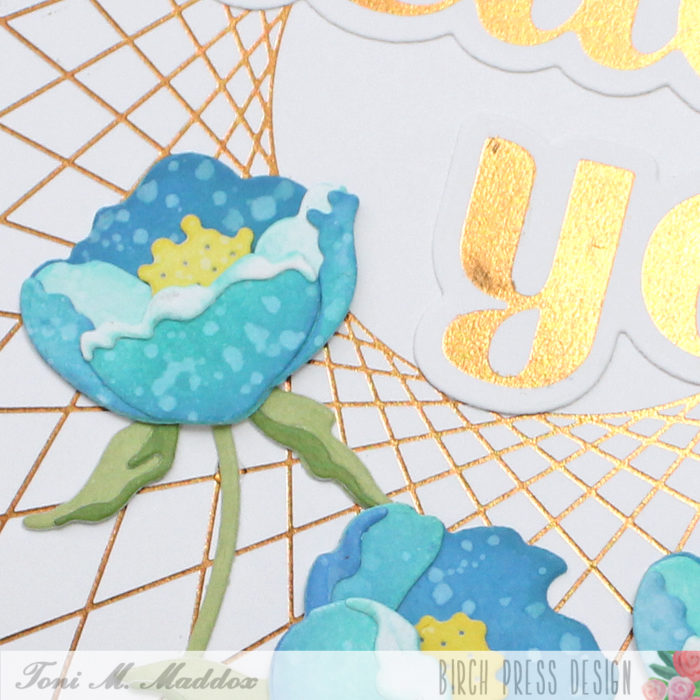
Hello, Birch Press fans! Toni here with you today sharing a card using some of the new hot foil products that Birch Press Design and its parent company, Memory Box, have on offer. How exciting!
I’ve been working with hot foil for a while and definitely have my opinions on which brands/styles I like and which I don’t. I’m happy to say that these are fabulous with good coverage and minimal over-foiling.
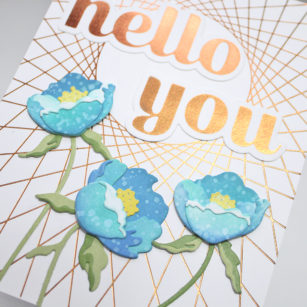
This was especially important with the String Art Frame Hot Foil Plate which has a lot of tightly spaced foil lines but I had no problems with the foil appearing where it shouldn’t. Woo hoo!
I also used the Hello and You Sugar Script Hot Foil Plates & Dies, using the same Spellbinders Polished Brass Hot Foil. The outline dies made it so easy to line up so I had even white space all around.
I cut out the Prime Peony Duo Contour Layers blossoms and sponged them with Distress Oxide Peacock Feathers and Prize Ribbon before spattering with water. I cut out the stem portions in Memory Box Lush Green 6×6 cardstock. I love how the colors coordinate with the polished brass foil!
I hope you enjoyed today’s card and have a great rest of your week!
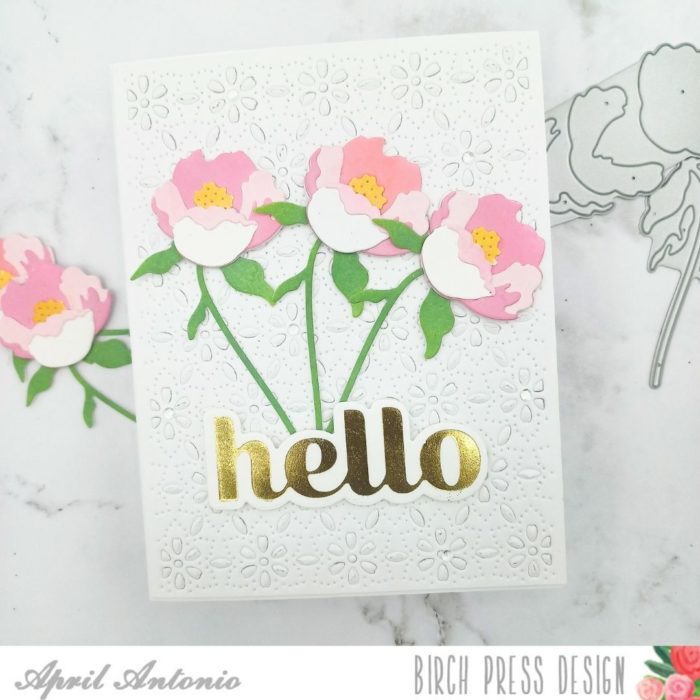
Hello crafty friends! I am excited to be back on the blog today to share a project using some of the newly released supplies.
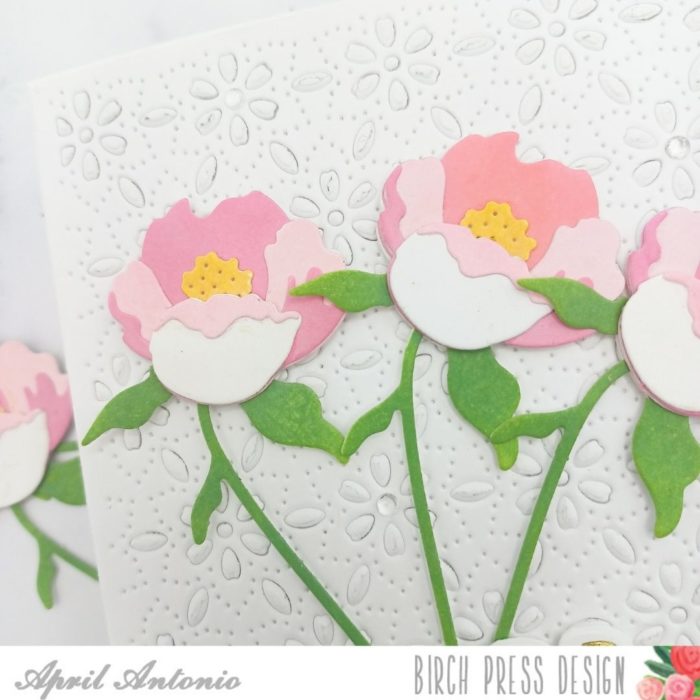
For today’s project I decided to use the new Prime Peony die set. It creates a beautifully, realistic looking peony. The set comes with both large and small peony pieces, including the petals, stamen (center part) and stem/leaves. I started by cutting the large peony die from white cardstock multiple times.
I then used detail blending brushes and Distress Oxide inks to quickly ink blend each piece as I desired, using the booklet that comes with the die set as a guide.
After I ink blended each piece, I assembled the flowers assembly line style. I did leave off the dimension on the leaves, and will save those small pieces for a future project. I think my favorite part of making this card was when I assembled the flowers because each additional layer makes them look more and more realistic.
Next I dry embossed Layer C from the Flora Plate Layer set from heavy weight cardstock. To dry emboss I used my typical die cut plates, but placed an embossing mat underneath the die so it would not fully cut into paper.
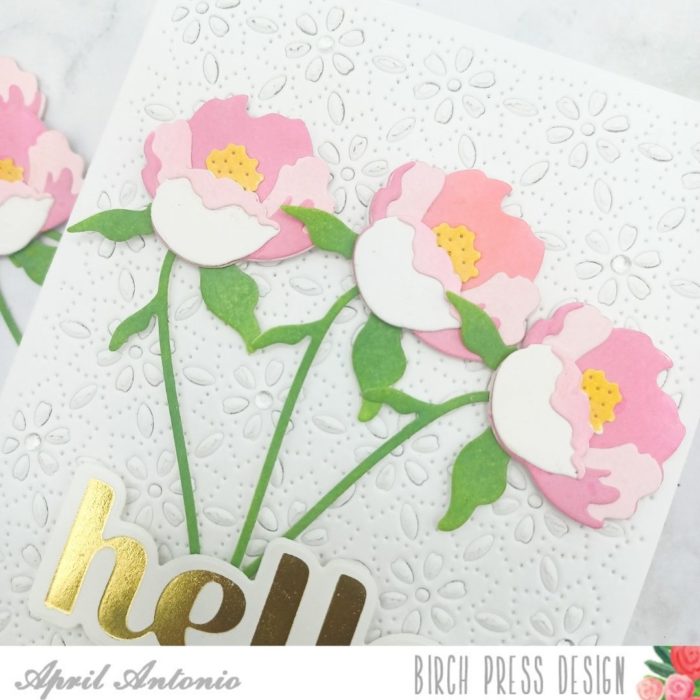
I glued the panel down to an A2 white card base, and arranged three of the assembled flowers into the middle of the card, making sure the stems gathered together at the bottom.
I then adhered the hello created using the NEW Sugar Script hot foil die. I popped this up with foam tape to give it similar dimension to the flowers.
My final touch was to add a few of the clear Fair Drops across the card in no particular order.
The new hot foil sentiment together with the 3D looking flowers adds such beautiful dimension to the card. I really like how it came together and looks simple yet detailed at the same time.
Thank you for joining me today and I hope this post has inspired you not only check out the new Birch Press hot foil designs, but to go craft some more!
Hello, Everyone! Look who has hot foil plates now! We are very excited to be able to show off these gorgeous plates and how hot foiling can complement the rest of the beautiful Birch Press Design products.
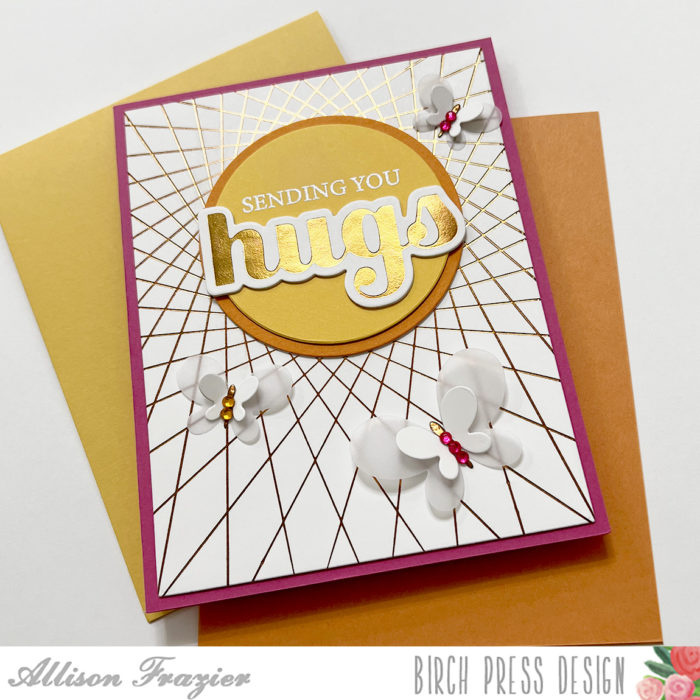
Not only are there sugar script hot plates, but one of my favorite background dies is now available as a hot foil plate, too. And that is what I started this card with. I took a piece of smooth white card stock and hot foiled the String Art Frame plate with copper foil. This foil looks gold in the pictures, but that’s the wonderful thing about foil – it changes color and luminosity as the light hits it. The hot foiled image came out crisp and beautiful on the first try, so I set that aside.
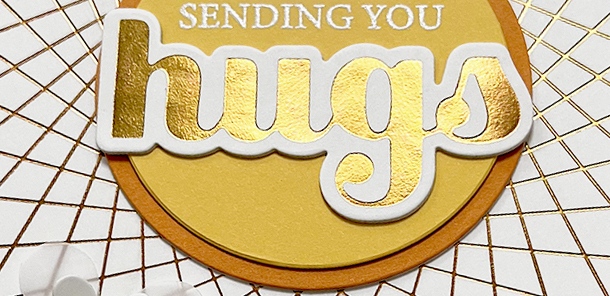
Next, I foiled the hugs hot foil plate with the same copper foil onto the same white card stock. I cut it out with the matching die that comes with the plate. It came out gorgeous! The hugs sugar script die has always been one of the most used sentiments in my stash, and I know that this hugs hot foil plate will get just as much use.
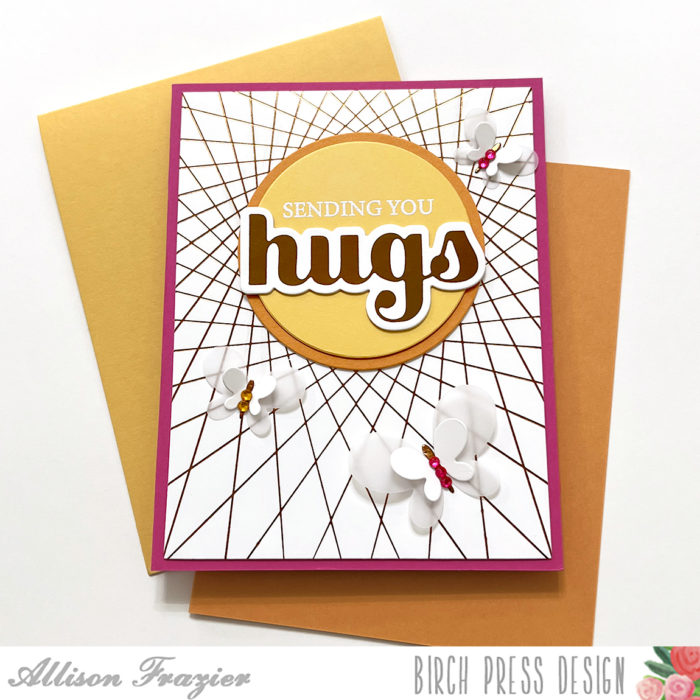
To ground my sentiment in the center of the string art frame, I cut two circles from yellow and orange card stock. On the smaller yellow circle, I stamped a partial sentiment from the Kind Hearts stamp set. The full sentiment is “Sending you sunshine, laughter & hugs.” In order to stamp just the “Sending you,” I masked off the rest of the stamp with washi tape, inked the stamp with VersaMark ink, removed the washi tape, and then stamped it onto the yellow circle. I then heat embossed it with white embossing powder. I assembled the two circles together, glued the hugs sentiment below the stamped sentiment, and adhered it onto my foiled panel. I then adhered the panel onto a hot pink A2 card base.
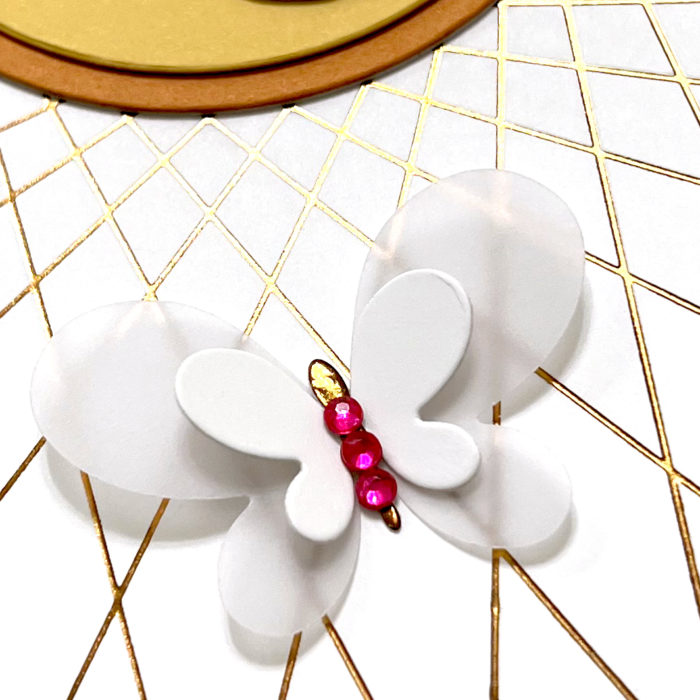
To embellish the card, I die cut three butterflies using the Simple Butterfly Contour Layers die set. I cut the larger layers from vellum and the top layers from white card stock. The bodies of the butterflies were actually cut from the same copper hot foil that I used on the rest of the card. If you have a solid hot foil plate in your stash, you can easily create solid foiled pieces of card stock. As a final embellishment, I added colorful fairy jewels to the butterfly bodies.
In this last photo, you can see the copper color of that foil. Again, it just depends on the lighting – the foil gives the card such a dynamic feel. I hope you’re all as excited as we are about these new hot foil plates. Thank you so much for joining us today. I hope this card brings a smile to your face!
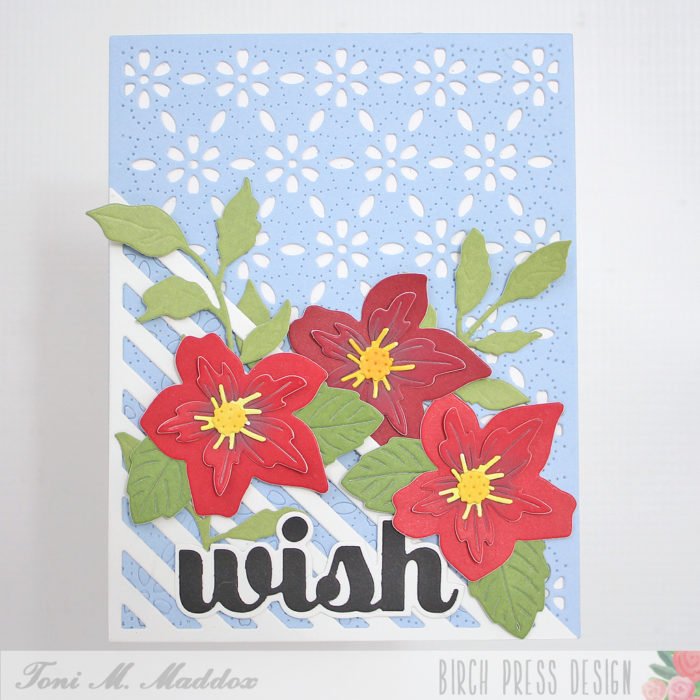
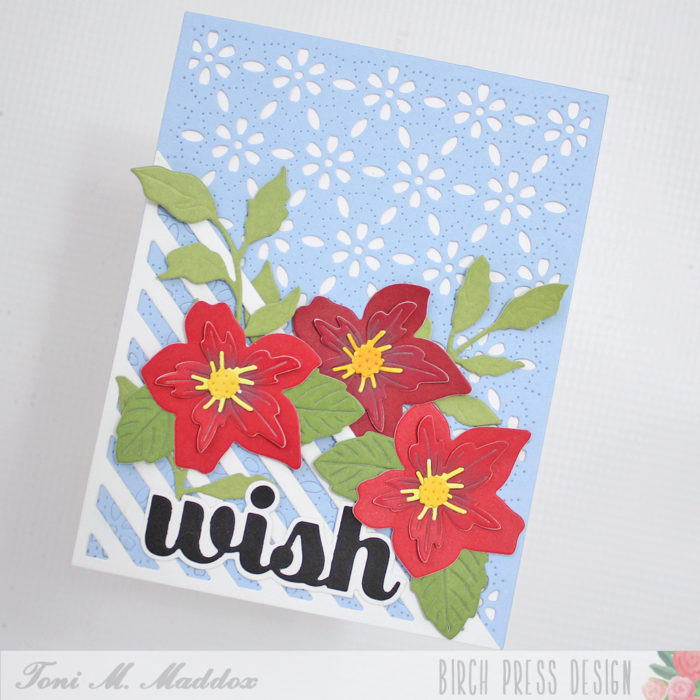
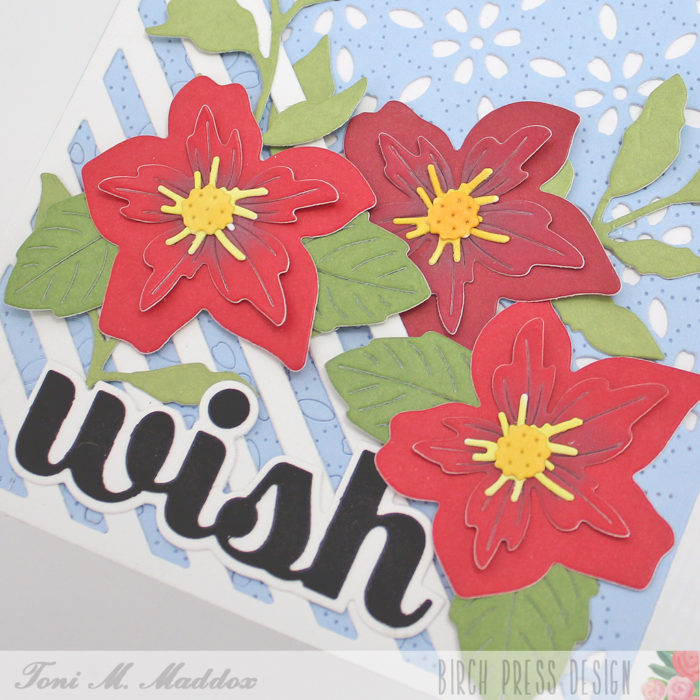
Hello, Birch Press fans! Toni here with you today sharing a rather summery birthday card.
I started the card by cutting the Linear Triangle from a sturdy white cardstock. I then cut out the Flora Plate Layer B out of a piece of Ocean Blue paper.
I adhered the Flora layer onto the card front, having discarded the bits not covered by the Linear Triangle.
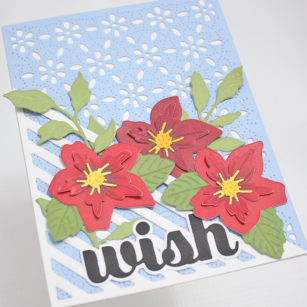
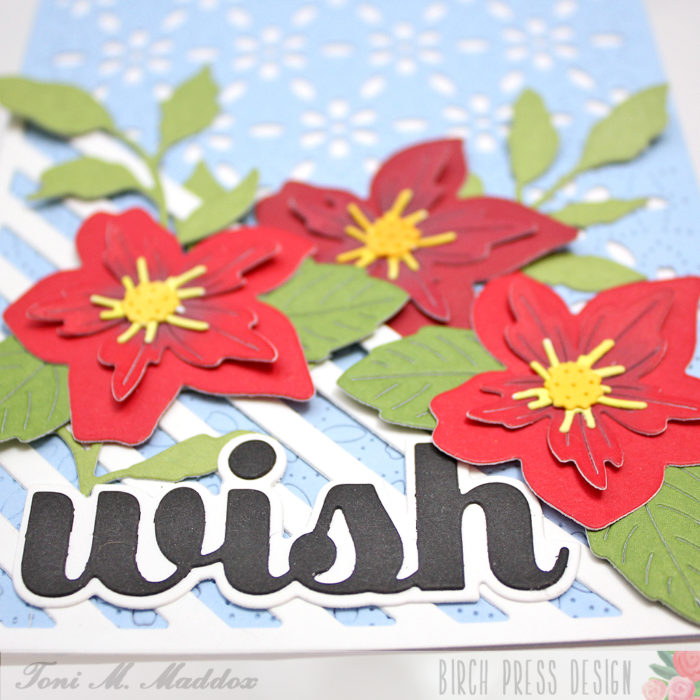
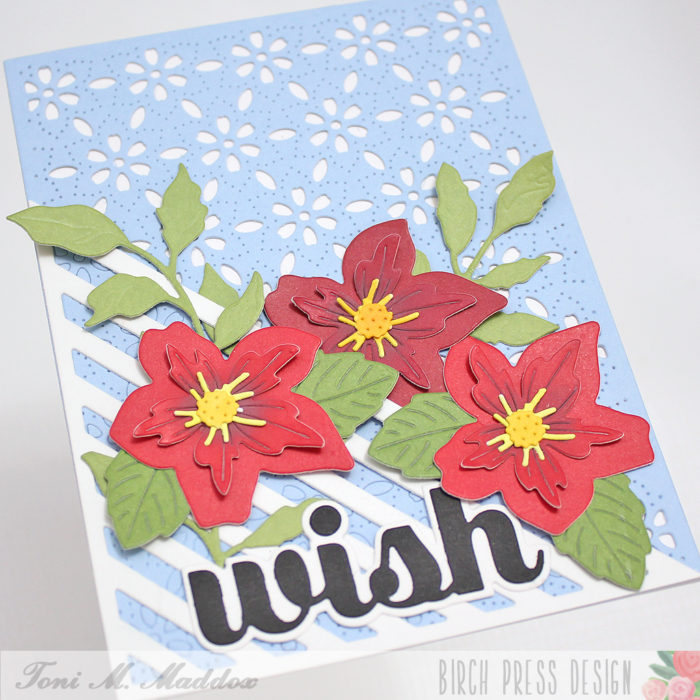
I cut out the the Pimpernel Contour Layers from a piece of Berry Red 6×6 paper. I used Distress Oxide Aged Mahogany to shade the centers.
I cut the stamens out of white then colored them yellow with Copics Y02, Y15 and Y35.
The flowers remind me of clematis so I cut the base layer of the Fuddled Leaf Branches out of Lush Green 6×6 paper, and wove them up and through the Linear Triangle for a climbing effect.
I cut the Make a Wish Sugar Script out of black and white cardstock, nestling it in among the blooms.
I hope you enjoyed today’s card and have a great rest of your week!
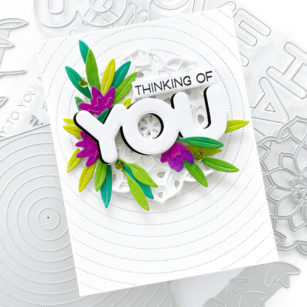
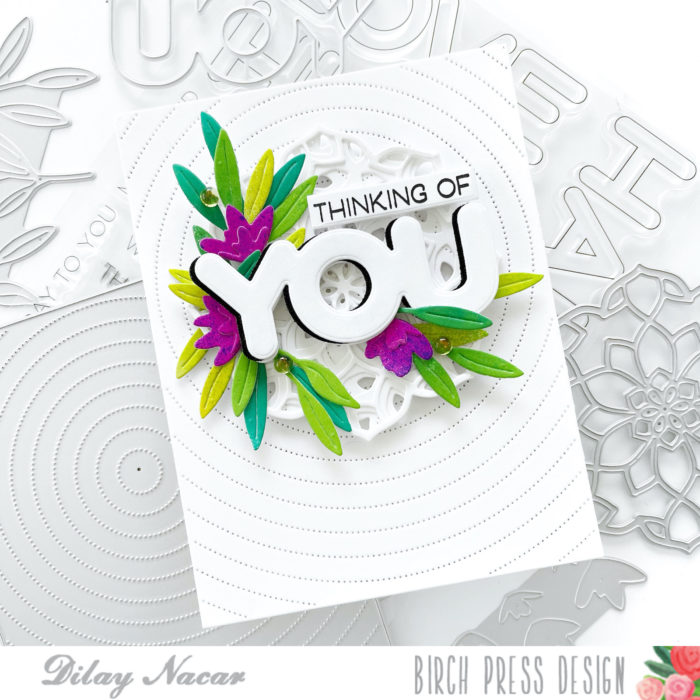
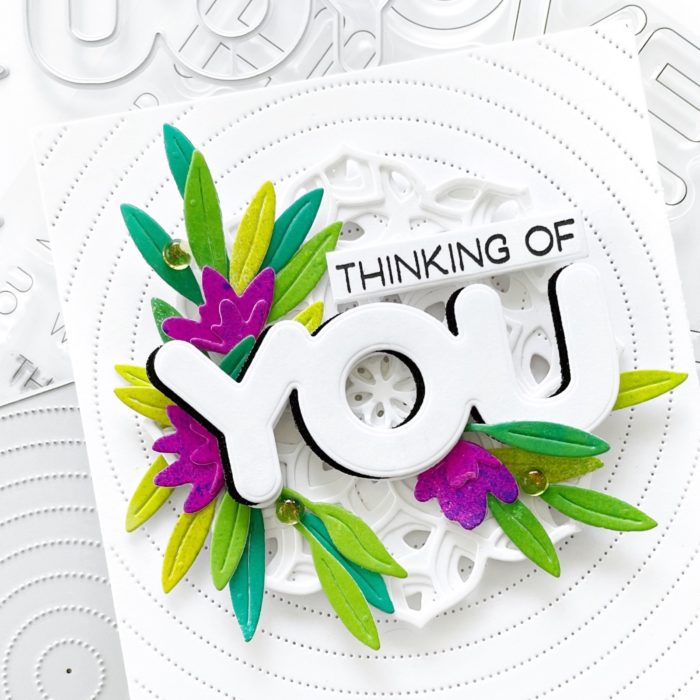
Welcome, crafty friends! Dee here sharing this card created using scraps to make a bold and colorful focal point! To start, I die cut the Pinpoint Radial die in white, then adhered it onto an A2-sized top folding card base. Next, I cut each layer of the Kinsley Layer Set from white cardstock and adhered them together. Once complete, I adhered the Kinsley Layer Set to the center of the Radial Pinpoint background.
As a paper crafter, I tend to have a lot of scraps and look for ways to use them as much as possible! For this card, I used a piece leftover that I had sprayed with acrylic paint that I die cut with the Tiny Tufts and Leaves Contour Layers die set.
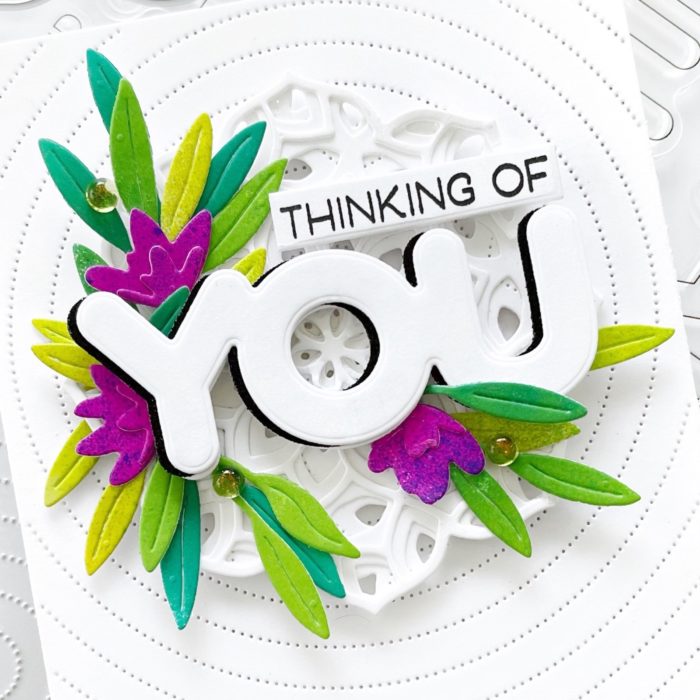
Before adhering the Tiny Tufts and Leaves, I stamped ‘Thinking of you & best wishes’ from the Happy Lingo stamp set in black onto white cardstock, trimmed it down (keeping only ‘thinking of’), and set it aside. I then cut the ‘you’ from Happy Lingo coordinating die set in white and black cardstock and adhered them together. I then adhered to both sentiments to the center of the Kinsley Layers.
Once the sentiment was in place, I tucked the Tiny Tuft and Leaves behind the sentiment and secured them with liquid and foam adhesive. To finish, I added clear embellishments l to the leaves.
I hope you enjoyed today’s card and are inspired to create something new! Thank you so much for stopping by!
Hi crafty friends I am excited to be back up on the Birch Press blog today sharing a fun and colorful card with you using the beautiful die set Wispy Blooms. For today’s card I wanted to create a colorful background to highlight these gorgeous blooms! So let’s get started!
I started today’s card by choosing my color palette! When card making I enjoy creating bright and colorful cards. I love the loose look of these flowers and wanted to highlight them with a colorful background! I chose 2 colors as the main colors for today’s card. I selected a gel print from my stash and then chose the second color for my flowers! I love these 2 colors together! It was now time to start die cutting! I started with the Wispy Blooms die set and Memory Box card stock in 2 color pad families: Sunny Orange and Lush Green. These pads are amazing as the colors all coordinate so well together and the mix of colors is just beautiful! I chose 2 colors of orange from the pad and die cut the flowers several times in both shades of orange. I did the same for the leaves using a green from the Lush Green paper pad from Memory Box.
Next I added some ink to each of my die cuts using several shades of orange dye ink. I love the added dimension the ink gives to the completed look. I applied the ink to the layers using a blending brush. I did the same for the floral stem. Once this was complete, I adhered the flowers together using liquid glue.
Next I chose a panel from my stash to die cut the butterflies and the hello script font. The panel I chose had shades of purple and sparkles. This panel was created using a powder pigment. I die cut 2 butterflies using the Simple Butterflies Contour Layers die set. I die cut a second set of butterflies using the Memory Box Vintage Pearl Mirror Pad, I chose a gold color from the pad. I then adhered the butterflies together using liquid glue. I set these aside.
To complete my card I chose the Big Hello Sugar Script die set. I die cut the shadow layer using white card stock one time, then the inner script hello 3 times for added dimension. I die cut this using white card stock and 1 layer using the same purple panel as the butterflies. I then adhered these together using liquid glue. Next I adhered the gel print background to an A2 card base and adhered the flowers, sentiment, and butterflies using both liquid glue and foam adhesive. I added a bit of sparkle using 2 sets of gems. I used the Winter Fantasy Fairy Gemstones and the Bright Jewels collection.
I had so much fun creating today’s card! I hope you enjoyed it and I will be back soon! Happy Crafting!!!!!
I hope you’re having a good day! I love flowers! When it’s too cold outside to enjoy the garden, I’m happy to be making with them in my craft rooms so the new release makes me HAPPY!
I like to cut lots of flowers in several different shades of cardstock all at the same time. When it comes time to making I have my choice of flowers to arrange. I lay them out on a clear piece of plastic the size of my card front before I commit and adhere them in place.
Because the plastic is clear I can pick up the entire arrangement and layer it over different backgrounds. For this card I used Viola Plate Layer A. Using just one layer of the three layer background set allows more color and gives a lacy look to the background.
To create a focal point I added an Arista Layer B die cut with a darker shade of pink adhered underneath. The foliage is adhered flat to the card base, and the florals are adhered with adhesive foam tape. This adds dimension.
Remember when you’re making that there’s no right or wrong.. it’s all about what appeals to you. I hope you’ll mix and match your different sets and imagine your flowers in unexpected colors. I think you’ll be delighted with the results!