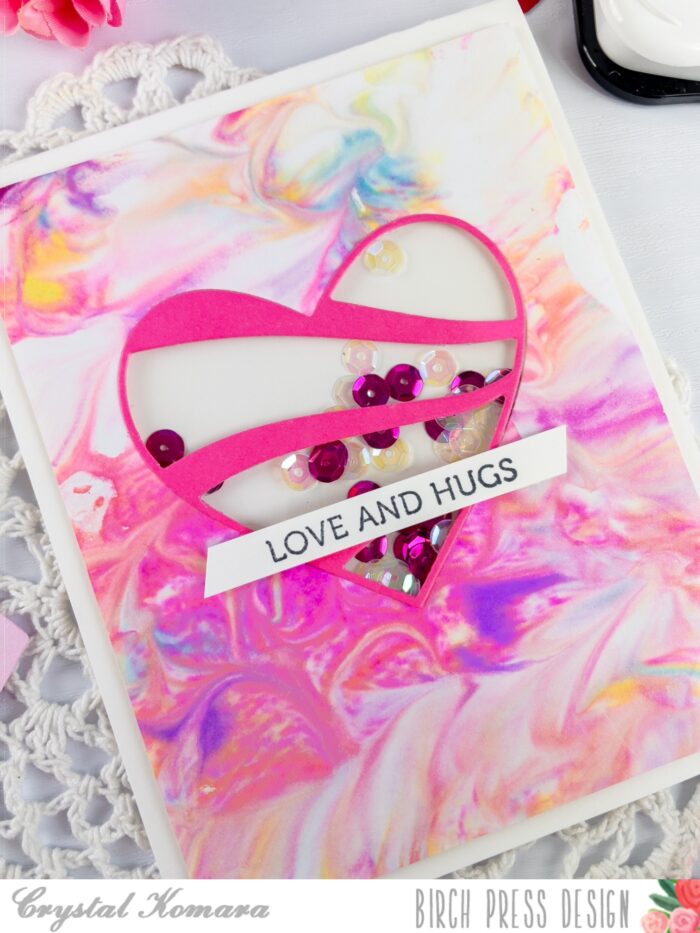
Hello Birch Press Design fans and happy New Year! This is design team member Crystal Komara here today and I tried out a messy new technique over the holiday season! Shaving cream! Now, I’m not typically a “messy” technique kind of person, so this one scared me a bit, but in reality, it was not nearly as messy as I envisioned. My only tip would be to use unscented shaving cream, my card does have a bit of a medicinal smell!
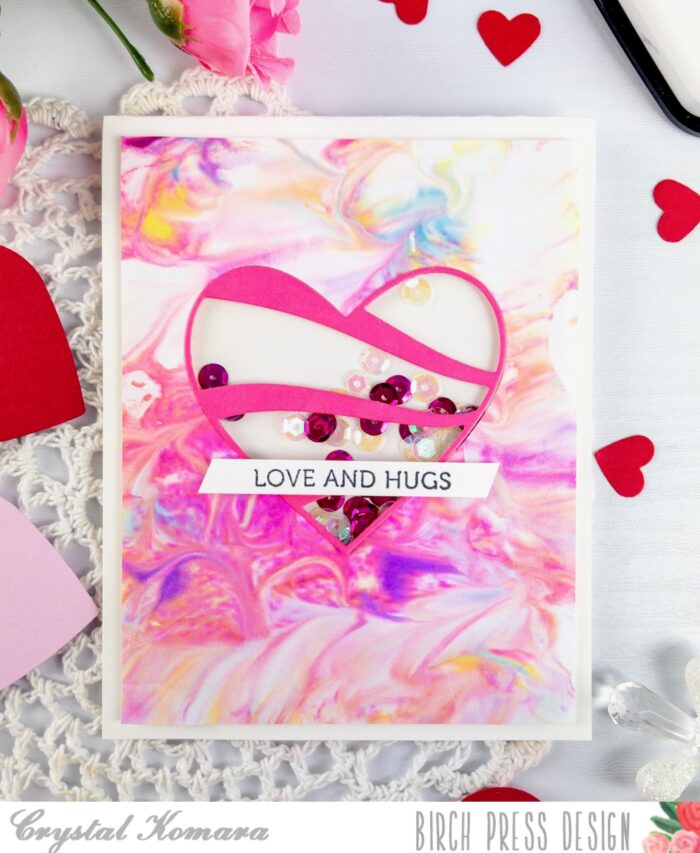
I found a whole variety of YouTube tutorials on how to make shaving cream backgrounds, but essentially I spread a 2″ layer of shaving cream into a 12″ x9″ jelly roll pan and dropped ink colors randomly over it and then used a toothpick to swirl or spread the ink around. Then I simply placed sheets of 5 1/4″ x 4″ Mixed Media paper into the shaving cream and let dry a little before wiping off the excess with a paper towel. I made about 30 backgrounds in under 30 minutes and each one has it’s own unique marbled look.
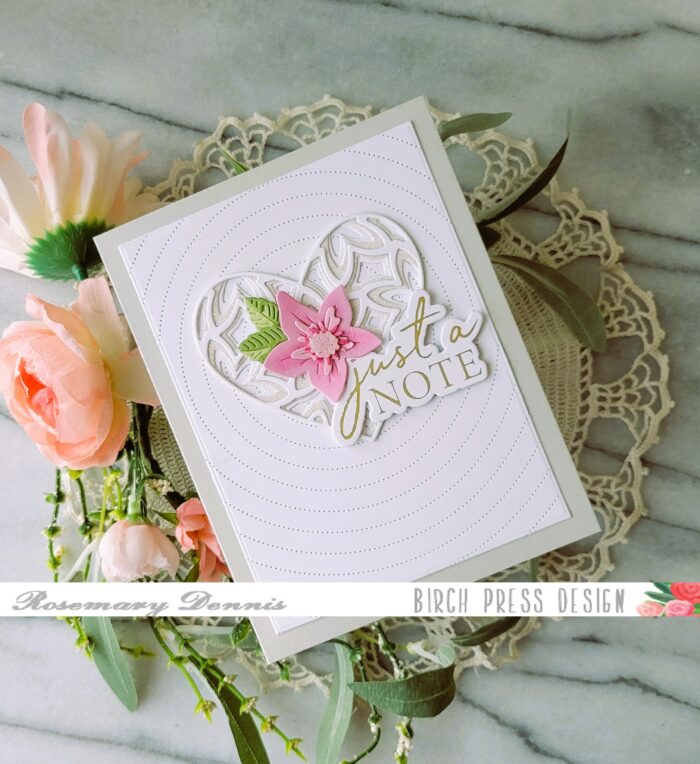
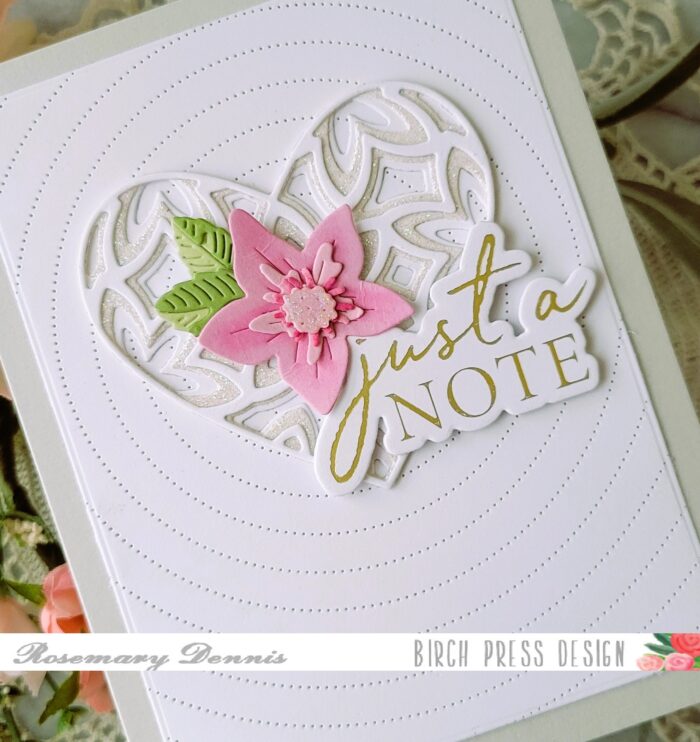
Card details:
The base of this A2 sized card is made from 80 lb. Neenah Solar White Smooth cardstock. This is my go-to cardstock for everything – die cutting, card bases, card inserts, Copic coloring, etc. It’s much easier to just keep one style of paper in my craft room than trying to figure out what paper works best for what.
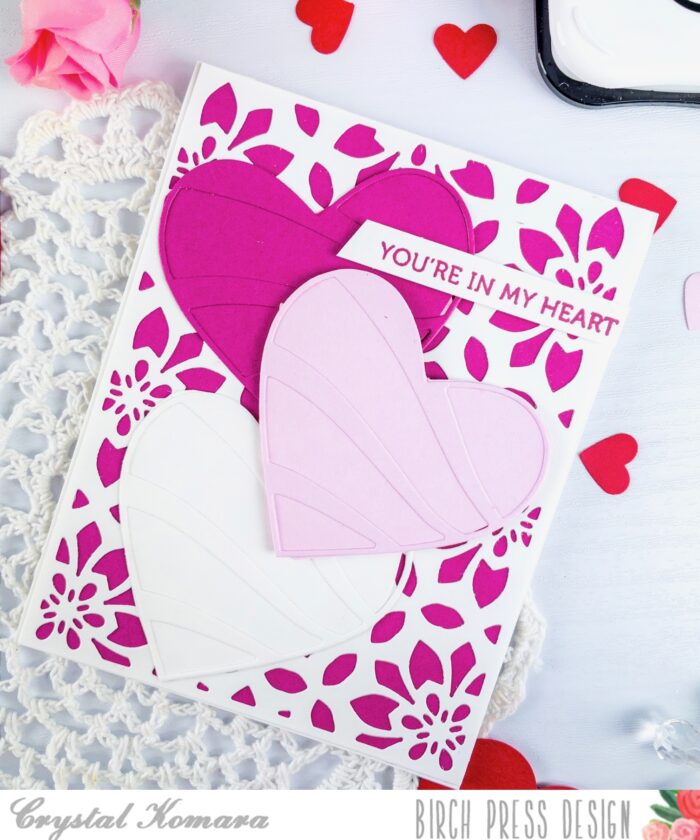
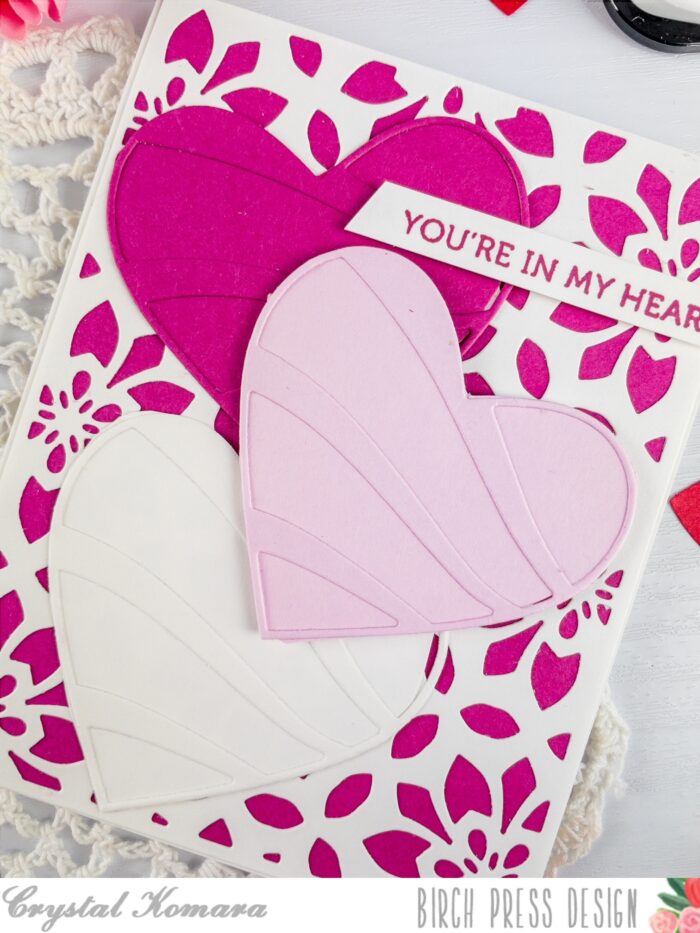
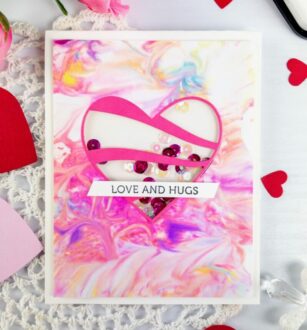
I cut the shaving cream background into a 5″ x 3 3/4″ rectangle and die cut the heart out of the center of the card using the Banner Heart Layer set. I placed a piece of acetate behind the shaving cream background to create a shaker card. Next I die cut Layer A of the same Banner Heart Layering dies from a magenta pink cardstock and adhered it to the front of the acetate. Using foam adhesive I lined the back of the shaving cream background end-to-end (so no sequins will fall out) and placed about a tablespoon of sequins on before sealing the ends.
Lastly, I stamped the sentiment “love and hugs” in black ink on a thin white strip of cardstock and adhered the sentiment strip using 3M foam adhesive for added dimension. This sentiment came from the Lingo Thanks stamp set.
I hope you’ll give this fun (and only slightly messy) technique a try! Shaving cream is usually something everyone has on hand quite readily at home. Thanks for visiting and have a wonderfully creative day!
Supplies