Category: Distress Ink

  • No Cardstock? Create your own with a Gel Press | by Tracey McNeely

    No Cardstock? Create your own with a Gel Press | by Tracey McNeely

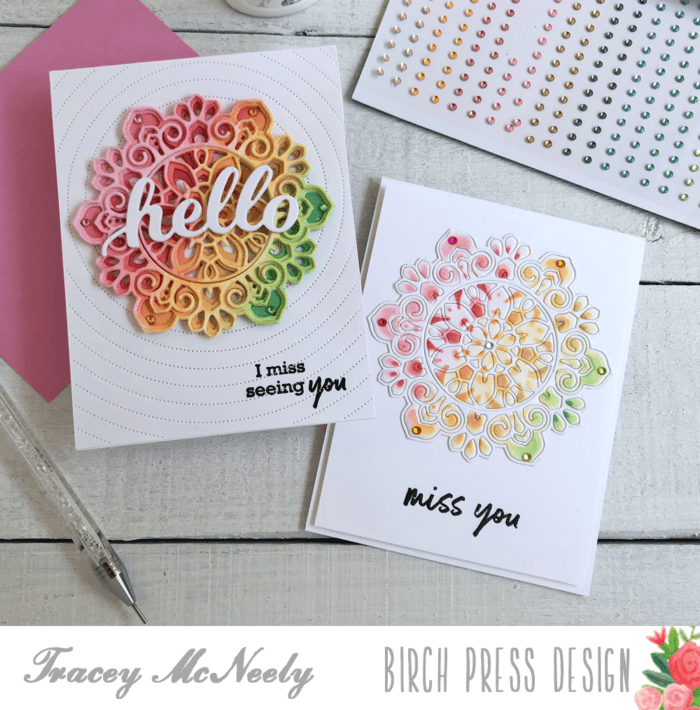
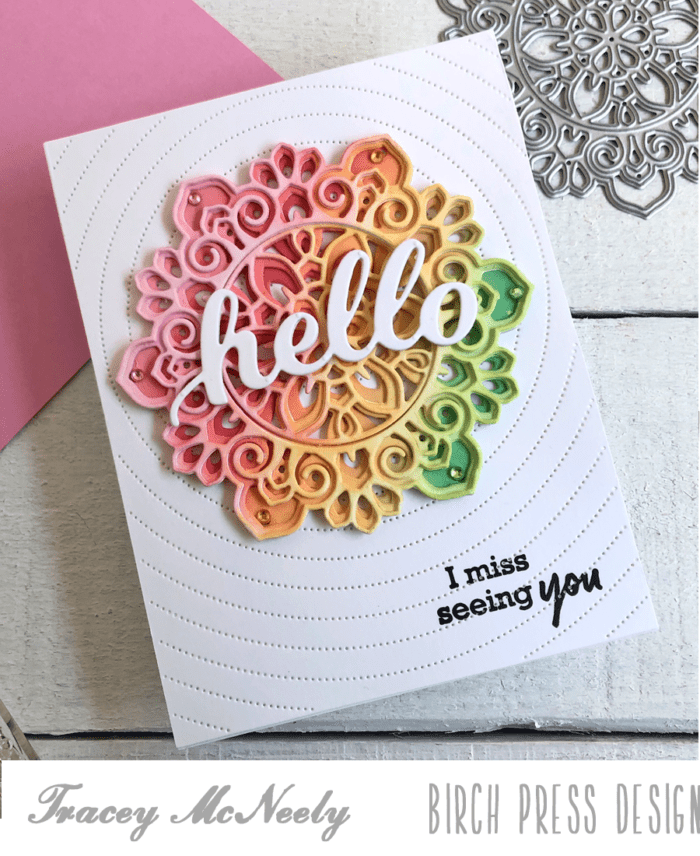
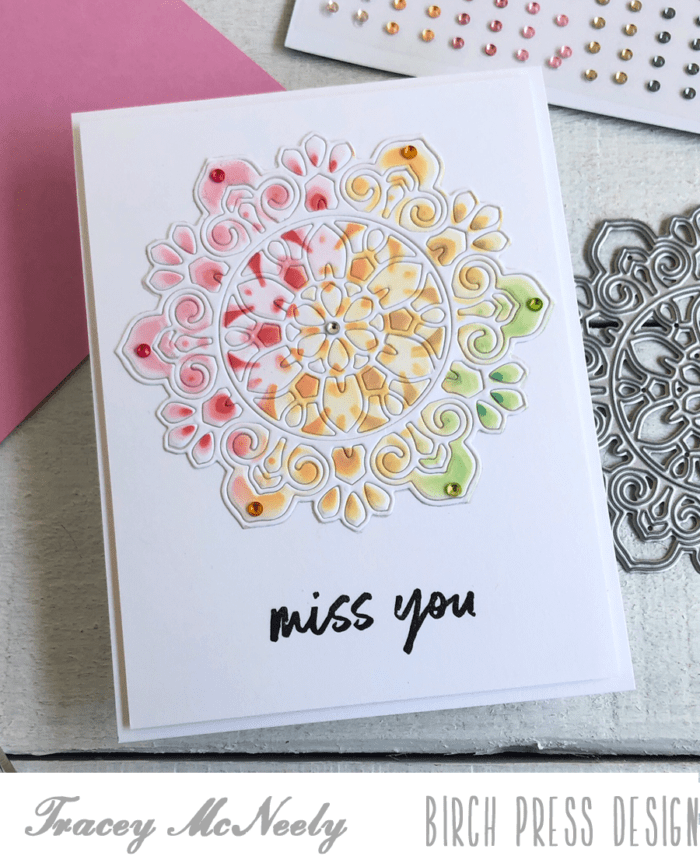
    Hi there crafty friends, it’s Tracey here today and I have the pleasure of sharing a card I made using the new Arista Layer die set!

    I created my own paper to use on my project using a gel press.

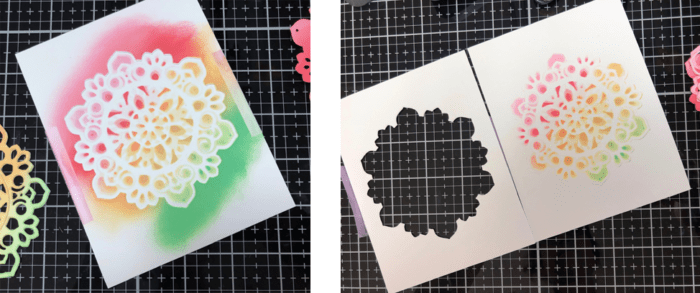
    After making my card I realized that a lot of people are unfamiliar with what a gel press is? It is literally a clear piece of gel that you can put ink on, then lay your paper down on it and when you lift it up it transfers the ink to the paper in unique ways! I made a quick little video to show you the process I used for my background.

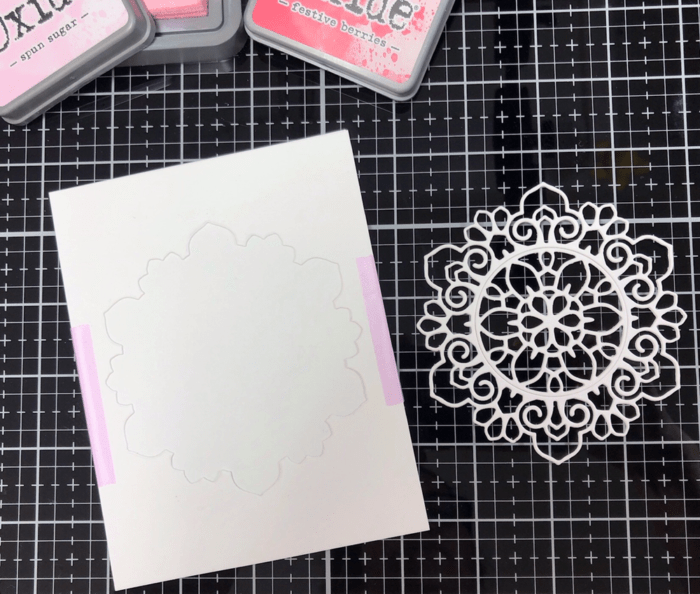
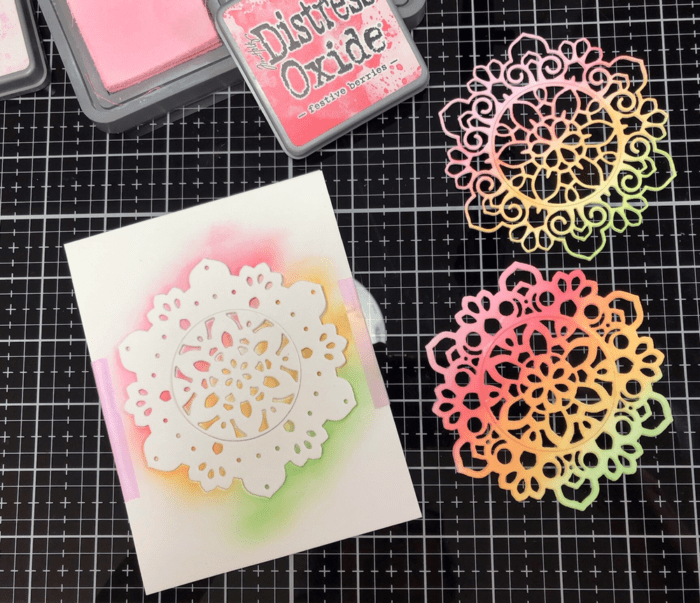
    I used using Kitsch Flamingo and Salvaged Patina Distress Oxide inks to create the background panel. The fun with using the gel press is that every single print you make will be 100% unique. I set the panel aside to work on the focal die cut.

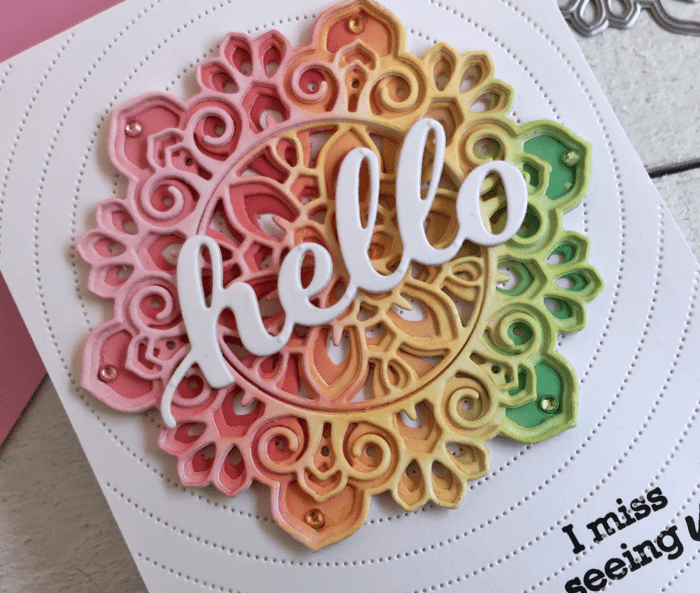
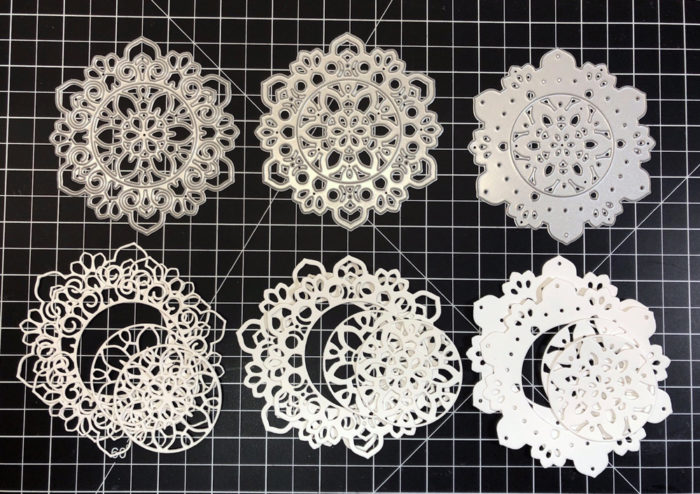
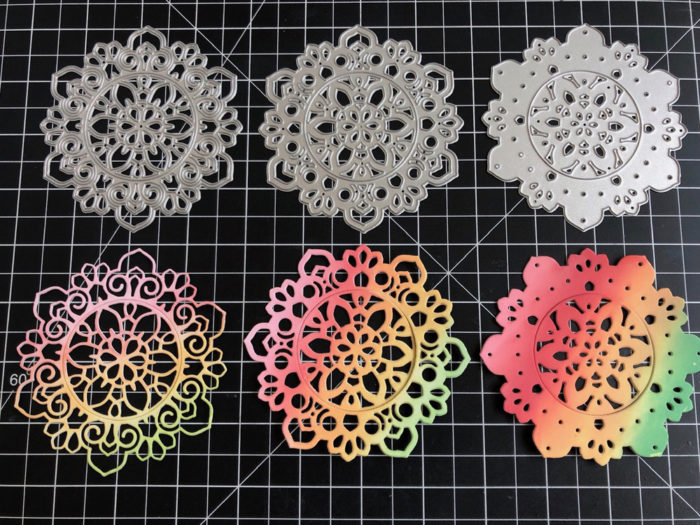
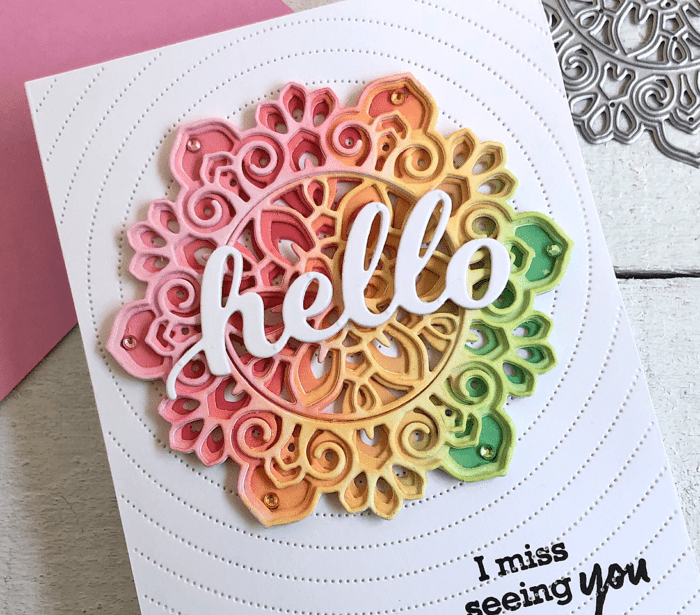
    I had already made a panel using pink and yellow Distress Oxide inks–Kitsch Flamingo and Scattered Straw . I cut the Arista medallion, using only Layer B to showcase the amazing embossed detail on the die. I die cut it once from the pink/yellow panel and then two more times in white. I glued the three layers together to give it a bit of dimension.

    The background was trimmed down to 5 1/4″ x 4″ and adhered to a white top folding card base for foam tape for even more dimension. Trimming the panel down leaves a nice 1/8″ border around it. A simple detail that really steps up your overall clean and simple card design.

    A sentiment from the new Classic Sentimental Wreath stamp set was stamped on the front of the card, leaving room above for the Arista medallion.

    The medallion was attached using foam tape which gives it even more fabulous dimension. I added a few of the pink Open Studio Fairy Jewels to the medallion for just a bit of sparkle! These self adhesive jewels are a great addition to your craft supplies.

    Thank you so much for crafting with me today and I hope I’ve inspired you to make something pretty!

    Supplies

  • Mini Slimline Butterfly Basics | By Dilay Nacar

    Mini Slimline Butterfly Basics | By Dilay Nacar

    Hello, friends! Dee (@dilaynacar) here and I am super excited to share this mini slimline card that features the brand new Butterfly Basics die set! This adorable set includes 9 dies, and coordinates perfectly with Birch Press Design’s other butterfly die sets! Let’s get started!

    To begin, I die cut a piece of white cardstock down to a 3.5” x 6” panel, then die cut the butterfly wing and body die three times in white and three times in black cardstock. I wanted a subtle yet intricate background, so I adhered the white butterflies directly onto the white base.  

    Next, I die cut solid backings for the black butterflies, ink blending each with Distress Oxide inks. Once dry, I adhered a black butterfly cutout onto each colored backing then onto the background with foam squares, trimming off the excess. 

    To complete the card, I heat embossed a sentiment from the Happy Lingo stamp set and adhered it to the card with foam tape. As a finishing touch, I added black embellishments and mounted the card onto a side-folding mini slimline base. 

    Thank you so much for stopping by today! Please be sure to check out the new goodies over at the Birch Press Design shop! I hope you found some inspiration today!

  • Rainbow Wishes | by Tracey McNeely

    Rainbow Wishes | by Tracey McNeely

    Hi there and Happy Mother’s Day to all the mother’s visiting here today. It’s Tracey and I am very excited to share a project using a couple of newly released products from Birch Press Design!

    The new Rainbow Days Lingo Notes stamp set was starting point for my card. I stamped the rainbow off the card on the left side with embossing ink and white heat embossed it.

    I stamped the rainbow on to a full adhesive Post-it Note and trimmed it use as a mask. I masked off the rainbow and then ink blended a sky with Broken China and Tumbled Glass Distress Oxide inks. Once the blend was done I splattered some diluted white acrylic paint on to the panel. When that was dry I smooshed some Broken China Distress Oxide ink on to an acrylic block with a bit of water and then splattered that on to the panel.

    Once the mask was removed I coloured the bands of the rainbow using my ZIG Clean Color Real Brush watercolor markers blending the colours out with a water brush and set aside to dry.

    I blended a panel of Bristol Smooth cardstock about the size of the butterfly in the Eloquent Butterly Layer die set. I blended on an angle a rainbow of Festive Berries, Spiced Marmalade, Wild Honey, Mowed Lawn and Tumbled Glass Distress Oxide inks. I cut Layer C of the Elequent Butterfly from the ink blended panel. Then I cut Layer A of the Eloquent Butterfly from Vellum. Layer A has beautiful embossed details on it that look stunning on the vellum. It was glued to the centre of the Layer C ink blended butterfly and set aside.

    Now that all the pieces were completed I white embossed a sentiment from the Rainbow Days Lingo Notes stamp set on the top centre of the sky. Then the butterfly was attached to the end of the rainbow on a slight angle.

    The panel was attached to a white top folding card base with foam tape for some life and the final touch was to add to pearls to the body of the butterfly.

    This was such a fun card to make, a few different techniques with such a pretty end result.

    Thank you so much for crafting with me today and enjoy the rest of your weekend.

    Supplies

  • Birthday Shaker Bundle | By Amanda Wilcox

    Birthday Shaker Bundle | By Amanda Wilcox

    Hi there! It’s Amanda from Twiddler’s Nook back with you today sharing a set of 4 birthday shaker cards.

    All of a sudden I needed multiple birthday cards and I thought this was a fun way to get them all finished and ready to go.

    I started things off by cutting all of my pieces at once. We’ve got 4 card bases, 4 card front panels and 4 white pieces measuring 4×5.25 inches with the string art circle collage die cut from the middle top of each panel.

    Next, I blended distress oxide inks in different color combinations on each of the card front panels. Here is a little collage photo to show you all the combos in case you’d like to try them out too.

    Once they were all finished, I spritzed the panels with water and then flicked some watered down black acrylic paint on them for a little texture.

    To make these into shaker cards, I added an acetate sheet to the back side of the circle string art collage opening of each panel. Then I added doubled-up foam tape to the back too.

    Next, I chose my embellishments and made a little pile in the middle where the opening would be. I removed the release paper and added the string art collage panel to the ink blended panel, sealing the shaker bits inside.

    For each card, I chose an embellishment mix and different colored micro beads to help the pieces move around nicely.

    With all of the shaker mechanisms created and sealed up. I used liquid glue to adhere them all to the card bases and moved on to sentiments. For that I chose the Big Lingo Happy die set. You can see here that it can be used two ways – the outline over the shadow or the inside letters on the shadow. You really could use either piece on its own too. It’s a very versatile die. I chose to cut the letters twice and used both versions with white shadows.

    Then I pulled out the Crystal Lingo stamp set and stamped the “birthday to you” part on white cardstock. I die cut these with the banner die in the Christmas Ornament and Labels set.

    I used liquid glue to adhere the sentiment pieces together and then to the front of the cards.

    And then to finish things off, I glued a scattering of the shaker bits on the front of the card design to tie things in together.

    I really like what this does for the look of the cards. And then, like magic I have 4 birthday cards ready to go!

    I hope you found some inspiration to create something wonderful and share it with someone.

    I appreciate you sharing your time with me. Have a fabulous day!

    Supplies

  • Spread Kindness this Easter | by Tracey McNeely

    Spread Kindness this Easter | by Tracey McNeely

    Hi there crafty friends, I’m back today with a landscape slimline card showcasing the fabulous Crystal Lingo stamp set and the beautiful Petal Egg Layer die set.

    The faceted rectangle from the Crystal Lingo stamp set was white heat embossed on to a 8 1/2″ x 3 1/2″ panel of Bristol Smooth cardstock. I ink blended over the panel in a rainbow using Distress Oxide inks. The colours are Kitsch Flamingo, Carved Pumpkin, and Twisted Citron Distress Oxide inks and Mustard Seed, Tumbled Glass and Shaded Lilac Distress ink.

    The panel was trimmed down to 8 1/4″ x 3 1/4″ and it was attached to an 8 1/2″ x 3 1/2″ white card base with foam tape to add a bit of dimension.

    I wanted to use the pretty background along with the Petal Layers die set in a way that one wouldn’t overpower the other. I cut all three layers from heavyweight white cardstock. I adhered the layers together with liquid adhesive and once dry.

    I decided to use pinks and oranges as my egg colour from the background. You can place your egg anywhere on the card depending on the colours that appeal to you or your recipient. I chose to place the dimensional egg on a angle. I placed small pieces of foam tape behind the egg to pop it off the background.

    The sentiment from the Blooming Spring clear stamp set was heat embossed and trimmed down and added to he panel with foam tape.

    I love the idea of sending someone a landscape, slimline card. So easy to be displayed without tipping over.

    Thank you so much for creating with me today. Wishing you a happy and safe Easter.

    Supplies

  • Do the Slimline with Crystal Lingo | by Tracey McNeely

    Do the Slimline with Crystal Lingo | by Tracey McNeely

    Happy Spring crafty friends! Today I’m creating two slimline cards using the Crystal Lingo Stamps and dies.

    The faceted rectangle stamp in the Crystal Lingo clear stamp set is the perfect size for 8 1/2″ x 3 1/2″ slimline cards.

    For both of the my cards today I started off by white heat embossing the faceted rectangle from Crystal Lingo on to two panels of watercolour cardstock cut to 8 1/2″ x 3 1/2″.

    TIP: When embossing on watercolour cardstock I always make sure I prep the paper well with my embossing buddy and I always double stamp my embossing ink.

    I laid down a combination of Distress Ink and Distress Oxide inks on to my craft mat in a staggered rainbow. I used Kitsch Flamingo, Carved Pumpkin, and Twisted Citron Distress Oxide inks and Mustard Seed, Tumbled Glass and Shaded Lilac Distress ink.

    I spritzed some water onto the mat and then put my panel facedown into the ink and picked it up right away. I did not smoosh the ink, just straight on and off. I dried the panel thoroughly and then went back to the mat and tapped the panel around putting on a second layer. I spritzed a bit of water on my panel where the Distress Inks were to disperse them a bit more.

    Once again I dried the panel thoroughly and went back to the mat one more time but before tapping down I spritzed the craft mat a bit more to reactivate the ink and did one final layer by tapping the panel on the craft mat. I stamped and die cut the Big Lingo Type Thanks die in white and black and attached it to the card with foam adhesive!

    The second panel was actually the first panel but a little bit of Frayed Burlap was all it took to muddy up my rainbow.

    Rather than toss it away I kind of liked the masculine vibe that the brown gave to the card. So I did the same as I did for the other card.

    I dried it and added more ink until I had three layers! I die cut the Big Lingo Type Thanks using only the detailed die three times for the sentiment. I adhered the three layers together to give the die cut some stability. Trust me this takes some patience–lol! I adhered the die cut directly to the card front.

    It’s so much fun to take an image like this, emboss it and then have some fun with your inks. This technique can be done with most inks and of course a little bit of water.

    Thanks so much for joining me today and we’ll see you next time!

    Supplies

  • Enchantment meets Crystal Lingo | By Amanda Wilcox

    Enchantment meets Crystal Lingo | By Amanda Wilcox

    Hello everyone! It’s Amanda from Twiddler’s Nook today with another pair of cards to share. I seem to have a hard time either making choices or letting die cuts go to waste so I rarely make just one card anymore.

    This all started with my wanting to play with the Enchantment layering dies and create the card on the left. But I couldn’t let that ring go to waste so I die cut the middle portion a second time and created the card you see on the right. I made them simultaneously so forgive me if my tutorial today flips back and forth.

    I started by die cutting all the pieces from the three Enchantment layers once and the center portion a second time. My bottom layer is Thermoweb Deco Foil Flock, the middle layer is a textured cardstock and the top is a smooth cardstock. These three together look so cool in person! Definitely worth it!

    Once these were cut, I used liquid glue to adhere all the layers together and started playing with backgrounds.

    I ended up doing some ink smooshing with my Tombow markers for the first card. I always lay down one layer of ink, dry it with my heat gun and keep layering until I like it. Then I set it aside to dry.

    While that was drying I blended tattered rose and dried marigold distress oxide inks on a panel. Then I spritzed it with water and flicked pearl watercolor on it. Once that was dry I trimmed it down to 4×5.25 inches and lined the back with foam tape to adhere to a white card base.

    After adhering my backgrounds to card bases, I stamped and heat embossed sentiments from Crystal Lingo and used the coordinating dies to cut them out. Then I trimmed the smaller ones into strips.

    Assembly was simple using liquid glue for the layerd die cuts and a combination of foam squares and liquid glue for the sentiments.

    I did the same thing for both cards and then finished them both off with some pearl baubles for a little extra shine and interest.

    I hope you found some inspiration to create something wonderful today.

    I appreciate you sharing your time with me. Have a fabulous day!

    Supplies

  • Any Time Layered Hearts

    Any Time Layered Hearts

    Hi there, it’s Tracey here today with a couple square cards using the Layered Hearts dies. These began as cards for Valentines, but time got away from me. So they were finished after the 14th as cards that you can send any time of the year. Both of today’s cards are 4 1/4″ x 4 1/4″ square and although the cards are different, they both use the same process.

    The Kinsley Heart and the Petal Heart layer sets are beautiful whether you use all three layers together or just the top for a delicate look! I love this die set because even with all three layers you can still see the amazing stitched lines on the bottom layer!

    To make the pink heart using all three layers of the Kinsley Heart layers dies. I began by blending a panel with Distress Oxide Inks–Spun Sugar, Picked Raspberry and Seedless Preserves. This will be the background for the layered heart and the bottom layer of the letter dies. It was cut with the largest heart in the Perfect Hearts die set. The layers of the Kinsley heart were cut from white cardstock and glued together. The ‘xoxo’ was cut using the Mod Alphabet die set. The bottom layer from the ink blended panel and the top from white cardstock.

    Before attaching the layered heart and ‘xoxo’ to the card base it was spritzed with Distress Oxide Spray in Picked Raspberry. I sponged a bit a pink ink on the centre of the heart for interest.

    The green card used the Petal Layers die set, but only Layer A for a more delicate design.

    Just like with the pink card I blended a panel with Distress Oxide Inks, this time I used Tumble Glass, Cracked Pistachio and Peacock Feathers. I used the panel once again for the layered heart and the bottom layer of the letter dies. Layer A of the Petal Heart layer set was cut from white cardstock. The ‘xoxo’ was cut using the Mod Alphabet die set. The bottom layer from the ink blended panel and the top from white cardstock.

    This time before attaching the heart and ‘xoxo’ to the card base it was spritzed with Cracked Pistachio and Peacock Feathers Distress Oxide Spray.

    So quick and so fun to use similar supplies and the same basic techniques to make two cards to you can use to Share Handmade Kindness!
    Thank you so much for stopping in to craft with me, see you next time.

    Supplies

  • Linear Triangle Duo | By Amanda Wilcox

    Linear Triangle Duo | By Amanda Wilcox

    Hi again! It’s Amanda from Twiddler’s Nook today featuring a couple of new products available in the shop. I was very interested in this new linear triangle die so I cut a couple out and started playing around, which is how I figured out today’s fun design. I hope you like it.

    I started by blending distress oxide inks in aged mahogany, fired brick and tattered rose on 4×25.5.5 inch panels.

    Then I die cut the linear triangle from 2 shades of teal cardstock – twice each so I could make both cards at the same time.

    I spritzed the inked panels with water, glued down the linear triangles with liquid glue and splattered them both with gold watercolor.

    While the watercolor was drying, I stamped sentiments from the new Crystal Lingo set and heat embossed them. The big words are in gold on white paper and the smaller sentiments are in white on black paper. I die cut the large words, cut strips from the small ones and lined the backs with foam squares.

    Last, I just removed the release paper and attached my sentiments to the card fronts. Here is the portrait version.

    And my favorite part about this design is the linear triangle die is how well it works both ways. Here is a landscape one so you can see how the panels fit the card fronts.

    Such a fun combo to make. Also, very easy to swap out sentiments and colors for different occasions and needs. I love cards like that. Don’t you?

    I appreciate you sharing your time with me. Have a fabulous day!

    Supplies

  • Hugs and Kisses | by Tracey McNeely

    Hugs and Kisses | by Tracey McNeely

    Hi there crafty friends, it’s Tracey here with you today. I used the Dahlia Heart Layer dies to create a slimline Valentines card. Using one sheet of white cardstock I was able to make my card base which is 8 1/2″ x 7″. The remaining piece of cardstock left was 8 1/2″ x 3 1/2″. I trimmed a 1/4″ off of the length and now had the perfect sized mat for the front of my card.

    I started by ink blended a panel of Bristol Smooth cardstock using Distress Oxide Inks–Spun Sugar, Picked Raspberry and Festive Berries. Once the panel was blended I tapped some watered down Perfect Pearls over the panel to add some interest and set it aside for now.

    Using the Dahlia Heart Layer A die, I cut a heart near the upper portion of the 8 1/2″ x 3 1/2″ panel.

    I trimmed my ink blended panel down and adhered it to the back of the front panel that I cut the heart from.

    Next I used the Dahlia Heart Layer A die and cut it from gold sparkle cardstock. I added liquid adhesive to the back of the gold sparkle heart and I inlaid it into the heart cutout. I panel was adhered to the card base leaving a small 1/8″ border.

    The hugs sentiment is from the Jumbo Lingo Hugs die. I cut the base layer from my ink blended panel and the top layer with the same gold sparkle cardstock I used for the heart. It was attached to the card using small pieces of foam tape.

    To finish off the card I splattered a bit of yellow gold metallic watercolour on to the card front. Then I embossed the XOXO using gold pearl embossing powder.

    Thanks so much for stopping in today and crafting with me. There is lots of time to make some Valentines cards for your loves or for friends. Have fun and get creative with your Birch Press Design dies. Enjoy the rest of your day and well see you next time!

    Supplies