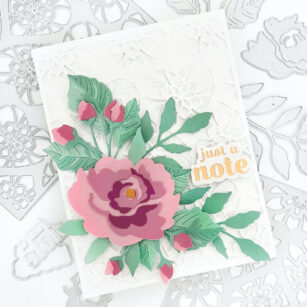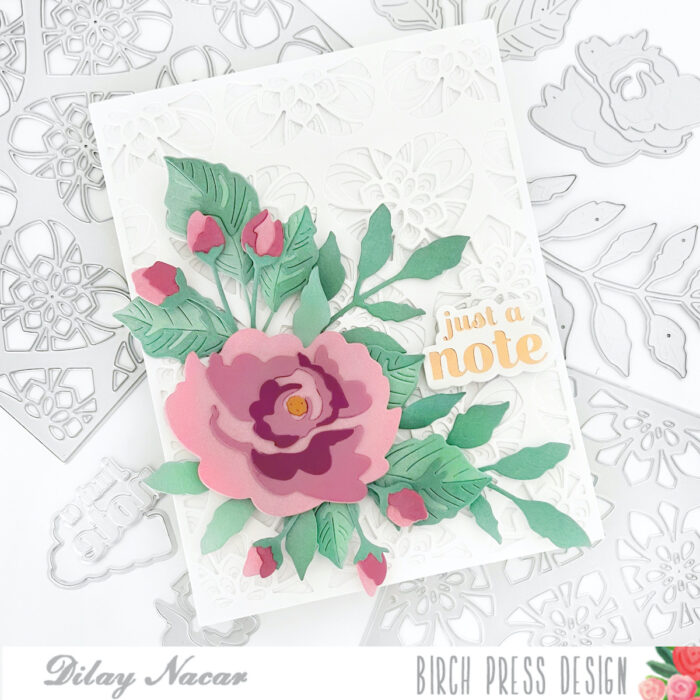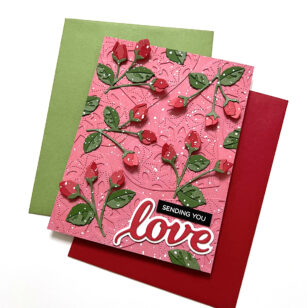
Hello, Birch Press friends! It’s that time of year, so I wanted to make a Valentine’s card. Except, this one can really be for any occasion when you want to send your love to someone special. My card features the buds from the Morning Rose and Triple Buds Contour Layers set.

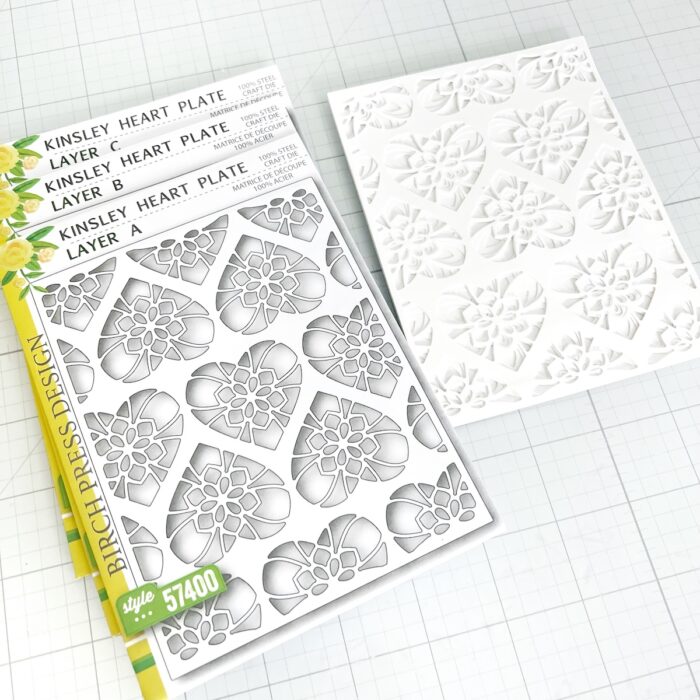
I started by choosing three different shades of red and pink card stock. I used my lightest shade for the card base. In order to give the background some texture, I cut out several hearts and adhered them to the base. I used Layer C from the Kinsley Heart layering die set, which is now retired. But, you can use any of the various heart layering sets that are in the Birch Press Design store.

Once I finished my background, I cut the rose buds out of the other two shades of red card stock. I adhered all of the pieces of the buds together, and then I adhered them to the stems, which I had cut out of green card stock. For the leaves, I used the Dainty Rose and Leaves Contour Layers set. I used two different colors of green card stock for those leaves.

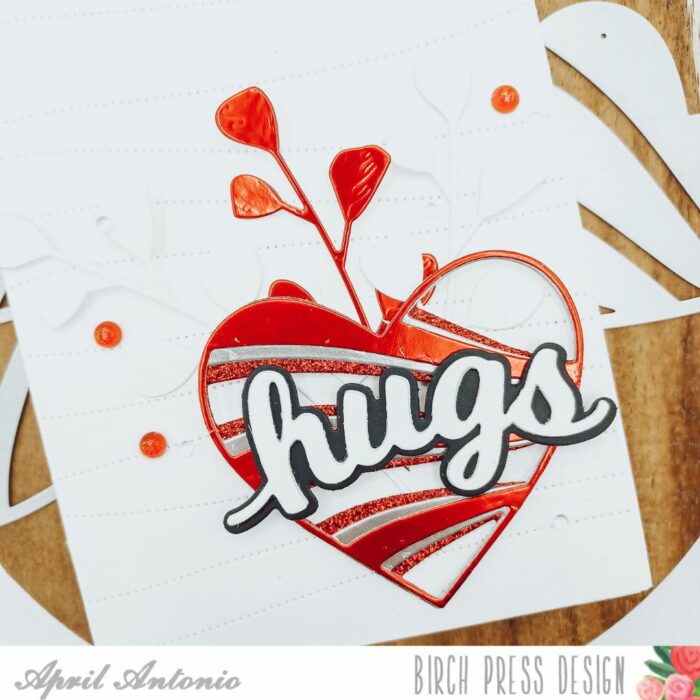
For my sentiment, I used the Love Honey Script Die, cutting the word out of the darker shade of red that I used for my flowers. I adhered that to a white shadow layer. I temporarily placed my sentiment where I wanted it, so that I could decide where I was going to place all of my flowers and leaves. Once I figured out placement of all the elements, I adhered everything down except for the sentiment. I adhered the leaves first, and then I adhered the stems, glueing them only at the bottom in order to create dimension.

Once everything was attached to the card base (except for the sentiment), I splattered it with white paint. I let that dry, and then I attached the sentiment. To finish the card, I added the “sending you” sub-sentiment, which is from a stamp in my stash.
Thank you so much for joining us today. I hope this card inspires you and brings a smile to your face!
Wishing you a crafty day,
Allison

Supplies