Category: Glitter

  • Dad you rock! | by Kimberly Wiener

    Dad you rock! | by Kimberly Wiener

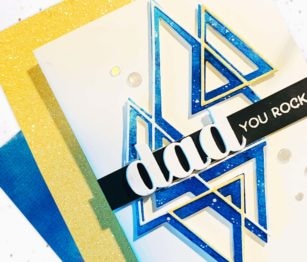
    Hello Birch Press Design fans! How about this for a great modern masculine card? The Prismatic Triangle Layers Set is perfect for any Father’s Day card. Which, I might add is currently on a great sale!

    The sentiment that I used for this card is the Big Birthday Sugar Script. I ran the die six times cutting and piecing, making the word dad, and then layered it three times.

    The stacked word was added to a 1/2 inch black card stock strip that was embossed in white with the “You Rock” sentiment from the Best Friend Clear Stamp Set.

    I used Layer C for the brilliant blue bottom layer. The coloring medium is Brusho Color Crystal Inks in Turquoise and Ultramarine spritzed with water onto Open Studio Watercolor Paper. This layer was cut in half and splatters were added with a white gel pen.

    I ran the Layer A die onto white card stock and once again onto the gorgeous yellow Jewel Glitter Paper. I cut this layer in half. Two triangles were cut from the glitter paper and added to the white layer for a subtle sparkle of color.

    Once the white and yellow glitter layer are affixed to the blue layer, I added double foam tape on both pieces as well as the sentiment strip that I nestled in between them. I sure hope that you will experiment with this fun and versatile die set.


    Supplies


  • You Mean The World To Me | by Crystal Komara

    You Mean The World To Me | by Crystal Komara

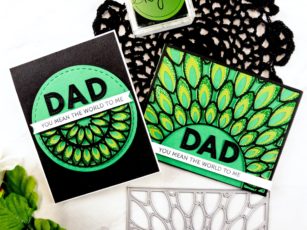
    Hello readers! Who else struggles with making masculine cards? I know that I sure do! Cutesy pink dancing pigs and glittery pop-up mermaids just aren’t going to cut it for my dad! With Father’s Day soon approaching I know that we are all looking for some inspiration to create cards for the special men in our lives. I have found that simply by using certain colors, it is easier to achieve a more masculine look. For today’s two cards, I used the Lumina Layering Plates (A, B & C) and a darker color palette of black, gold and green. I think this same card in navy blues and golds would also be an excellent masculine inspired combination.

    Here is the first card I created using the “leftover” cutout circle pieces from the Lumina Layering Plate. I could have added this cut-out back in to the original card design, but I like the idea of creating two cards from one die!

    Here is the second card I created using the Lumina Layering Plates:

    I have created a step-by-step YouTube video tutorial sharing how I made both of these cards. I like to keep my videos short and sweet, so it under 7 minutes long!

    Thank you for visiting and I hope you have a wonderfully creative day!

    Supplies

  • A Rainbow of Mandalas | by Crystal Komara

    A Rainbow of Mandalas | by Crystal Komara

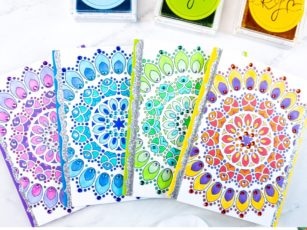
    Hello crafty readers! This is Crystal here with you and today’s post is all about coloring the beautiful Thankful Mandala stamp set. If you love to color, then these cards will be perfect for you to try. And, well, if you don’t love to color so much then you can simply admire the beauty of someone else’s coloring!

    I will be the first to admit that I have a love/hate relationship with coloring. There are times when I find it peaceful and soothing, yet there are also days when I find it can be simply dreadful! So, listen to how YOU feel. If you feel like coloring today, then go for it! If you’d rather sit back and eat a hot fudge sundae, you certainly won’t find me judging you! : )

    For this yellow mandala I used Copic marker numbers V17, R27, Y02 and YR68.

    For the green mandala I used Copic markers numbers YG06, G21, G05 and BG13.

    For the purple mandala I used Copic markers number RV19, RV55, RV66, V9 and BV02.

    Each of these cards begins the same way. I stamped the large Thankful Mandala on a 5 1/2″ x 3 1/4″ piece of Neenah Solar White Smooth cardstock in Memento Tuxedo black ink. Then I selected 3-4 colors of Copic markers in complimentary hues and color away. There is no rhyme or reason to my madness! In all honesty, each mandala took me about half an hour to color and then I adhered various colored rhinestones for added sparkle.

    I found a complimentary colored cardstock base for each color and added two strips of die cut glitter paper down each side of the mandala.

    For the blue mandala I used Copic marker numbers B02, B24, B52 and B12.

    I hope you have enjoyed these cards and will maybe try coloring some too! Thanks for visiting and have a wonderfully creative day.

    Supplies

  • Happy, Happy, Happy Birthday! | By Amanda Wilcox

    Happy, Happy, Happy Birthday! | By Amanda Wilcox

    Hello everyone. Amanda Wilcox from Twiddler’s Nook here and I’m so excited to be joining Birch Press Design Creative Team. Today I have my first card share for you. It looks a little involved but it really is simple. Let’s get started.

    I die cut each of the layers for the Frilly Triangle twice and glued them together.

    Next, I moved on to ink smooshing my background. This is a fun technique that gives a great effect. You just color Tombow, or other water based markers, on a clear block, spritz with water and smoosh your paper on it.

    After the first round, I used a heat tool on it and smooshed it on the liquid that was still on my block for a layered effect.

    And a quick tip: If you have a laminator, run the panel through that once it’s dry to flatten it back out. It really helps.

    Next, I moved on to my sentiments. I die cut the Big Lingo Happy 3 times – the shadow from white and the letters from black. I used my Quickie Glue Pen to adhere them together. This pen is great for skinny little spaces and keeping your fingers out of the glue.

    For assembly, I adhered the smooshed panel to a card base and the frilly triangles to opposite corners. Then, I die cut the happy shadow 9 more times from white cardstock. See how the letters will overlap the triangles? We need to raise parts of the word up to meet those. So I cut the “H” off of 3, left the middle 3 alone and cut the “Y” off the last 3. Then I adhered everything together and then to my card.

    Last, I stamped the Happy Birthday sentiment from Awesome Ticker Tape Messages and cut it out. This is popped up with foam tape on the middle Happy.

    For finishing touches, I added Wink of Stella glitter brush pen to the banner sentiment and the die cut letters and some gems to both of the frilly triangles.

    I hope you enjoyed today’s card and found some inspiration to create something beautiful.

    Supplies
  • Glitter Flutter Butterflies by Jeanne Jachna

    Glitter Flutter Butterflies
    by Jeanne Jachna

    Happy Saturday! I hope you’re having a great day and that the sun is shining so you can spend some time outdoors today! I am so happy the weather is warmer and I can feel the sun on my face!

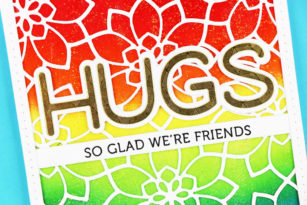
    Today I’ve got a glittery card so share made with the Flutter Plate Layer B. Here’s how I made it sparkle!

    I applied packing tape to the back of a card stock panel before I die cut the panel. The tape prevents the panel from cutting all the way through providing an outline for me to color with markers.

    I colored the panel with Copic markers but any marker will work. Don’t worry about staying in the lines.. no one will see!

    I mixed Glossy Accents with micro find crystal glitter and then spread it over the colored panel with a spatula and then attached a panel cut from white card stock. When it was dry I attached another white die cut panel to add some depth and give a stained glass look.

    This card is so sparkly and glossy it’s like candy for the eyes.

    The simple sentiment is from the Best Friend stamp set.

    I hope you’ll give this technique a try!

    Finished Size 4.25 x 5.5″

    Supplies


  • Midnight Mandala by Jeanne Jachna

    Midnight Mandala
    by Jeanne Jachna

    Hi friends! Big hugs to you as the shelter in place continues! I hope you’re all safe and healthy and have all you need. Today I’m playing with the new Midnight Mandala stencil.

    This technique is fun and easy and I hope you give it a try. All you need is a stencil, distress ink, glitter and glossy accents.

    You can tape your stencil in place but if you want to treat yourself, invest in a can of Pixie Spray. It holds the stencil firmly in place and lifts off easily – no more tape and you’re hand’s free. I inked the stencil in ombre shades of blue distress ink.

    I love the shine of glossy accents and the sparkle of glitter so I mixed them together and spread the mixture thinly and evenly over the inked stencil. When you’ve got complete coverage gently lift the stencil and wash it immediately with warm soapy water.

    Just look at all that sparkle and shine!

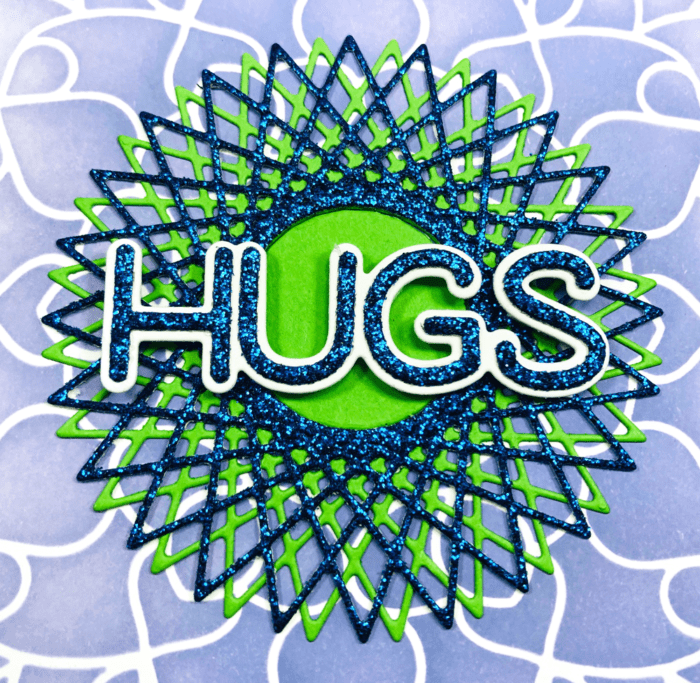
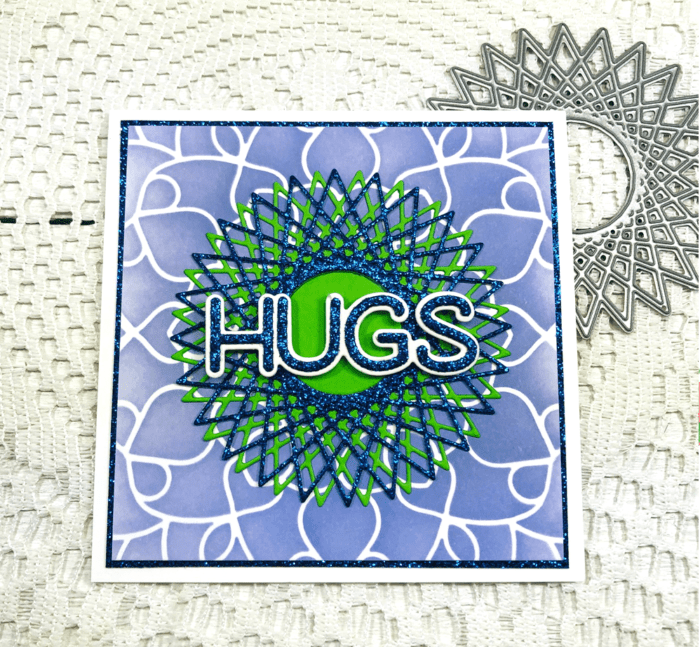
    I didn’t want to cover up these pretty shades of blue so I added a simple sentiment – the Big Hugs Sugar Script adhered with adhesive foam tape and a stamped “Sending” from the Memory Box Cherry Blossom Wreath tucked in a Tim Holtz Trinket Pin.

    Easy right? I hope you’ll give this a try! You’ll love the raised texture that reminds me of embossing!

    Supplies

  • Enchantment by Jeanne Jachna

    Enchantment by Jeanne Jachna

    Hi friends! I hope you’re all safe and well! Now more than ever I’m turning to crafting for a sweet escape and a way to deal with stress.

    Today I’m sharing a card made with the beautiful new Enchantment layered die set. The set includes three full size (A2 4.25 x 5.5″) cover plates with lots of versatility.

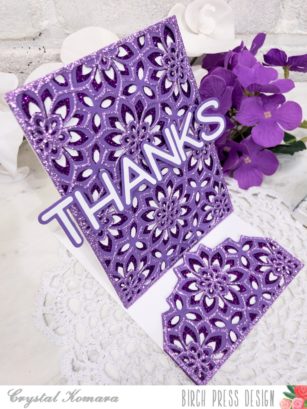
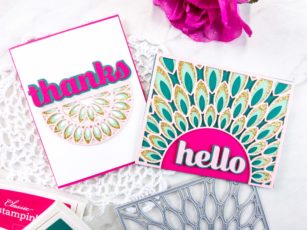
    Not only can you mix and match the three layers , you can also switch out the colors of the half circles on the left margin of the die. I cut the die from shades of red, yellow and orange and layered them over a glittery panel of card stock from the Memory Box Pastel Glitter Pad. TIP: When layering dies always complete the entire bottom layer first, then the entire middle layer etc. This allows you to fit the die cuts tightly together with no gaps.

    I die the the Thanks Honey Script word die from three shades of blue. I chose a contrasting color so the word die would contrast with the background.

    This die set has so much potential – imagine all the different shades and colors you can assemble the layers in!

    Finished Size 4.25 x 5.5″

    Supplies


  • Folk Art Heart Wedding | by Crystal Komara

    Folk Art Heart Wedding | by Crystal Komara

    Hello readers and happy Thursday! This is Crystal here with you today and I am sharing a wedding themed card created using the Folk Art Heart Layering dies. And yes, that is a mouthful to say! My husband and I actually had a wedding that we were supposed to attend two weeks ago in Orange County, California, that was canceled due to coronavirus. There were over 300 people anticipated to attend and travel in from across the country. Ugh, I can’t even imagine what that poor bride (and groom too, of course!) have been going through. . .

    *You can see full details on how to make this card in the video at the end of this post.

    The base of this A2 sized card is made from Neenah Solar White smooth cardstock. I also created a white scalloped frame from the same cardstock. Using Memento Tuxedo black ink, I stamped the sentiment at the top and bottom of the card, so that there would be room for the two hearts in the middle. I tried to create each heart to resemble more traditional bride and grooms colors, though you could easily make the hearts to match the wedding colors, or create two pink and white hearts if there were two brides to be celebrated!


    Here is a video tutorial that I created showing how to create this card:

    Thank you for visiting and I hope you have a wonderfully creative day!

    Supplies

  • Shadow Dies as Windows | by Jennifer Svare

    Shadow Dies as Windows | by Jennifer Svare

    Hello! Shadow dies are so versatile and can be used as either a background for the letters, a window, or as in this case – both!

    The sentiment is actually on the inside of the card, so is visible when opened.

    Here the shadow die was also used for a background for the word. I used the light green glitter paper from the Delicate Pastel 6 x 6 pad to create the background, along with the Handwritten Hello and Outline.

    These cards were so fast and simple to make, it was fun to use different colors and sentiments. For the card above, I used the Handwritten Just a Note die set. It comes with the words and an outline. It’s not a window in this example, but easily could have been.

    Each card started off the same way, and that was by stamping outlined flowers onto colorful backgrounds. I love the beautiful lines from the Wild Rose Stem clear stamp set by Memory Box. Next, I placed the shadow die where I wanted the window to be, secured it, and then taped the colorful sheet onto the white card base. The die easily cuts through two sheets of paper, so it created the window through the top of the card and base both at the same time. It saved time, but also made sure the windows aligned perfectly.

    I trimmed the sides down for a border on each side, and then it was time to embellish!

    The insides of the flowers have wonderful outlines of stamen, which is perfect for little dabs of Fairy Sugar.

    Can you see the different colors of the glitter glue? It added such a great, subtle variety in color to make little colorful stamen sparkles.

    These glitter glues from Birch Press Design are such gorgeous colors. The pastels have a subtle look but yet catch the light and show their colors when titled. So beautiful to see in person!

    For the card above, I used the words and shadow die from the Hello Honey Script set. I die cut the letters out of yellow and also pink. I stacked them so there would be an extra shadow layer underneath. So many fun ways to use word dies, along with outlines! I hope you have a wonderful day and thank you so much for stopping by the blog today!


    Supplies


  • You are So Awesome: Glittered Stencil and Butterflies | by Kimberly Wiener

    You are So Awesome: Glittered Stencil and Butterflies | by Kimberly Wiener

    Hello Birch Press Design fans! I am sticking with the “Spring” theme in my creations today. This design is a total glitter-ful stunner that will please any receiver.

    I stamped and die cut the Lovely Butterflies clear stamp and die set in black versafine ink. The gorgeous wings were colored with blendable alcohol markers in bright pinks and lavender shades. Drops of Pansy and Topaz Gleam Glitter Glue were added to the body as well as the circle details on the wings.

    The Leafy Rows Stencil was blender brushed on a heavy weight white cardstock in a light citron green, a darker green shade, and a muddy yellow amber distress ink.

    A layer of clear glitter gel paste was stenciled over the ink layer. Once dry, the stenciled cardstock is trimmed to 5.5 x 4 to make two card front panels.

    The sentiments from the You are Awesome Clear Stamp Set stamped in black ink and a .25 inch strip of black card stock placed beneath the stencil layer.

    I just love this soft and very Spring ombre effect that shines through. You will love the results too if you are able to try this technique. Happy crafting!


    Supplies