Category: Layered Background Die

  • Happy Christmas Ornaments | by Rosemary Dennis

    Happy Christmas Ornaments | by Rosemary Dennis

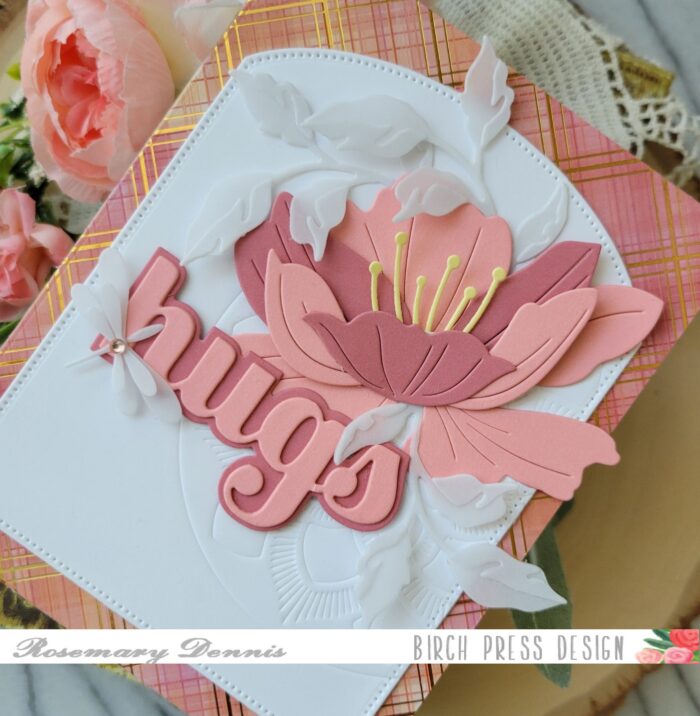
    Hello BPD friends! Rosemary here on the blog today! Christmas is just two weeks away and I’m still making Christmas cards! This card was made with several new Birch Press Design products as well as two “oldies but goodies”. Let’s see what I created.

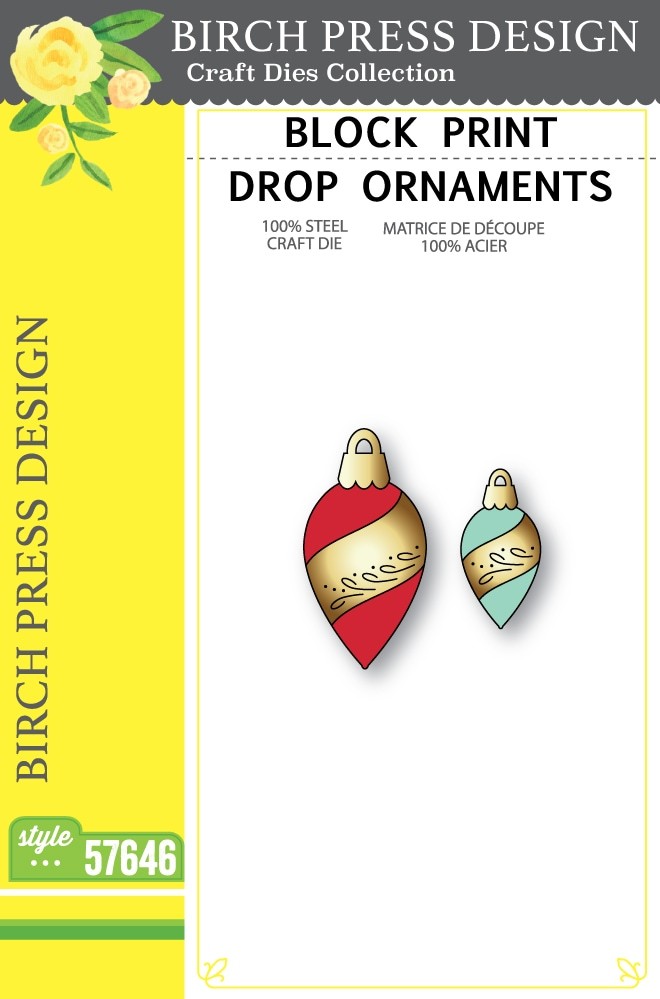
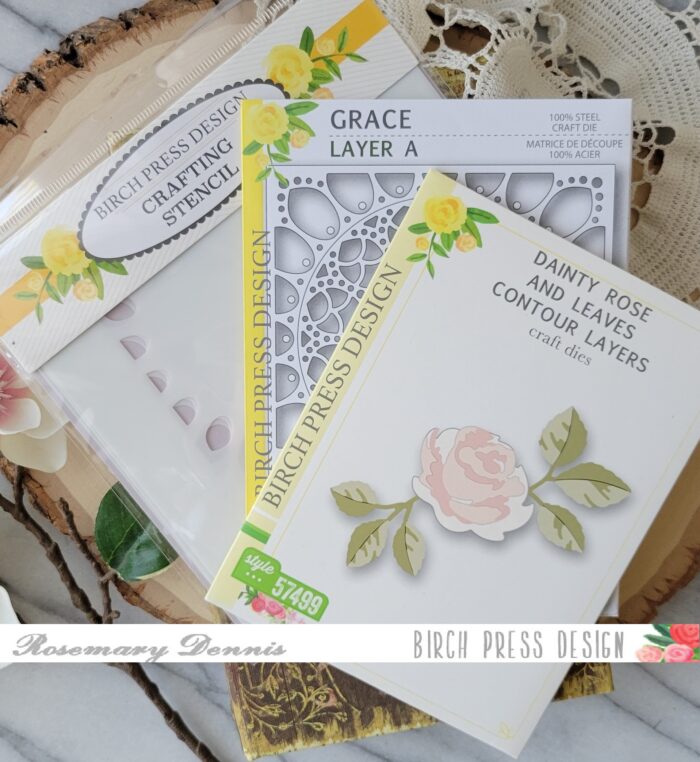
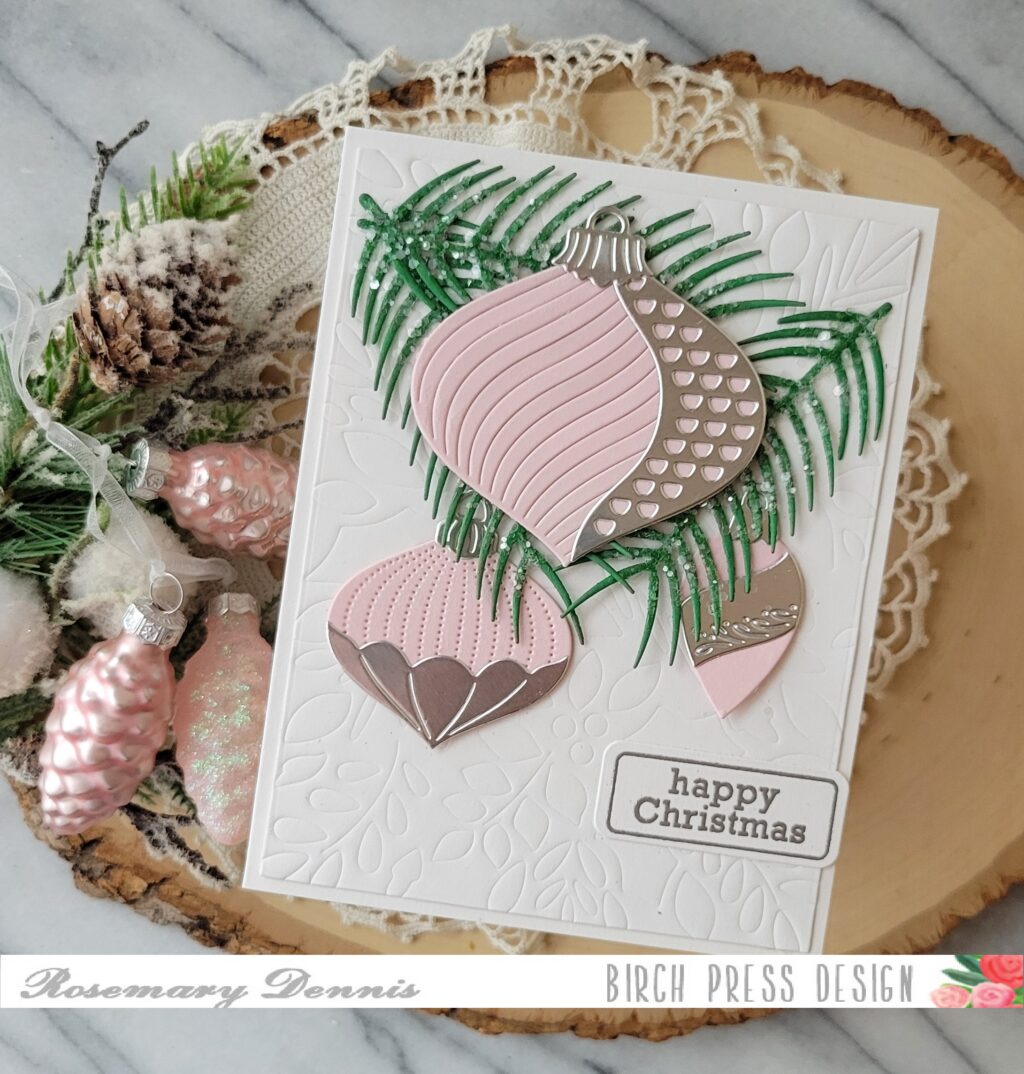
    For my card I used the following new products: Block Print Petal Ornament, Block Print Wave Ornament, Block Print Drop Ornaments and Simple Pine Needles. The two older products I used are Contempo Christmas Greetings and Herbarium Layer A.

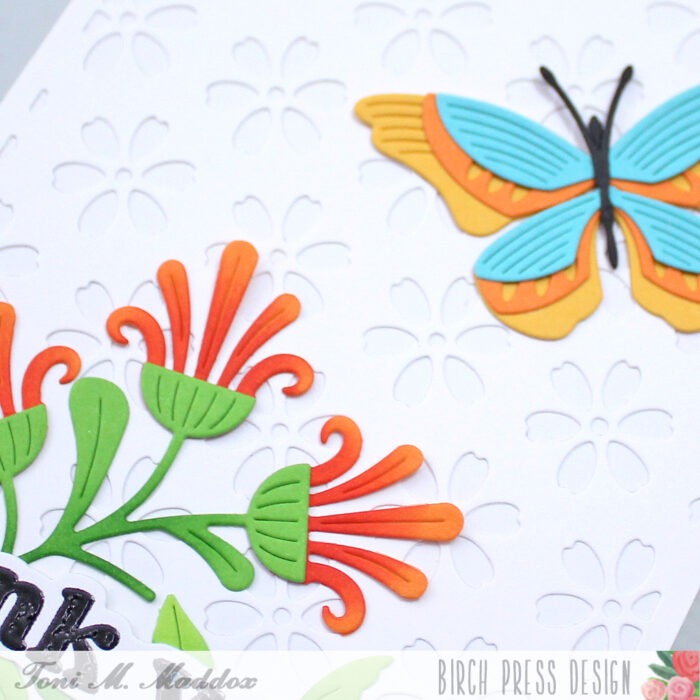
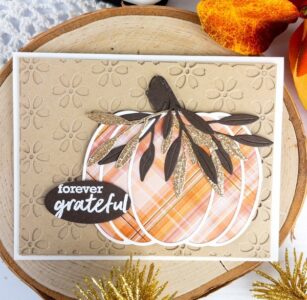
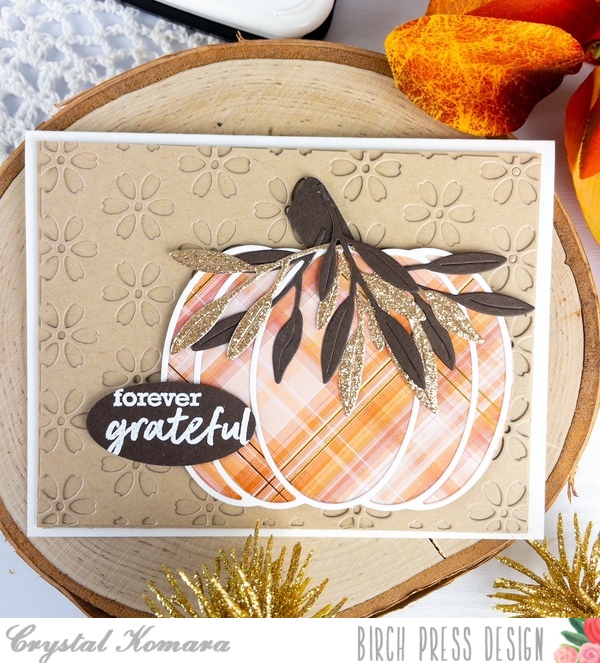
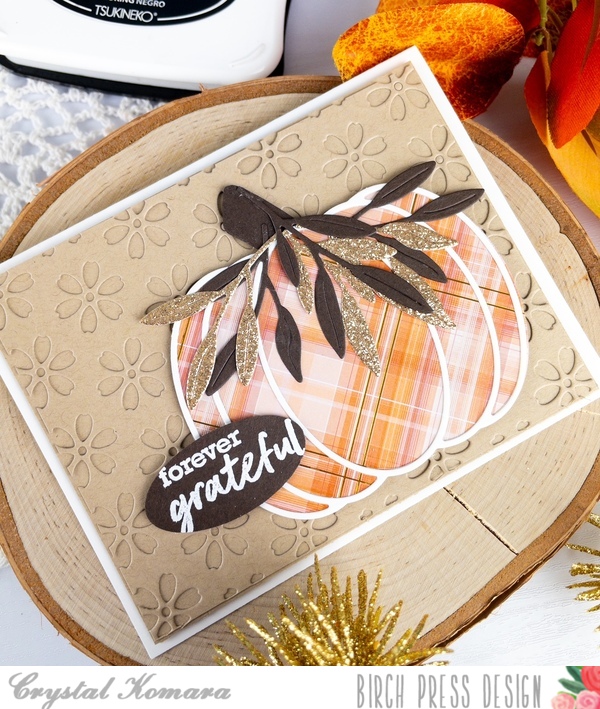
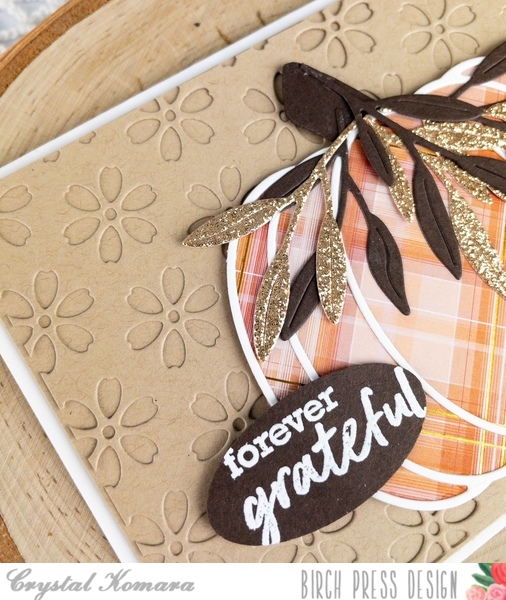
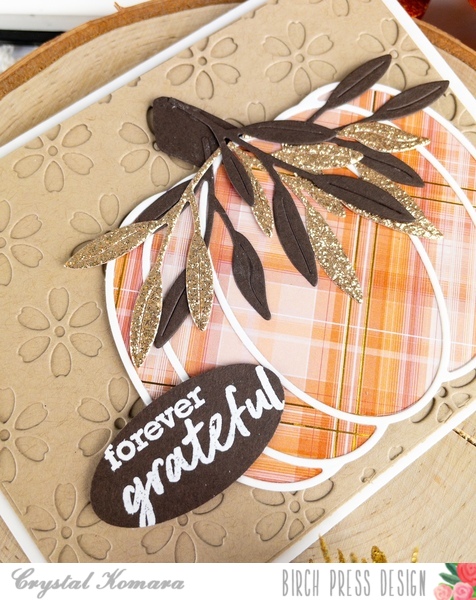
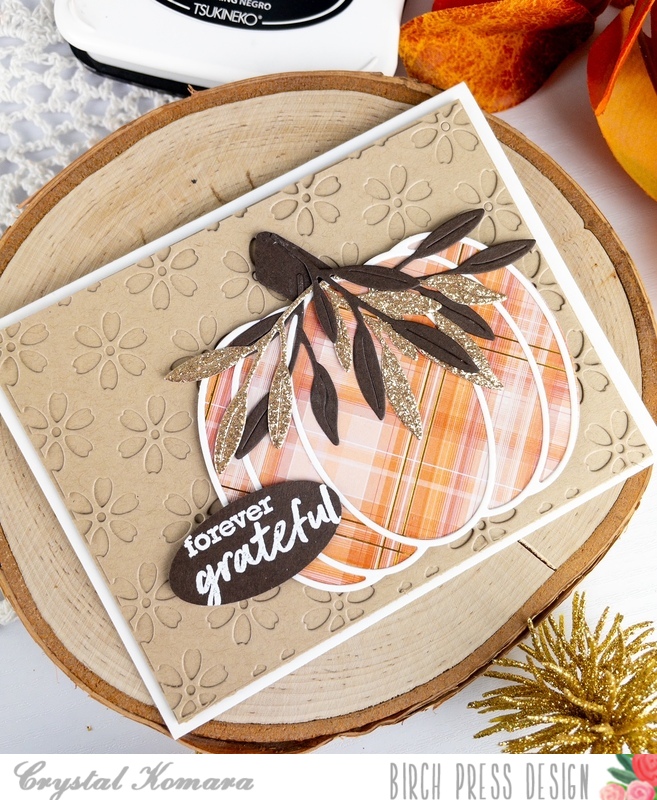
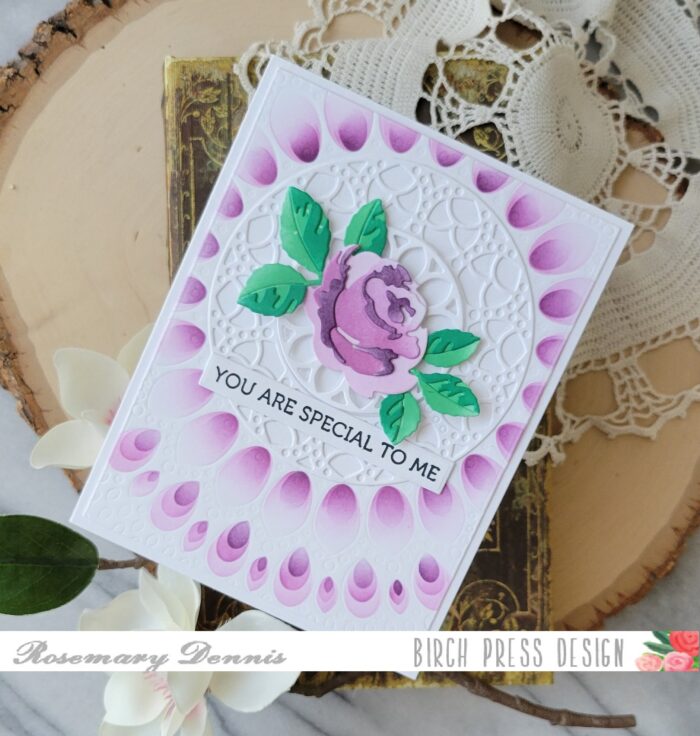
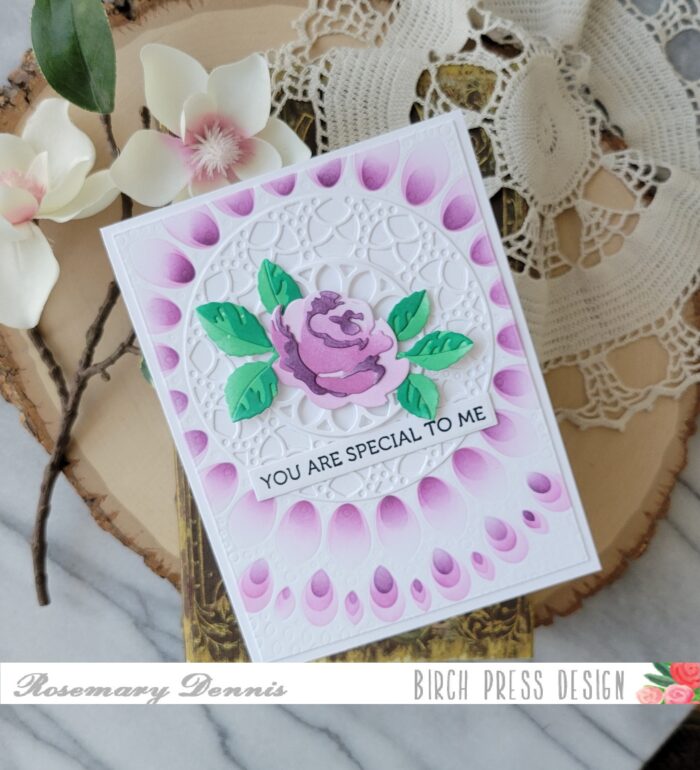
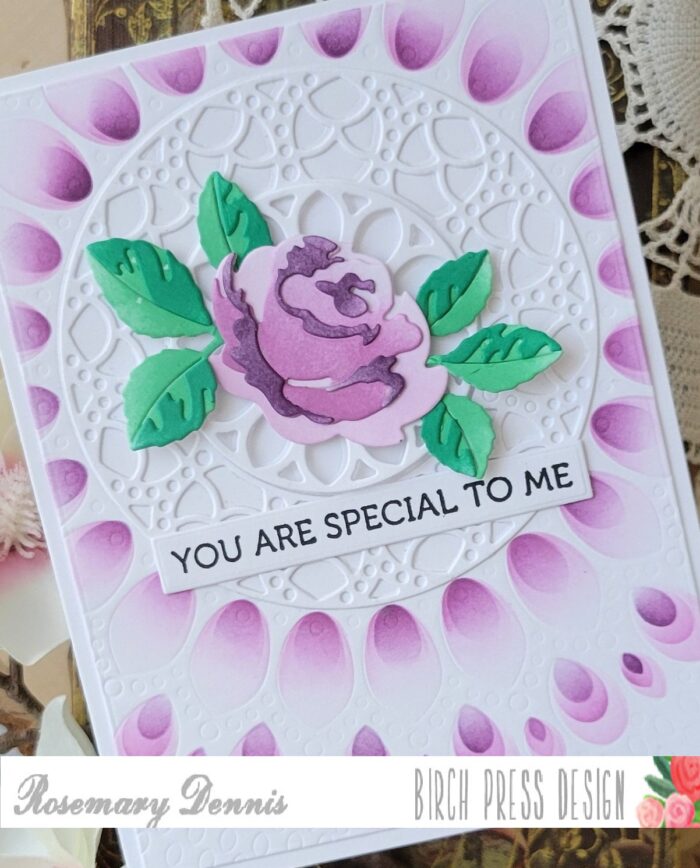
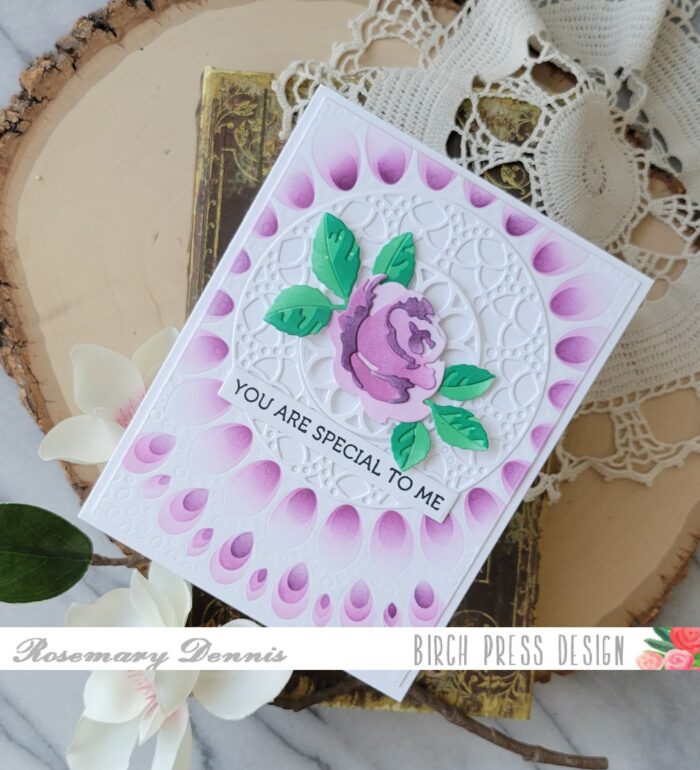
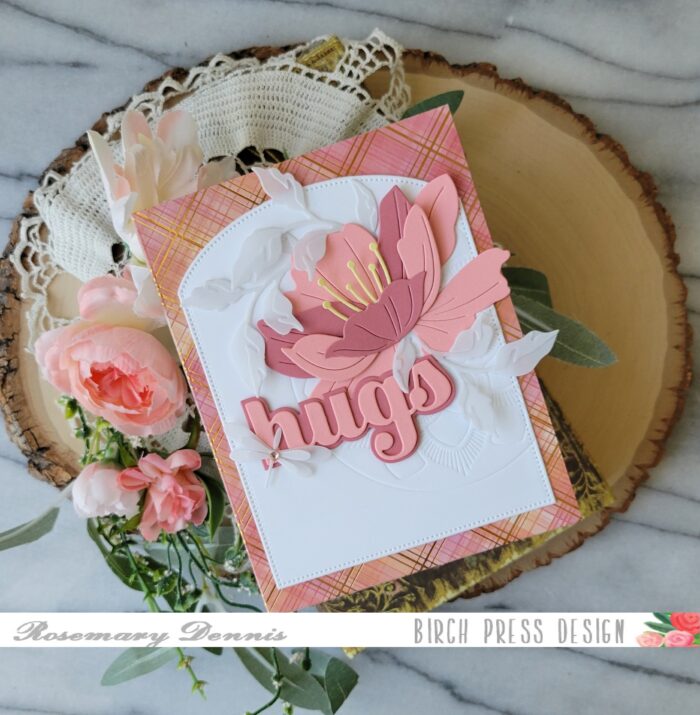
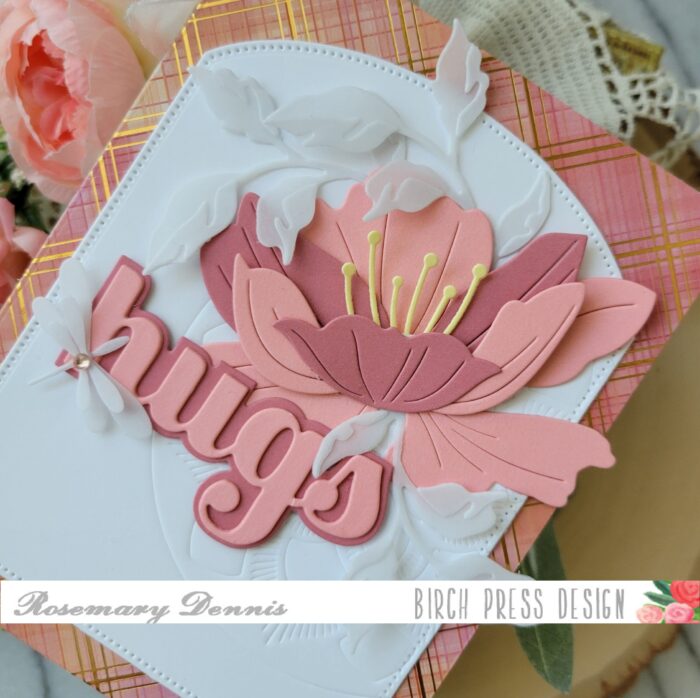
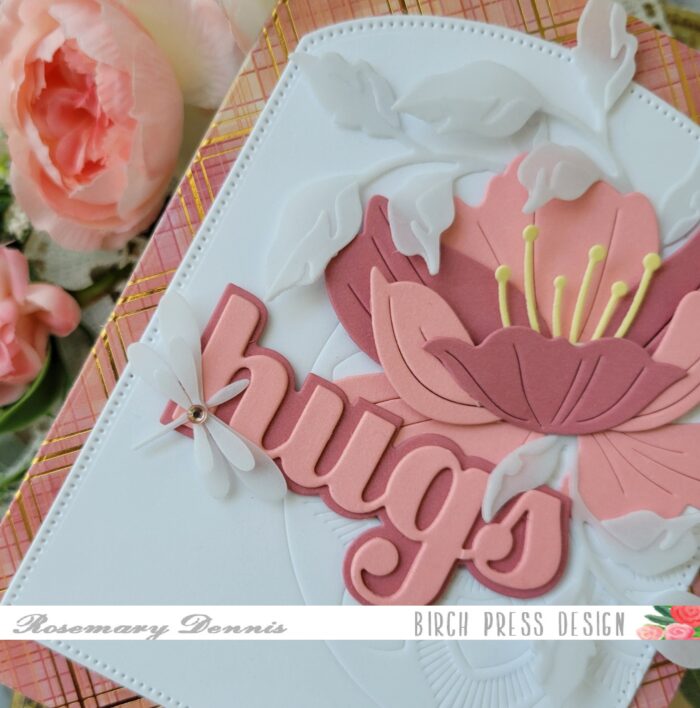
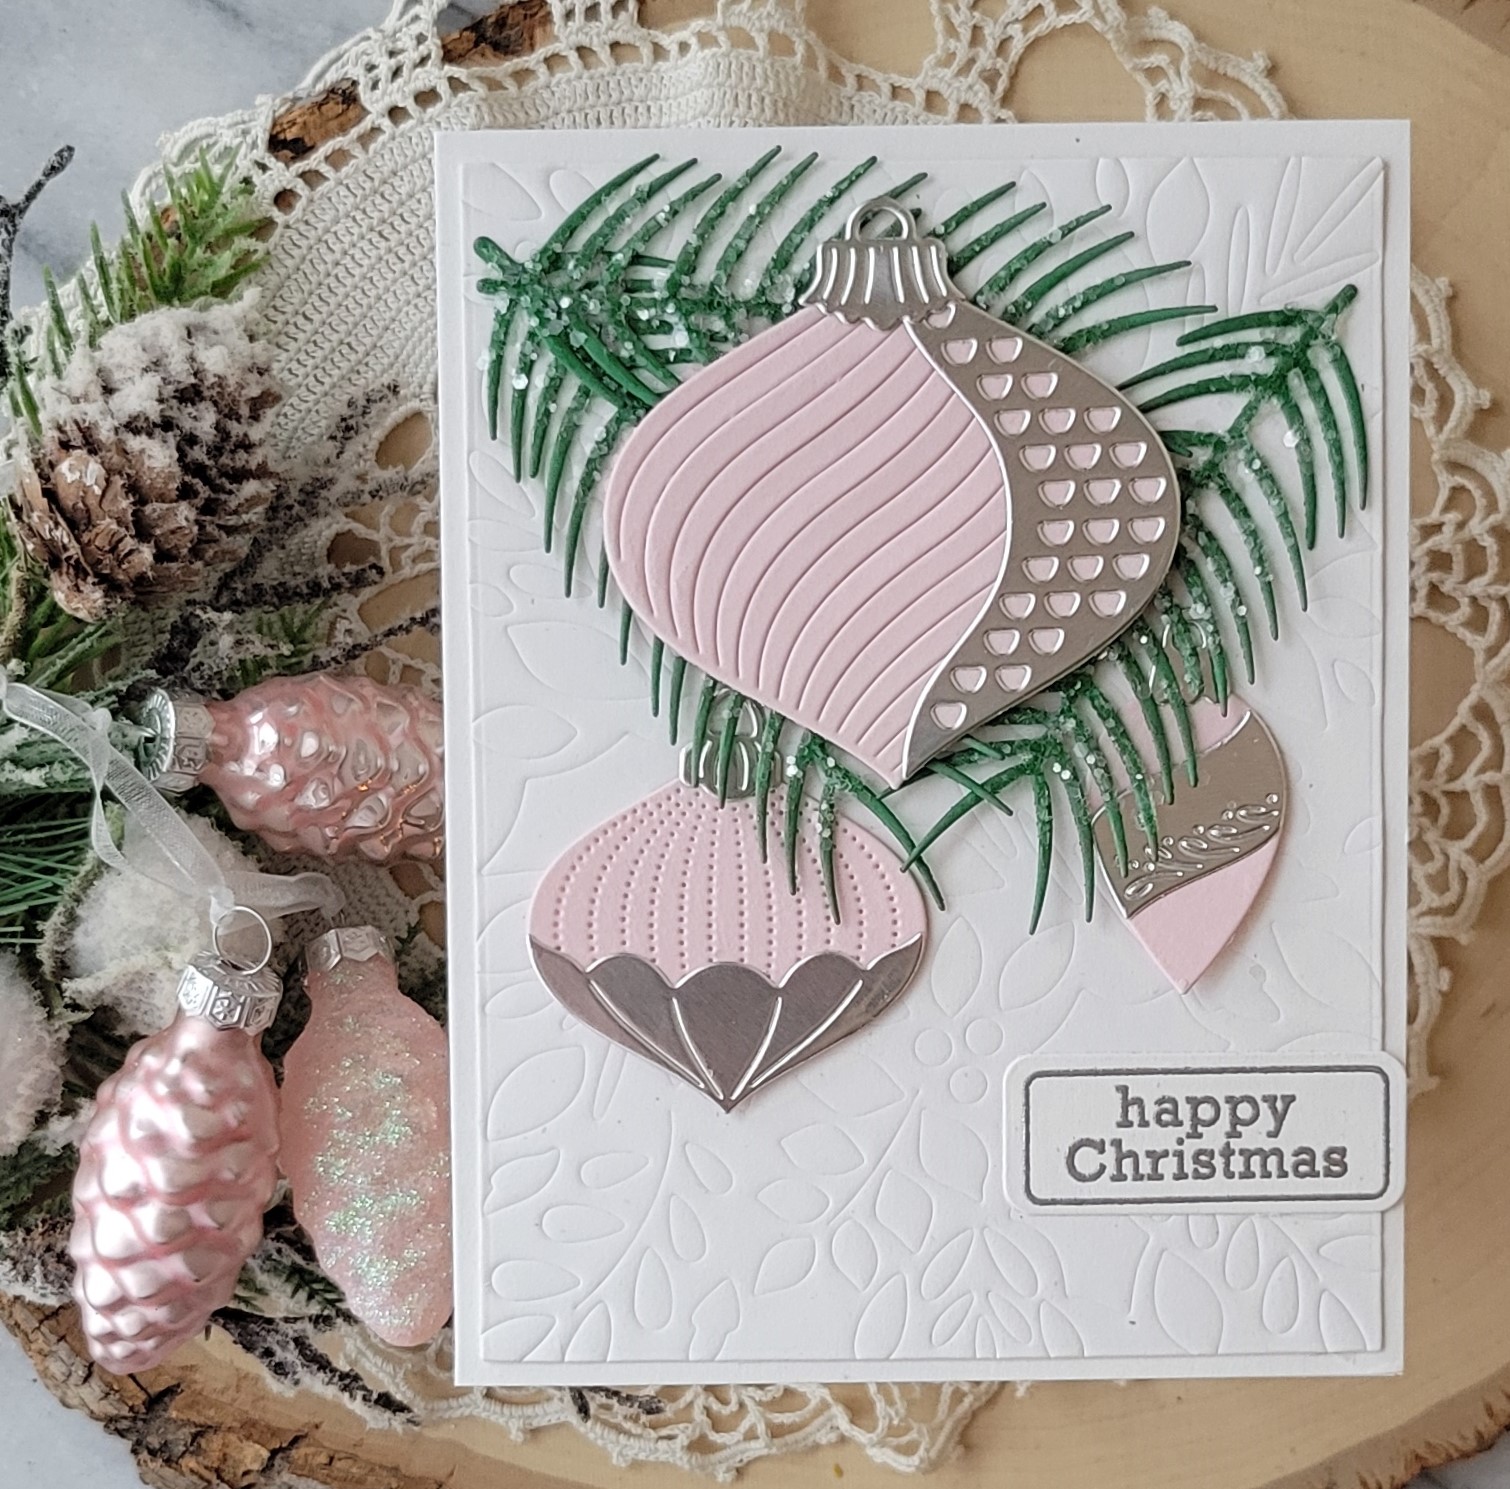
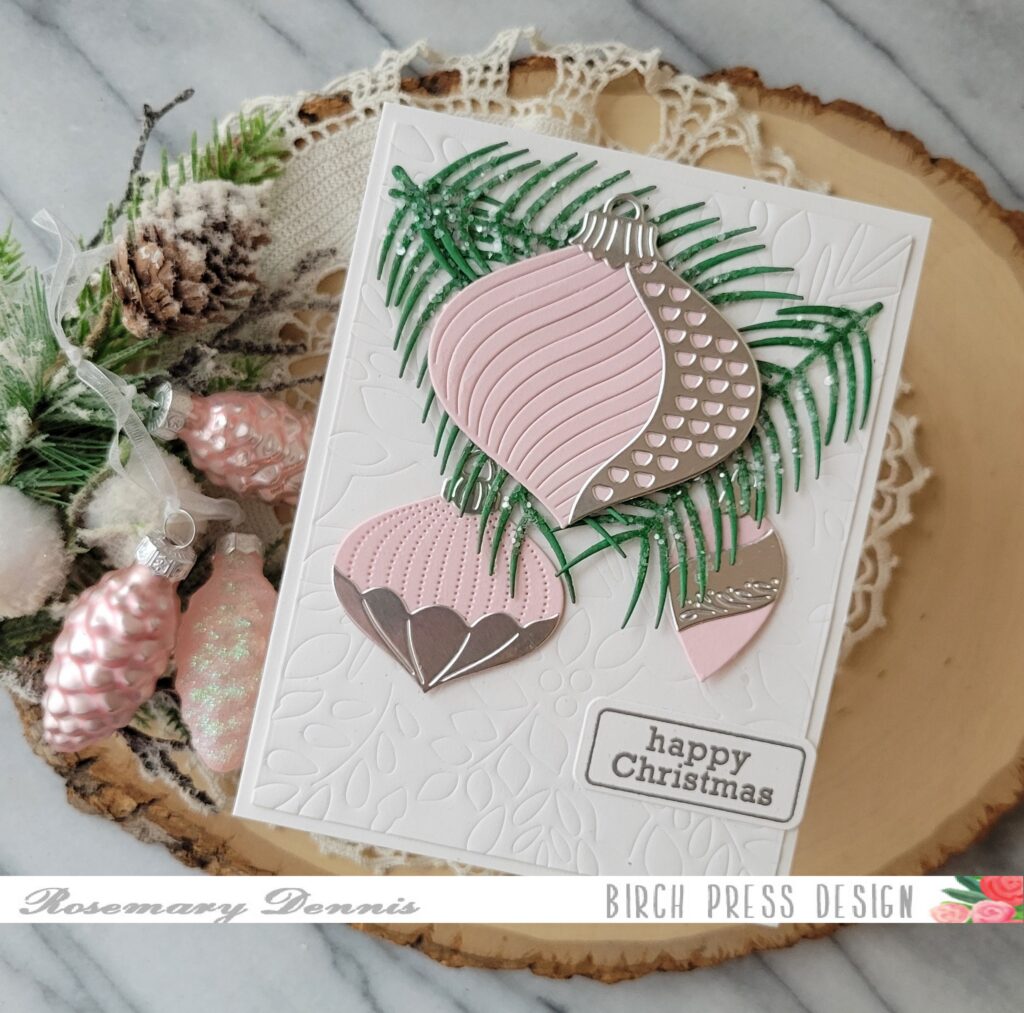
    I decided to go with a simple color palette of light pink, silver and green. I die cut all my pieces and assembled the ornaments. I added glossy accents to the pine needles and then covered them with Rock Candy chunky glitter for sparkly, icy look.

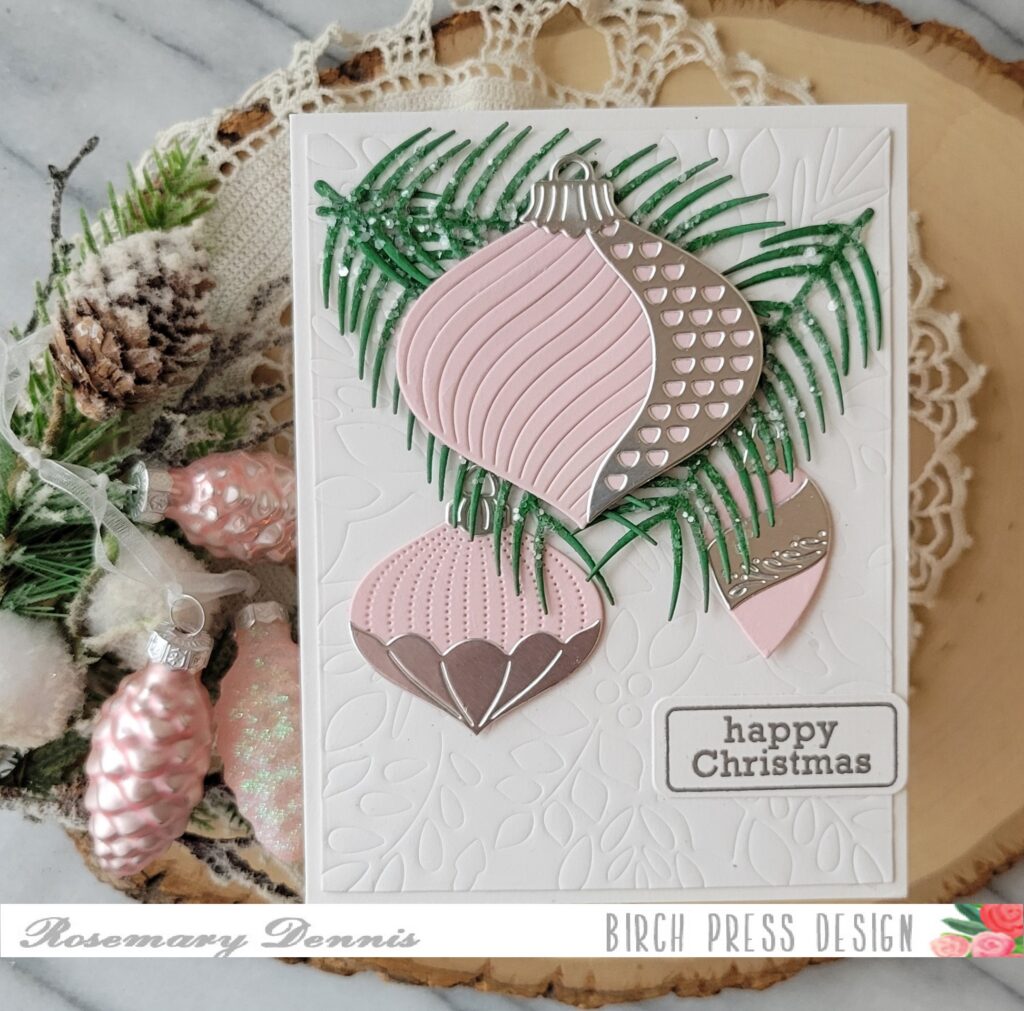
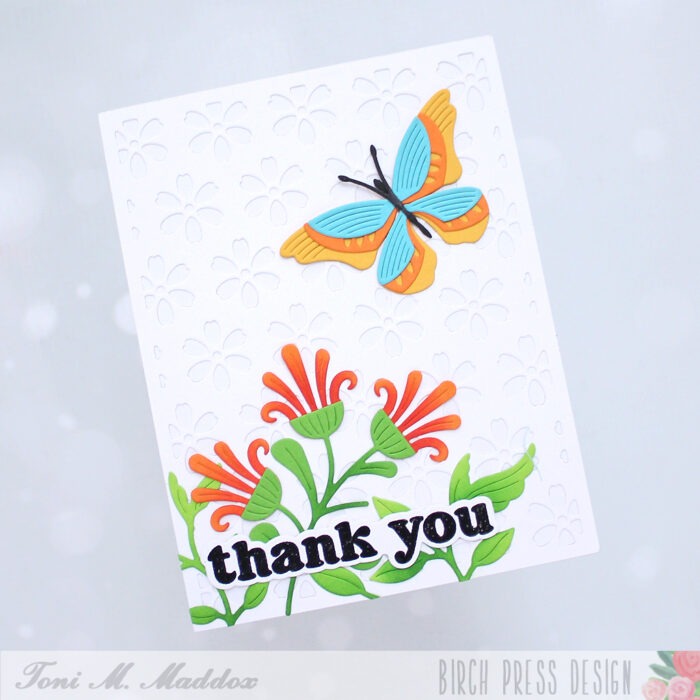
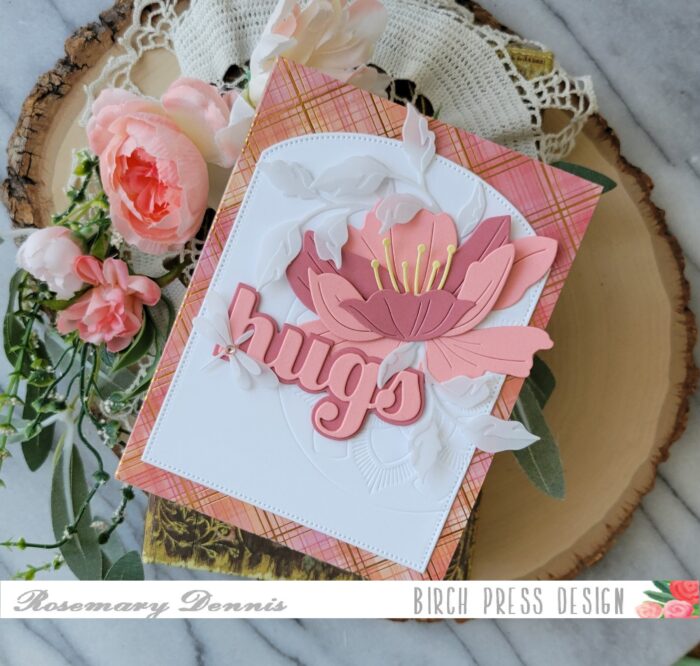
    I decided that I wanted a neutral background with a little bit of interest. I pulled out a favorite BPD layering die set called Herbarium and I used layer A to emboss a panel of off white cardstock. I love the subtle interest it provides while still keeping things simple.

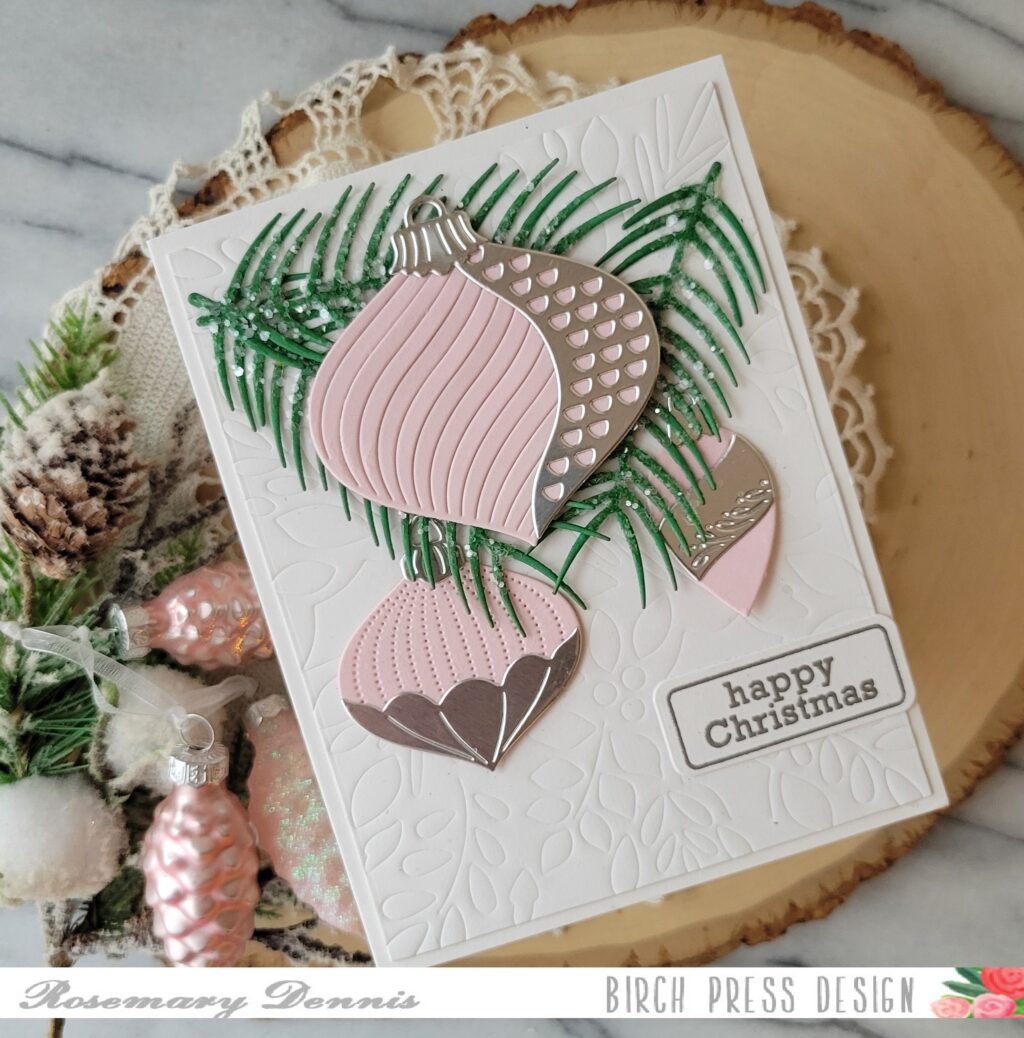
    I arranged my icy pine needles on the embossed panel using liquid adhesive and then layered the largest ornament on top and tucked the two smaller ones in beneath the larger one using liquid adhesive. I finished with the “Happy Christmas” sentiment from the Contempo Christmas Greetings set that I heat embossed with silver embossing powder after stamping with watermark ink. The sentiment was then die cut with a matching die and adhered to the card front.

    Well, that’s it for me! I hope you enjoyed today’s project and that I provided you with inspiration to create with your new and old Birch Press Design products! Have a wonderful day and Merry Christmas!


    Supplies


  • Block Print Passion Fruit Flower Butterflies | by Crystal Komara

    Block Print Passion Fruit Flower Butterflies | by Crystal Komara

    Hello friends and happy Tuesday! Welcome back to another post with Design Team member Crystal Komara. Today I have gotten a little extra creative and turned the new Block Print Passion Fruit Flower dies into butterflies. It sort of happened by serendipity – or a fortunate accident, but I’m not mad!

    The base of this A2 sized card is made from 110 lb. Neenah Solar White smooth cardstock. This is my go-to cardstock for all my card bases because it is nice and sturdy. First, to create the background I cut a 5 1/4″ x 4″ piece of lilac purple paper and adhered it directly to the white card base.

    Using Plate B of the Flora Plate Layer Set, I cut a piece of white cardstock and adhered this directly over the lilac purple cardstock to create visual interest.

    Now for the flower/butterflies: Using the Block Print Passion Fruit Flower dies, I create flowers from various colors of purple cardstock (with green stamens. I create a total of four flours and then I accidentally dropped two of them on the flower and they kind of fell into a butterfly shape and I thought hmmmm. . . . if I cut off the stems and glue them together, they DO look like butterflies, so I went with it!

    I adhered two of the flowers together to create a butterfly and then I added a second set to the front of the card.

    Lastly I added a tab foil sentiment from Memory Box Company (a sister company of Birch Press Design) and voila – a butterfly card made from flowers!

    Thanks for visiting and have a wonderfully creative day!

  • Pretty Layered Die Cuts | By Christina Rannow

    Pretty Layered Die Cuts | By Christina Rannow

    Hello! It’s Christina, and I’m excited to share with you this card featuring a variety of products from past collections. I started with the incredible layered die set, Field of Blooms, and then perched a sweet little bird from the Block Print collection on a big, bold greeting. This is a straightforward die cutting-only card design, except for a little heat embossing! And it’s easily customizable to any occasion by simply changing up the sub-sentiment. So grab your die cutting machine, and let’s get started!

    My first step was to create the layered background with the Field of Blooms dies. There are three plates in this set that can be used together or separately with beautiful results. I chose to use all three layers, die cutting them with white cardstock for the first layer, light pink cardstock for the second layer, and green cardstock for the last layer. I secured the layers together and then attached them to a darker pink cardstock panel that peeks through all the layers to be the other half of the flower. 

    I trimmed down the layered background panel a bit and added a white frame with a stitching detail before mounting everything to a white A2 cardstock panel. 

    Next, I die cut and assembled the pieces for the perched bird. I chose two shades of yellow, white, and black cardstock for the die cuts and a black pearl for the eye. 

    For the sentiments, I die cut the greeting from black cardstock and layered it with a white shadow die cut. Then I heat embossed a sub-sentiment with white embossing powder on a black sentiment strip. 

    The final step was to attach all the elements to my card design. I used foam squares for added dimensions and finished with a few black enamel hearts for embellishment. 

    Thank you so much for stopping by and reading about my layered card design featuring products from past Birch Press collections. See you again soon!


    Supplies


    Supplies


    Supplies


  • Layered Floral Thank You | by Toni M  Maddox

    Layered Floral Thank You | by Toni M Maddox

    Hello, my friends! Toni here with a heavily layered floral thank you.

    I especially enjoyed making today’s card because I used up some leftovers, including the sentiment and the background coverplate, in addition to working with fabulous new dies!

    To start, I adhered the Flora Layer Plate to a white card base.

    Next, I assembled the Block Print Brilliant Butterfly and Block Print Tapestry Blooms using Memory Box Key Lime, Leaf Sprout, Orange Peel, Pool Party & Summer Squash cardstock with Catherine Pooler Inks.

    I decided the bottom of the card needed a bit of filler behind the embossed Vintage Everyday Greetings sentiment. So, I cut out Foliage Bunch from Memory Box Key Lime and sponged it before adhering it to the bottom of the card front.

    I hope you enjoyed today’s card and have a great rest of your week!


    Supplies


  • Folk Art Bird | by Toni M Maddox

    Folk Art Bird | by Toni M Maddox

    Hello, friends! Toni here today and I’m still loving the Block Print Birds. They lend themselves to all sorts of card designs.

    For this one, I created a Scandinavian folk style of sorts using the Block Print Bright Bird, Foliage Bunch, and Hello Scripted on the Flora Plate Layer Set.

    I love the boldness of the black against the more muted Memory Box Muted Squash and Pool Party colors.

    I hope you enjoyed today’s card and have a great rest of your week!


    Supplies


  • Elegant Cranes | By Christina Rannow

    Elegant Cranes | By Christina Rannow

    Hi friends! Christina here to share a project featuring the new Block Print Crane. I used red-crowned cranes as my inspiration for this lovely duo, and I paired them with the Waves Plate Die Set for a background reminiscent of Japanese woodblock art. I finished my design with the simple Big Hello Sugar Script and a few white enamel dots from my stash. Follow along below with the steps I took to create this elegant card featuring the Block Print Cranes.


    I started by die cutting the layers for the background. The Waves Plate set has three plates that die cut different layers. You can use the layers individually or together to create many different designs. I chose to use all three layers. I used white cardstock for layer A, teal cardstock for layer B, and Deep Turquoise for layer C. I secured the layers together and then mounted them on an A2 Deep Turquoise card panel.

    With the background finished, I got to work on the other elements. I started with die cut the pieces for the cranes. I used a combination of white, black, gray, and orange cardstock. To create the black necks of the cranes, I die cut the body a second time from black cardstock and used a pencil to lightly mark where I needed to cut with small scissors. I googled images of red-crowned cranes to get an idea of where the coloring was on their necks. I assembled the cranes, securing everything with liquid adhesive, and then attached them to my background. I used an acrylic stamp block to weigh them down a bit while the adhesive set.
    Next, I die cut the hello greeting from orange cardstock and the shadow from white cardstock and then attached it using the same process as I did with the cranes: liquid adhesive and an acrylic block for a little weight.

    To finish up my design, I added a few white enamel dots from my stash and the tiniest white highlights to the eyes with a gel pen. And that’s all there is to this elegant card design. I hope you’re inspired to create something beautiful today!

    Supplies

  • Late Summer Evenings | by Toni M Maddox

    Late Summer Evenings | by Toni M Maddox

    Hello, Birch Press fans! Toni here with you sharing a card the reminds me of warm summer evenings.

    I cut the card base from Memory Box Fresh Aqua paper and sponged it with Catherine Pooler Suede Shoes and Something Borrowed. I spattered this with water and Copic Opaque White.

    I next cut out Forest Canopy Layer C from Memory Box Cilantro Paper and sponged it with Catherine Pooler Eucalyptus.

    For the Memory Box Evening Moths, I randomly sponged a piece of scrap cardstock with Catherine Pooler Tiara, Tiki Torch and Something Borrowed.

    Lastly I foiled the Hello Sugar Script hot foil plated with Glimmer rainbow foil and cut it out with the coordinator word outline die. So pretty!

    I hope you enjoyed today’s card and have a great rest of your week!


    Supplies


  • Plaid Adornment Pumpkin | by Crystal Komara

    Plaid Adornment Pumpkin | by Crystal Komara

    Hello fall friends! This is Design Team member Crystal Komara here to inspire you today! I have been sharing a lot of detailed intricate die cut cards lately, so today I thought I would keep my card a little more simple. I know that those intricate contour dies can be intimidating to some (as they were to me at first), but Birch Press Design makes so many gorgeous products, that you can cater the level of detail to your own personal taste.

    Card details:

    The base of this A2 sized card is made from 80 lb. Neenah Solar White smooth cardstock. I cut a 5 1/4 x 4″ piece of Kraft cardstock and adhered it directly to the card base. Then, using Layer Plate B of the Flora Plate Layer Set, I die cut that from Kraft cardstock and adhered it directly to the previous Kraft layer (so it’s kind of see through).

    I die cut the base of Adornment Pumpkin from plaid cardstock from the Gladiola paper pack by Memory Box Company (a sister company of Birch Press Design). I LOVE their paper packs, they are all stunning. I cut the outline of the Adornment pumpkin from white cardstock. I layered the two together using a fine-tip liquid glue before adhering the pumpkin to the card with 3M foam adhesive for dimension.

    I die cut a bunch of leaves using the Tiny Tufts Leaves and Flowers contour set. I die cut these leaves in both a dark brown and gold glitter cardstock. I adhered the leaves to the top stem of the pumpkin. Lastly, I stamped the sentiment “forever grateful” from the Brush Sentiment clear stamp set. I stamped the sentiment in Versamark ink on dark brown cardstock and heat embossed the sentiment with white embossing powder. I then used an oval punch to punch out the sentiment. I adhered the sentiment to the pumpkin using 3M foam adhesive.

    Fall is one of my favorite seasons to make cards for. I promise you will be seeing lots more ways to use this Adornment Pumpkin in the very near future!

    Thanks for visiting and have a wonderfully creative day!

    Supplies

    Supplies

  • Purple Rose | by Rosemary Dennis

    Purple Rose | by Rosemary Dennis

    Hello everyone! Rosemary here on the blog today with a card that was a bit of an experiment for me, lol! Let’s have a look at what I made.

    I started my card by going through the stack of contour layering dies I have pulled out in order to use to make cards and settled on the Dainty Rose and Leaves set. I have had this set for awhile, but I don’t think I have used it yet. I die cut all the pieces from white cardstock and then decided what ink colors I wanted to use. I don’t often use purple so I settled on that and pulled out coordinating purple inks to ink up all the layers of the rose. Two shades of green were used for the leaves. The I assembled all the pieces.

    Since I have been into adding texture the background of my cards I pulled out the Grace Layer A plate and embossed a rectangle of white cardstock I had die cut with the die. I wanted to try something a little different so I pulled out the Gilded Grace Outside Stencil set. This set of stencils was designed to coordinate with the Gilded Grace hot foil plate, but it also works with the Grace Layer A plate.

    I used a grip mat to hold the stencils and cardstock in place as I did the stenciling. I only stenciled a portion of the background as I wasn’t sure how things would turn out. I’m actually pretty pleased with the end result. The interesting and unique thing about the Grace Layering dies is that the centers of each die cut out allowing three different looks. I decided to die cut the center portion of the layer A die and layer the larger circle on top of the embossing. I adhered flower to the center of the smaller circle and popped it up in the center using thin foam squares.

    Here are the different products I used to make the card. I finished things off with a sentiment from the Crystal Lingo stamp set.

    I hope you enjoyed today’s experimental project! Thanks for stopping by and have a wonderful day!

    Supplies

  • Monochromatic Hugs | by Rosemary Dennis

    Monochromatic Hugs | by Rosemary Dennis

    Hello everyone! Rosemary here today with a sweet monochromatic card that I had so much fun creating! I used lots and lots of different Birch Press Design products, as well as some products from Birch Press Design’s companion company, Memory Box. Let’s have a look at what I made.

    I recently did a little bit of organizing of my Birch Press Design products and as I went through them several items I hadn’t used in a while (or maybe I hadn’t even used them yet!) kind of popped to the forefront as items I could use to make the card for today’s post. I started with the Big Hugs Sugar Script die set and the Perky Bloom Contour Layers die set. Then I started looking through all my Memory Box cardstock pads and realized that I had not used the pad called Blush. Now that I had my starting point things really got going!

    I went with a light coral pink and a dark coral pink from the Blush pad. I die cut all the pieces from the Perky Bloom from both sheets and then alternated the colors. This resulted in two flowers. I decided to go with the one that has the light coral pink bottom layer for this card. I had a previously die cut stamen piece that I had cut from yellow cardstock. I like the little pop of yellow. I also die cut the Big Hugs from the sheets. Since I had used the light coral pink for the first layer of the flower I decided to use the dark coral pink for the shadow layer of my sentiment.

    When I layered the flower I used a combination of liquid adhesive and thin foam squares to give the various petals additional lift. Once I had the flower finished my creative juices really got flowing! I decided to die cut a piece of paper from the Memory Box Gladiola Plaid 6×6 pad to cover the front of my card base. I went with a piece that has a hint of yellow in it to tie in the yellow stamen in the flower. Then I die cut white cardstock using a Curved Cap Pinpoint Layers die. At this point I decided that I wanted to add some texture to the white panel so I looked through my background layering dies and landed on the Arista Layer B die. I love the detailing in this layer of the die set. So I embossed it using my die cutting maching. I offset the die to the right side of the panel for additional interest.

    I layered this panel on the card front using thin foam squares. I liked the look of the flower on top of the embossed image, but I wanted even more texture! So I pulled out the Fuddle Leaf Branches die set and die cut the smaller branch and layering pieces from thick vellum. The layering pieces were adhered with liquid adhesive. Then I arranged the flower and the little branches on the white embossed panel.

    At this point I thought I was finished, but nope, lol! I wanted to add one more thing! A sweet little vellum dragonfly! I used the smaller dragonfly from the Simple Dragonfly Contour Layers die set and cut all the pieces from the heavy weight vellum I used for the little leafy branches. A tiny coral jewel was added to the body for the final touch!

    I absolutely love how this card turned out. I started with a simple idea and just let my creativity go! It is so fun to do that and something I need to do more often. I hope you enjoyed today’s card. Thanks for stopping by!

    Supplies