Category: Stamps

  • Time Out Challenge by Jeanne Jachna

    Time Out Challenge
    by Jeanne Jachna

    I love to craft and have been doing it for as long as I can remember. Even as a child I was delighted with a brand new box of crayons and a pad of paper.

    That’s evolved into making scrapbook layouts to commemorate special events and card making for every day. I started my blog so I could play along with challenges. They’re a great way to find friends in who enjoy making (just like me) and lots of times there are prizes up for grabs!

    Birch Press Design is Sponsoring the Time Out Challenges theme challenge this week! That means if you play along that you’re automatically entered to win a $20 gift certificate from the store! The theme this time is Embellishments. You’re asked to play along using two or more, and if you’re feeling clever there is an optional twist … keep it a one layer card.

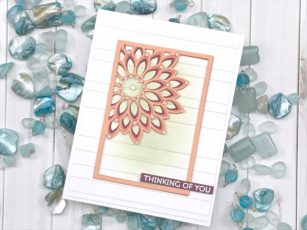
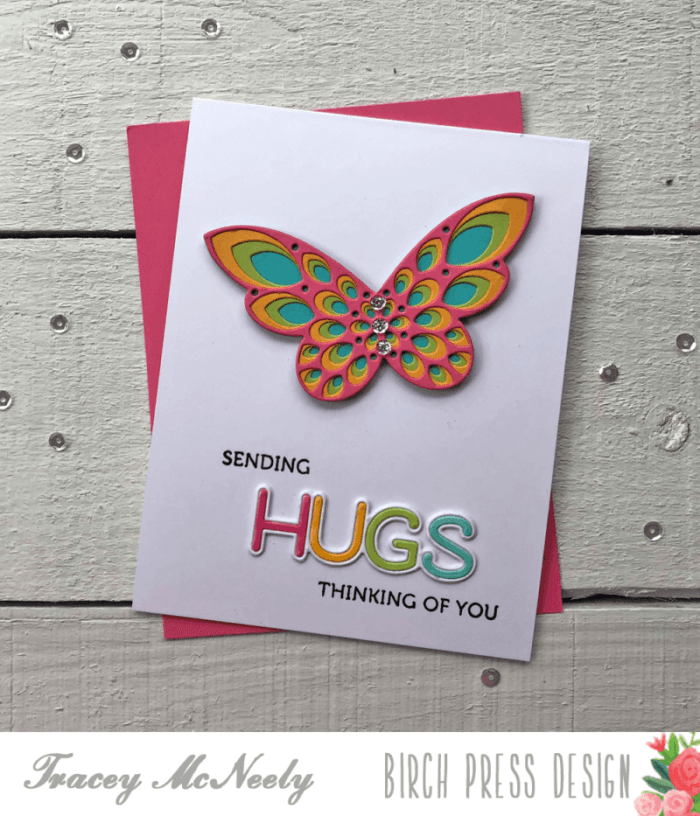
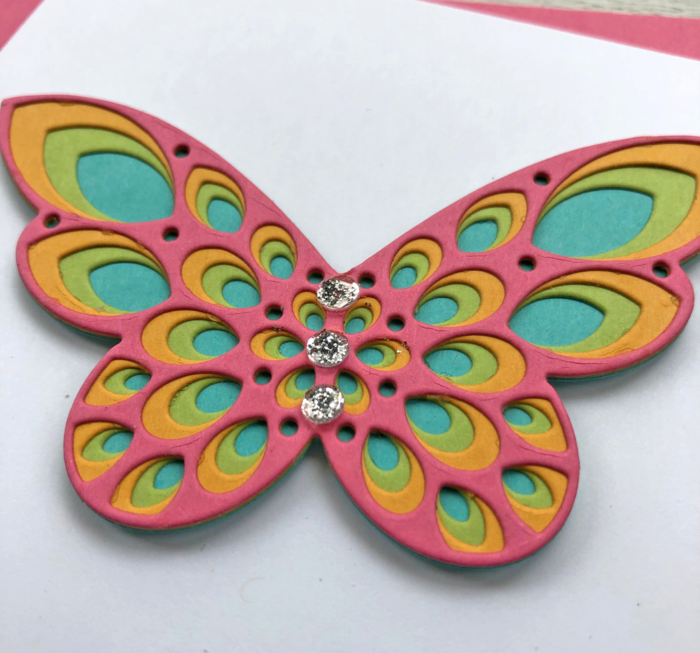
    I made two shaker cards with two embellishments.. the sequins on the inside, and the metallic button in the center of the Dahlia Mini Frame. There’s lots of ways to make a shaker, here’s how I made mine.

    I selected four shades of coordinating card stock colors. I cut the darkest shade with the Dahlia Mini Frame Layer C, and the lightest with the Memory Box Open Studio Wrapped Stitch Frame.

    I taped the Dahlia Mini Frame Layer C to the Wrapped Stitch Frame on the reverse side, topped it with a piece of acetate clear plastic, and then added strips of adhesive foam along the edges. It took me a long time to figure out that I could make my own double sided adhesive foam strips. All you need to do is add double sided adhesive to sheets of craft foam. Then just cut the foam into strips with a paper trimmer. This is so much easier than trying to trim down rolls of sticky adhesive foam tape.

    I pulled off the strips protecting the adhesive around the frame, filled the center with sequins and then topped it with a piece of card stock, to seal the shaker, before adhering it to the card base.

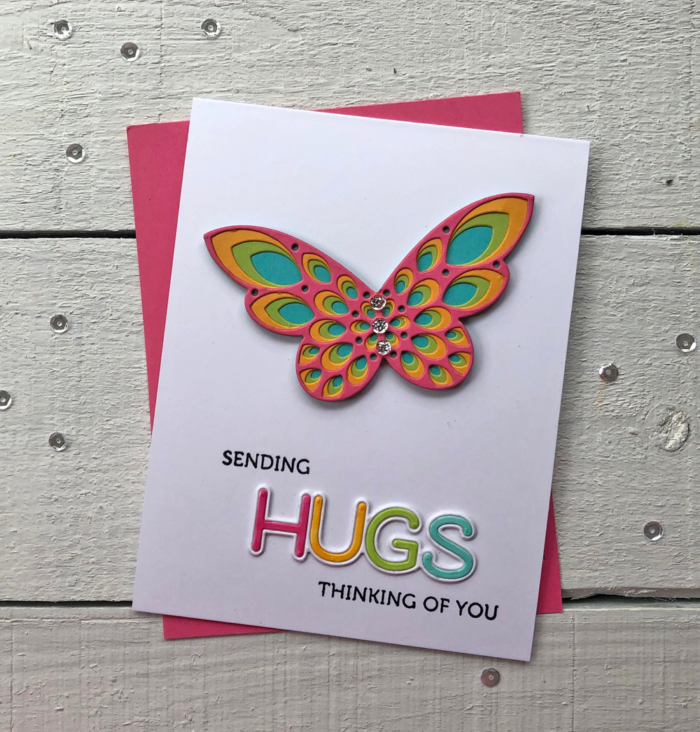
    I added the Dahlia Mini Frame Layers B and A to the front of the card, and added a Hugs Sugar Script die cut sentiment to the front of the card.

    I loved how this card turned out so I made one in blue too!

    I hope you have a great day and find time time to play along at Time Out Challenges! I can’t wait to see what you make!

    Finished Size 4 6/8 x 3 1/2″

    Supplies

  • Prismatic Triangle Layering Dies | By Desiree Kuemmerle

    Prismatic Triangle Layering Dies | By Desiree Kuemmerle

    Hello Everyone!

    I am here today featuring the Prismatic Triangle Layering Dies! These are perfect for those tough masculine cards we always struggle to make!

    We can always add interest to any of our cards by dogging into our stash and all those backgrounds we made at one point with our inks!

    I found a panel for each of my dies and started die cutting!

    Once my panels were die cut and I layered my pieces together I wanted to fill in with some bold and metallic card stock!

    I decided on a copper and black. I thought these were perfect for those open centers within each of my triangles.

    But then a dilemma came in, I had extra prismatic triangles cut and I could not let go to waste!

    So, I cut one more using only one of the layers. We will make another card using these die cuts as well! But let’s get back to our original card, we will circle back, LOL!

    I layered my die cuts together using my liquid adhesive and it created a great marble stone effect. Once it was secured onto my standard A2 size card base I started inserting my copper and black card stock into the open areas like a puzzle!

    I stamped my sentiment from the Just Because Clear Stamp Set into a shimmer piece of card stock and set in place across the front of triangles!

    Now back to our happy addition!

    I layered all those extra die cuts but offset set them on an angle from each other and adhered them the same as out first card right onto our standard A2 size card base.

    I also cut a strip as wide as my die cut, and used that same die to cut into the strip. After I placed my triangles in place, I then placed my strips on either side to create the illusion that the triangles are coming out of the panel.

    I die cut the Big Shine Sugar Script out three times to give my sentiment some dimension and adhered it to the center of my triangles and added some shimmer and shine using my shimmer pen and glaze.

    As always, I hope you enjoyed today’s project… and if you want to see more details just click on the video below and see how these projects come together step by step!

    Make sure you stay tuned for more wonderful projects coming soon! Have a great day and always remember… Be Creative!


    Supplies

  • Alcohol Inked Shining Mandala

    Alcohol Inked Shining Mandala

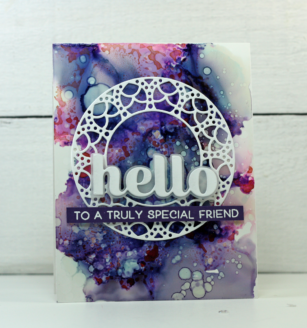
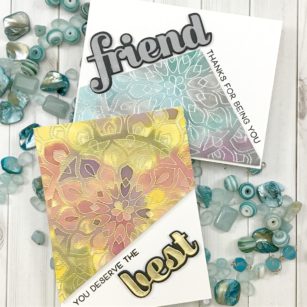
    Hi there it’s Tracey here today with some more inspiration for using beautiful Birch Press Design products. I have a card and a video for you to show you how I made this pretty background. My card features the Shining Mandala stamp set that will be heat embossed with white embossing powder. Then I will show you how to add colour to this design using alcohol inks. Here are the supplies that I will be using…

    To start off with we will stamp the Shining Mandala stamp set in Versamark ink and then heat emboss it with white embossing powder onto a 5″ x 7″ piece of Yupo paper. Yupo paper is a synthetic paper that is waterproof and commonly used with alcohol inks.

    Below is a video of my process so that you can see how I worked with the ink.

    You need to be careful as you will see the Yupo paper warps very easily. I was not too worried because I would be trimming my paper down to 5 1/4″ x 4″. Once the mandala was heat set and trimmed down I added colour to it with Alcohol Inks using the dip method. I started off by filling a plastic container with about 1″ of water. I randomly added a few drops of Wild Plum and Purple Twilight alcohol ink. Then I added a drop of the Silver Mixative to the water. With a plastic straw I moved the mixative around a bit so it wasn’t all sitting in one corner. I took the trimmed down mandala panel and I swept in through the water once and the alcohol ink grabbed on to the paper. The result was a panel that was swirled with pink, purple and silver that was set down onto paper towel to dry completely.

    Don’t be afraid of alcohol inks! They are fun, addictive and very forgiving. The dip method of applying the alcohol ink is very easy and a great way to get started with using these inks. If you are not happy with your results you can use regular rubbing alcohol along with a paper towel to remove the colour and then you can start again. No two results are ever the same, just work with colours you like and you never know, you might end up finding colour combinations that look amazing together.

    I used the Big Sending Sugar Script die set, cutting the word in a darker purple and the shadow in white. The second line of the sentiment ‘handmade hugs’ was stamped and embossed in white. The sentiment if from the Sending Love stamp set. Both of the sentiments were adhered to the mandala centre.
    The results are just beautiful.

    Thank you so much for stopping in today to create this card with my and I hope that you give this method of adding colour a chance. You can add to embossed panels or you can create you own panels and cut out your own designs using any of the gorgeous Birch Press Design craft dies! Be sure to stop back in on Friday for more creative inspiration here on the blog. Have a wonderful day!

    Supplies
  • 5 Backgrounds 1 Stamp | by Justine Hovey

    5 Backgrounds 1 Stamp | by Justine Hovey

    It’s Justine again here on the Birch Press Blog with a fun idea on how to use the Hex Fade Frame Stamp/Die set to create 5 backgrounds. These are my favourite types of stamps because the possibilities, colours and layout are endless!

    I think this one is my favourite with the woven look of stamped images and die cut stamped images. It’s so simple yet looks dimensional and complex. You can watch the creation of these cards in my video!

    I think when creating bulk cards it’s either for creating a bunch of cards to give to different people OR you can create a set to use as a gift. I do this often and had that in mind which is why I chose the same colour palette to go with the card bundle.


    Supplies

  • Peacock Mandala  by Erum Tasneem

    Peacock Mandala
    by Erum Tasneem

    If you’re looking for a little eye candy today be sure to check out Erum Tasneem’s blog for a trio of watercolor cards made with the Thankful Mandala stamp set (also our March item of the month here).

    Erum is also sharing a how to video that you won’t want to miss! You can start at her blog here or go directly to her You Tube channel here to get all the details!

  • Calen Layering Dies | By Desiree Kuemmerle

    Calen Layering Dies | By Desiree Kuemmerle

    Hello Everyone!

    I am so thrilled to be back with another project today! We are going to work with the Calen Layering Die Set and add a sentiment using the Believe Sugar Script die.

    The best place to start always is let’s get out pieces die cut all at once. So, we will have a die cut from each layer of Calen and I decided to cut 6 from ivory card stock for my sentiment.

    Once we have every die cut, we can now start gluing it all together!

    I started with my sentiment, by cutting 6 this will create a heavy chip board piece across our focal point. Now we can glue together the three layers of Calen. I chose a brown, Ivory and Pool color for each of my layers.

    I grabbed a piece of Navy-blue card stock for my back drop and set my focal point slightly above center. I cut a strip ¾ inches wide to stretch across the card front, but it will also separate the center of the Calen die cut from the outer ring!

    I then set the sentiment over the center circle and adhered my design panel onto my standard A2 size card base using my liquid adhesive and added a few ivory gems to add a bit of sparkle to our card!

    If you want to see more details just click on the video below and see our project come together step by step!

    As always, I hope you enjoyed today’s project… Make sure you stay tuned for more wonderful projects coming soon! Have a great day and always remember… Be Creative!


    Supplies

  • Wow, So Happy For You | By Eloise Blue

    Wow, So Happy For You | By Eloise Blue

    Hello friends, Eloise here and today I’m sharing a card using the Dahlia Mini Frame Die Set along with Lingo Thanks Stamp Set and Lingo Type Wow Die Set as well.

    I started off with die cutting the layered dies from different colours of Cardstock. Two A Dies from yellow and pink, Two B Dies from cream and Two C Dies from yellow and pink as well. I adhered them together and layered them on top of each other.

    I cut down a cream card base and adhered my frames over the top. I then die cut the word ‘Wow‘ from grey cardstock and also the inner piece from blue. I adhered them together with liquid glue and added foam tape onto the backs.

    Lastly, I white heat embossed the ‘So Happy For You’ sentiment from Lingo Thanks onto a piece of grey and added foam tape to the back as well. I then adhered them into the centre of my frames and that finished up my card for today.

    Thank you so much for stopping by today, and I’ll see you next time.

    https://youtu.be/aQRANulFMqY

  • Pastel Egg | by Jeanne Jachna

    Pastel Egg | by Jeanne Jachna

    Hi and thanks for stopping by! My hands down favorite technique is color block. I love the clean lines and bold graphic design you can achieve with this effect.

    Today I’m sharing a pastel egg design that looks complicated but is very easy.

    I started by creating a background with the Tall Triangle dies set. My 4.25 x 5.5″ card base is topped with a slightly smaller panel of dark teal card stock. Next I cut the second largest Tall Triangle twice with a medium teal, and three times with a light teal. I assembled the triangles on their reverse side with washi tape, and trimmed the panel to my card size.

    I cut the largest Stitched Egg from the assembled Tall Triangle panel and adhered it to my card base. The pastel eggs are created by cutting the two Stitched Egg dies at the same time. I have a magnetic cutting plate that holds the dies in place for me, but you could also tape the die cuts in place before running them through your die cut machine.

    Cutting the Tall Triangle panel with the Stitched Egg left a stitched outline around the die cut opening. The remaining eggs were inserted and adhered inside the egg shaped opening.

    The Simple Joy sentiment makes a clean greeting when paired with the Joy and Peace clear stamp set. I love that I’m repurposing a holiday stamp set so I get more value from it.

    Wishing you a wonderful day with time to do what you love best!

    Finished Size 4.25 x 5.5″

    Supplies


  • Rectangle Dot Layers | by Alicia Havranek

    Rectangle Dot Layers | by Alicia Havranek

    Hello! Today I am featuring the Rectangle Dot Layer Dies to create this very simple thank you card. I just love the dots on these dies. They kind of remind me of bubbles!

    This die set come with 4 dies. I cut out each die with card stock from my stash. I then stacked them and adhered them to my card panel.

    For my sentiment I used the Big Lingo Type Thanks die and the Lingo Thanks stamp set.

    I adhered my sentiment with some foam tape for dimension.

    Supplies

  • Rainbow Triangles  by Jeanne Jachna

    Rainbow Triangles
    by Jeanne Jachna

    Hi and thanks for stopping by! Today I’m sharing a card I made for my son. He is 23 and loves bold graphic designs. I knew the Prismatic Triangle set would be perfect!

    Whenever I use a layered die set I like to cut the first layer into the card base. This makes it easier to line up the die cuts because the first layer is going to fit right inside the die cut opening.

    I inlaid all the colored die cut pieces in the bottom layer. Where the color intersect I added a color that was a combination of the two. Just as an example, between the green and yellow triangle (where they overlap) I inserted a touch of lime.

    The Prismatic Layer B is cut from gold glitter paper, and I’ve added a gold matt to frame the cover panel. The Big Lingo Type Hugs is cut from white and purple card stock colors. The letters are removable so you can insert whatever colors you like.

    The Prismatic Triangles are beautiful and look amazing in any color combination you can imagine!

    Finished Size 4.25 x 5.5″

    Supplies