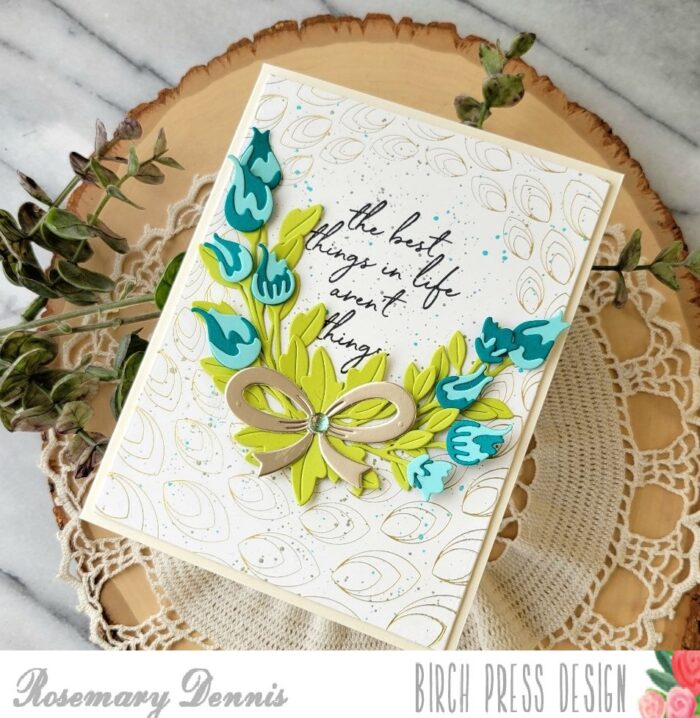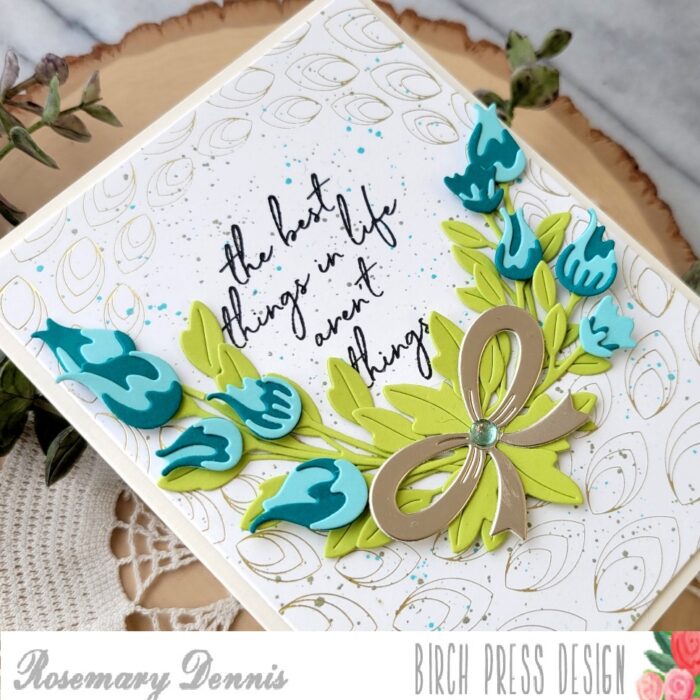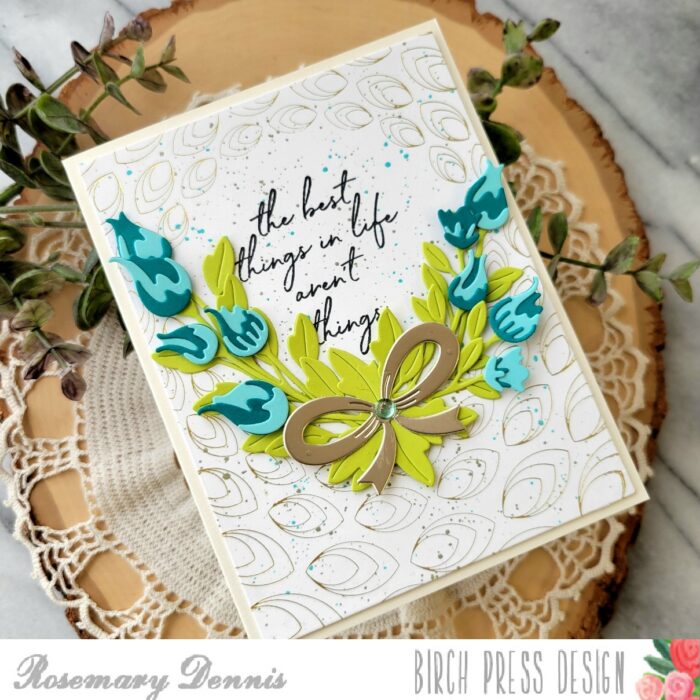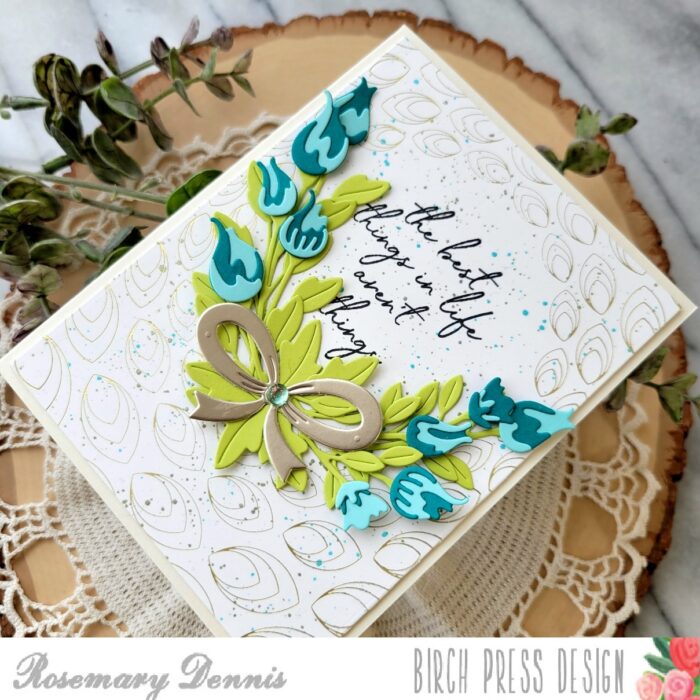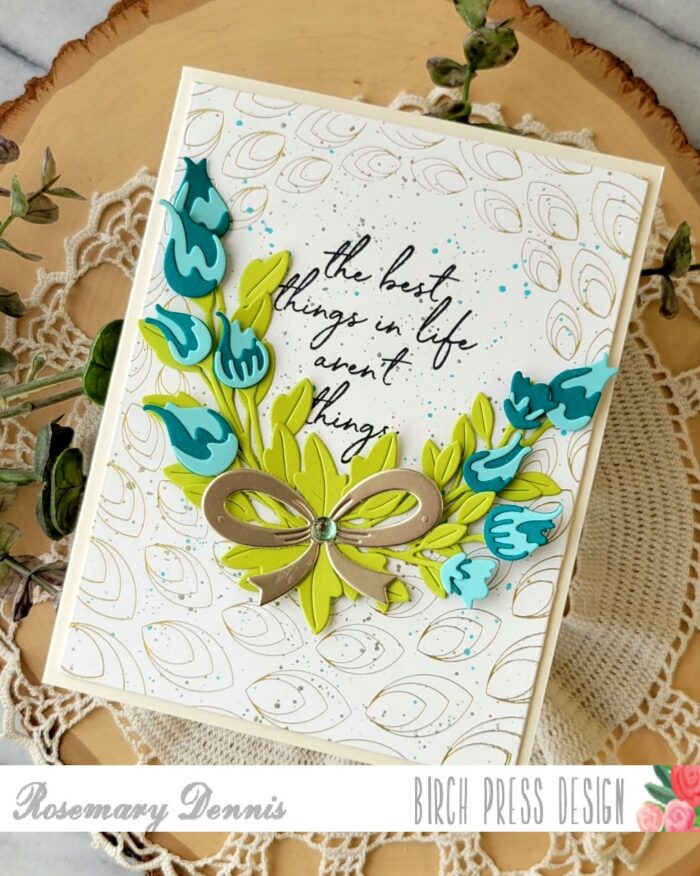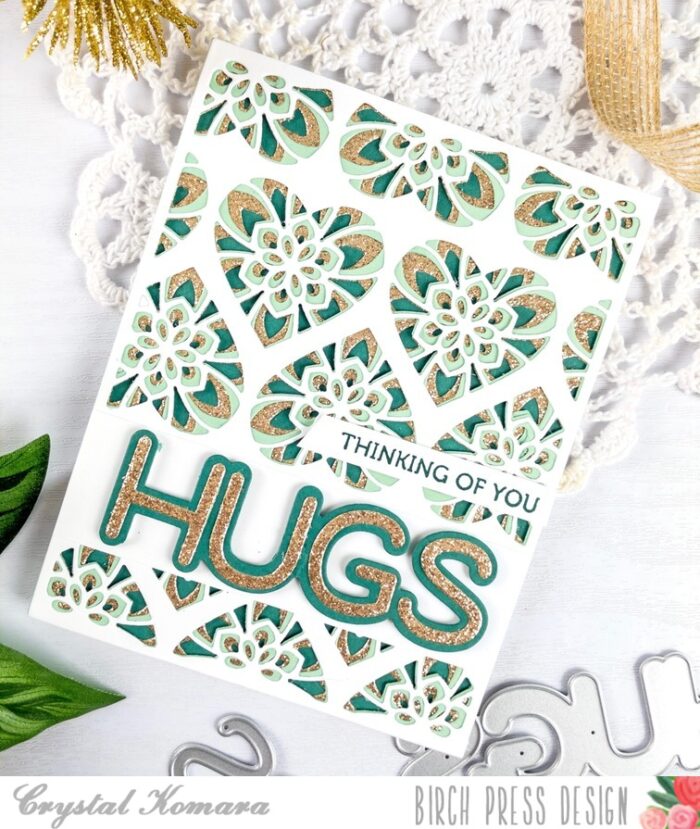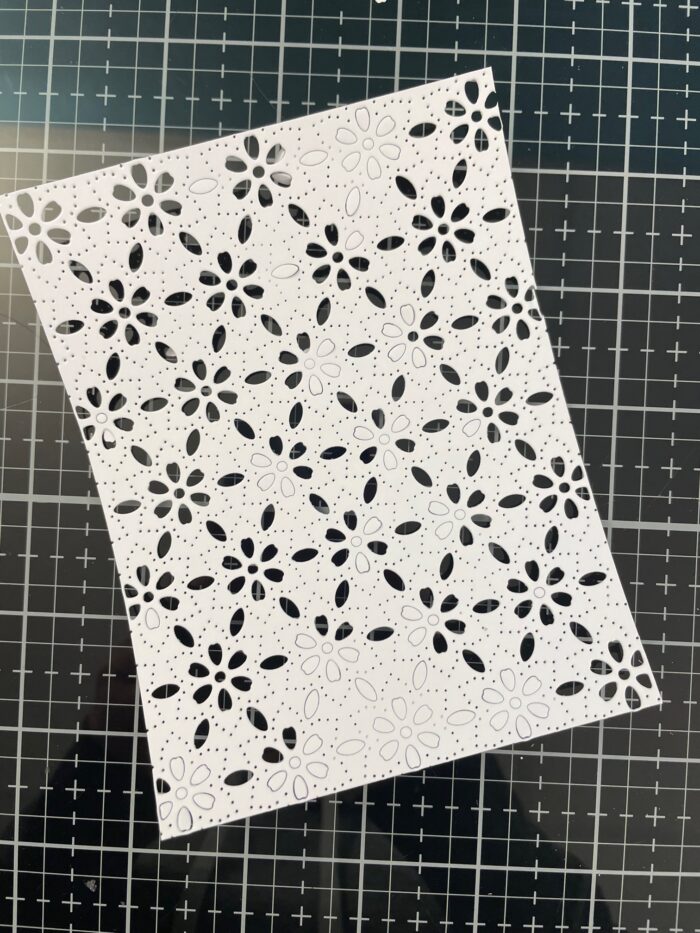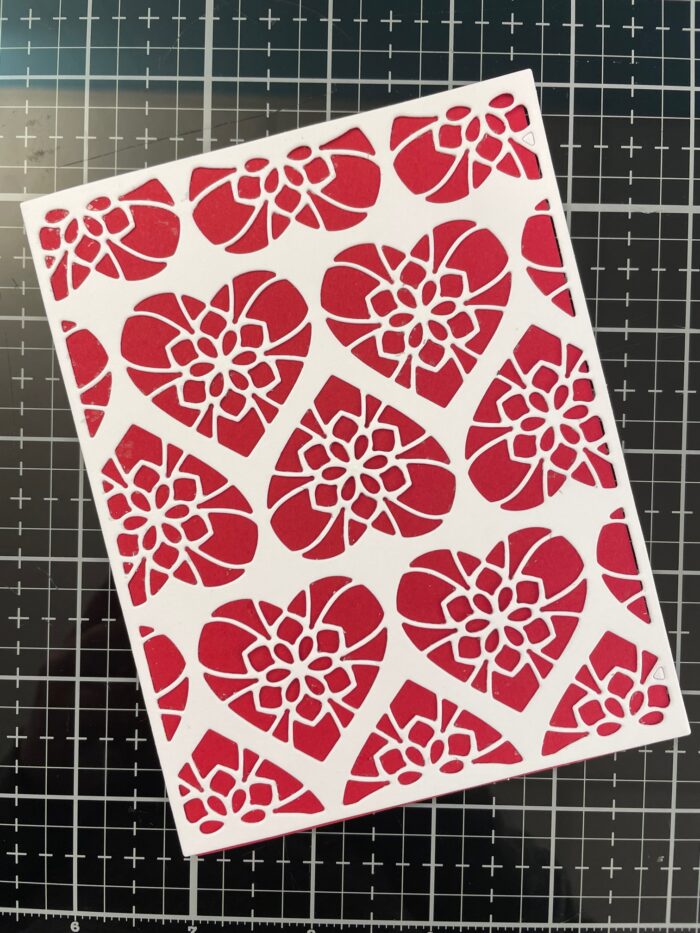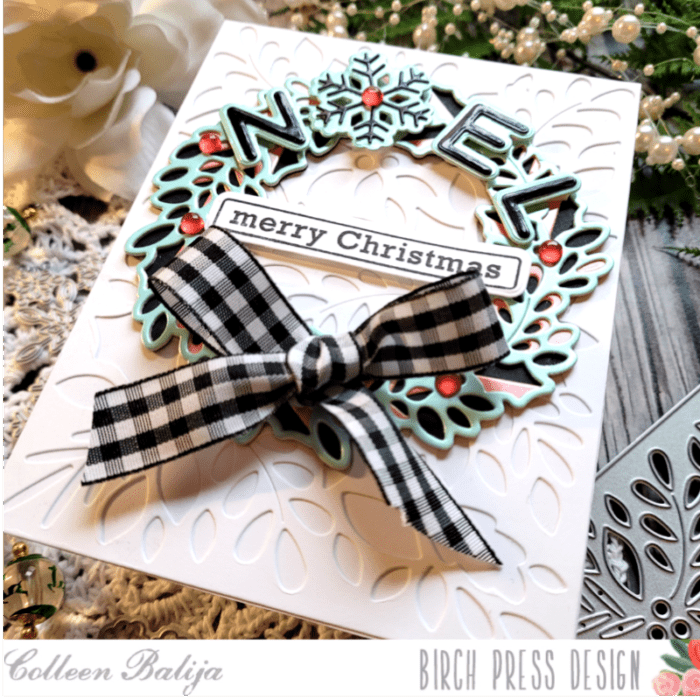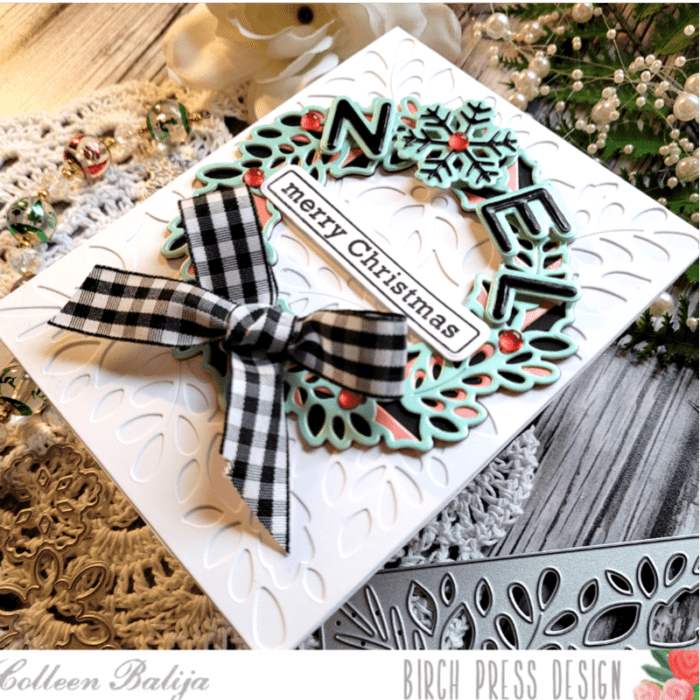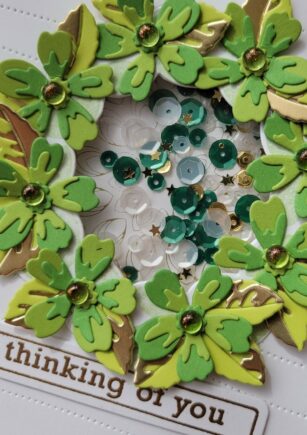
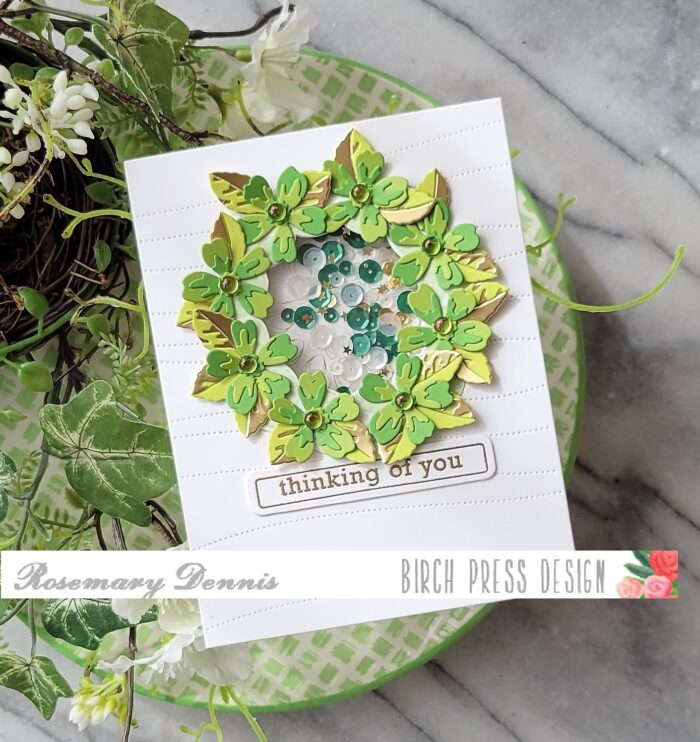
Hello everyone! St. Patrick’s day is tomorrow and with that in mind I decided to create a wreath using the new Phlox Blooms and Leaves Contour Layers dies in multiple shades of green with some gold thrown in for good measure! As I began to create my card I decided that I also wanted to provide some interest in the background so I die cut my cardstock with the Pinpoint Contour plate die. I also knew that I wanted to have a shaker element in card so to create that I used the Classic Sentimental Wreath stamp and die set for that element.
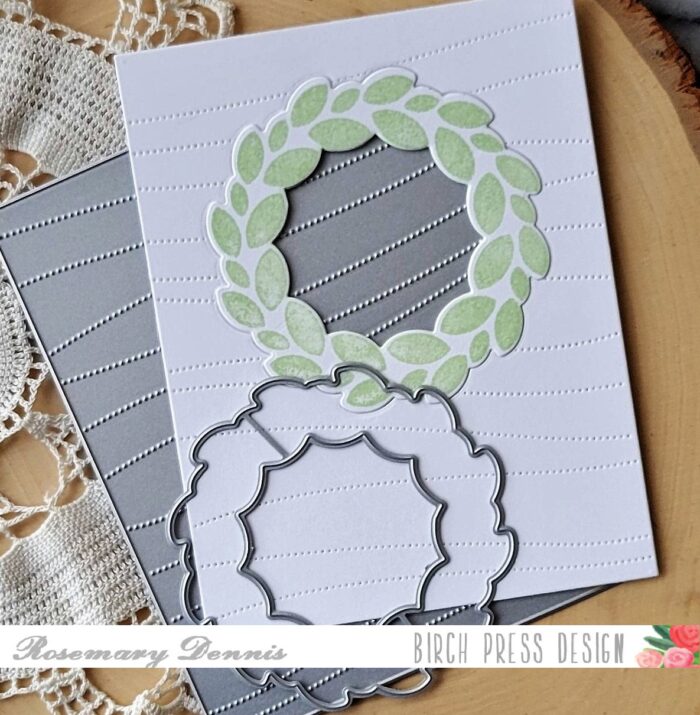
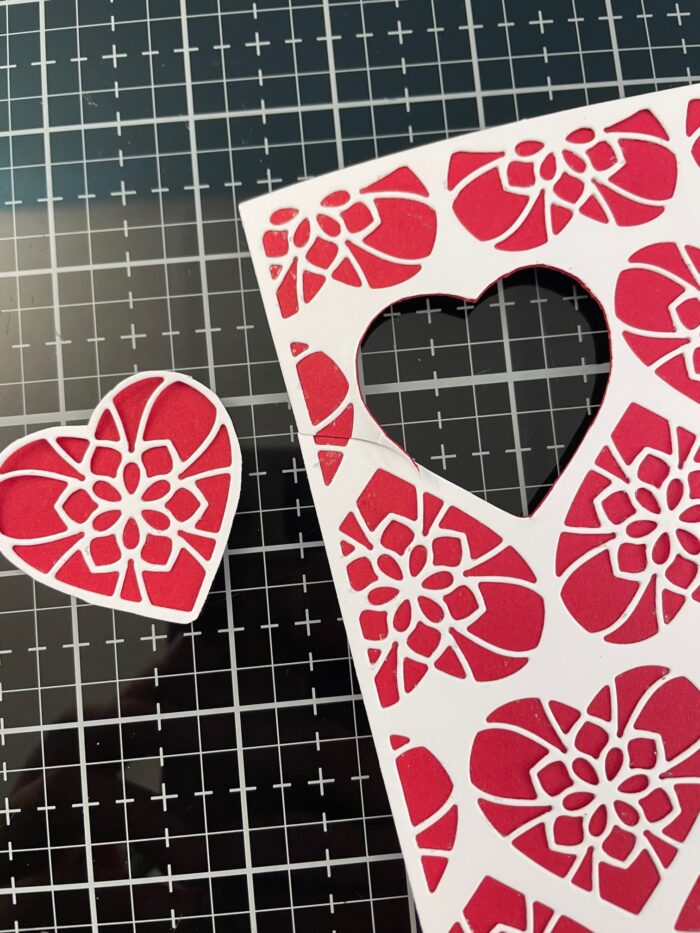
I die cut the panel with the Pinpoint Contour die and then positioned the wreath die from the Classic Sentimental Wreath stamp and die set in the top center of the panel and die cut the wreath. I then added low tack tape to the back of the panel to keep the wreath in place. As you can see, I then stamped the solid wreath image in a light green ink, die cut it and then layered it on top to form the base for my wreath. I then started building the shaker element.
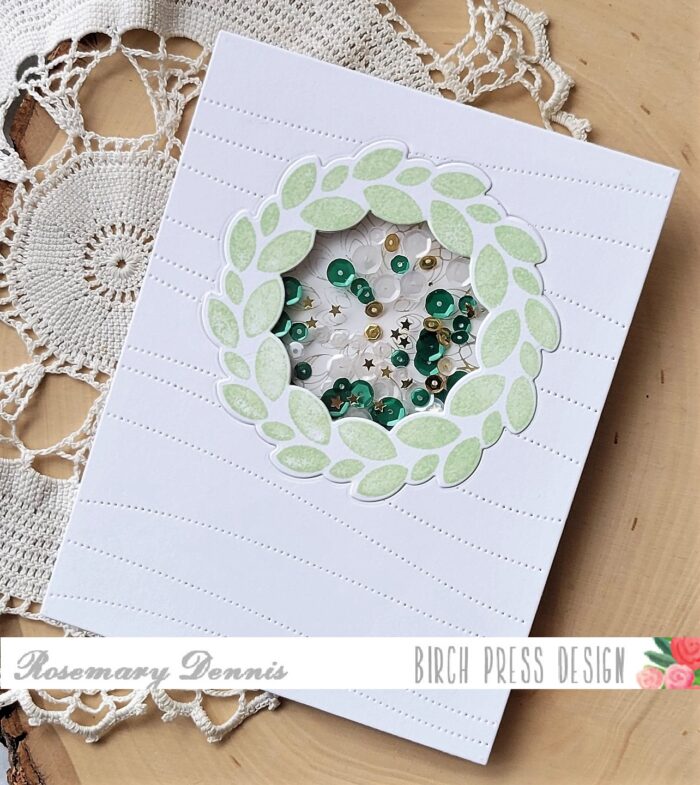
I had previously foiled the center medallion from the Gilded Petalpoint hot foil plate in gold so I decided to use that as my backer behind the opening. I added a piece of acetate to the back of the panel and then added foam strips to the back to create the well for the sequin mix. I added the mix and because I’m a little particular about how my sequins look I did actually flip the majority of the sequins over so they are facing in the “right” direction, lol! You can just see the foiled medallion peeking out through the sequins. Then I die cut the smaller phlox flower die from two shades of green cardstock and layered everything alternating the colors. I did originally die cut the leaves from the set in another shade of green and mirror gold cardstock, but the ended up opting to us a smaller leaf from the Dainty Rose and Leaves Contour Layers dies.

Once all the flowers and leaves were layered and dry I set about creating the wreath. I alternated the flowers for interest and then tucked the leaves in where they best fit. I finished off the wreath with pretty green/gold crystals from the Christmas Fairy Crystals pack. Here in the close up you can see more of the foiled medallion in the background.
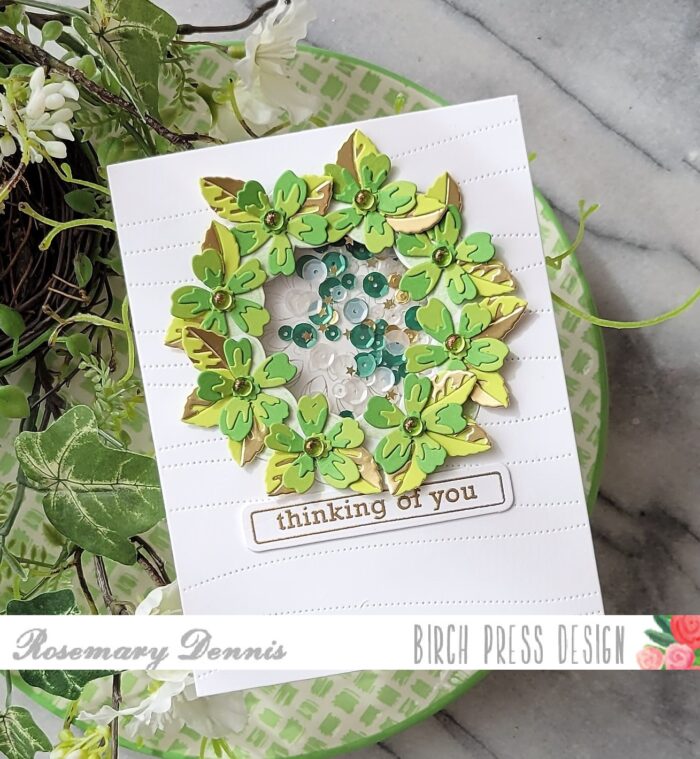
I finished off the card with the sentiment from the Contempo Greetings stamp and die set. I really like this stamp and die set. There are so many great sentiments and dies to cut them out! I stamped the sentiment in watermark ink, applied gold embossing powder, heat set and then die cut. I thought about trying to place the sentiment on the wreath, but ultimately ended up tucking up underneath the wreath.
Have a fun St. Patrick’s day!

Supplies