Hi there, it’s Seeka and I hope you’re having a nice week!
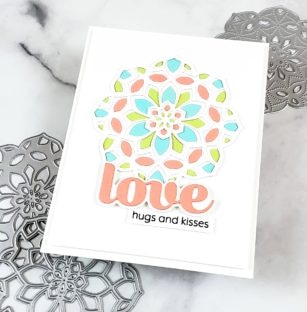
Today I’m using color cardstock for this die cut inlay card featuring the beautiful Kinsley Layer dies.
I started by cutting layers A and B out of white cardstock and gluing layer B to a white A2-sized panel. Next I cut three more layer Bs, out of pink, blue, and green cardstock, taking care to temporarily hold all of the fallout pieces in place with Post-it Tape. Using tweezers and glue, I adhered the little pink, blue, and green fallout pieces into the Layer B that I’d adhered to the panel.

I continued to fill in pieces until I completed the pattern. Because there are so many extra fallout pieces, I could easily have made two more cards.

Next I stamped the “hugs and kisses” sentiment from You Are Awesome stamp set in black ink onto a strip of white cardstock.
Then, I used the Big Love Sugar Script dies to cut the “love” out of the same pink cardstock, and the shadow layer out of white cardstock. I adhered the two layers together.
To assemble the card, I adhered the Kinsley Layer A die cut over my inlaid piece, and then adhered the two sentiments with foam tape. I trimmed 1/8″ off of each side of the panel and then used foam tape to adhere it to an A2-sized card base.
Thank you so much for visiting!


Supplies


Comments
One response to “Kinsley Die Cut Inlay | By Seeka”
Beautiful color combo and design!