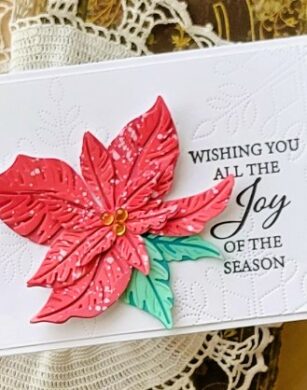
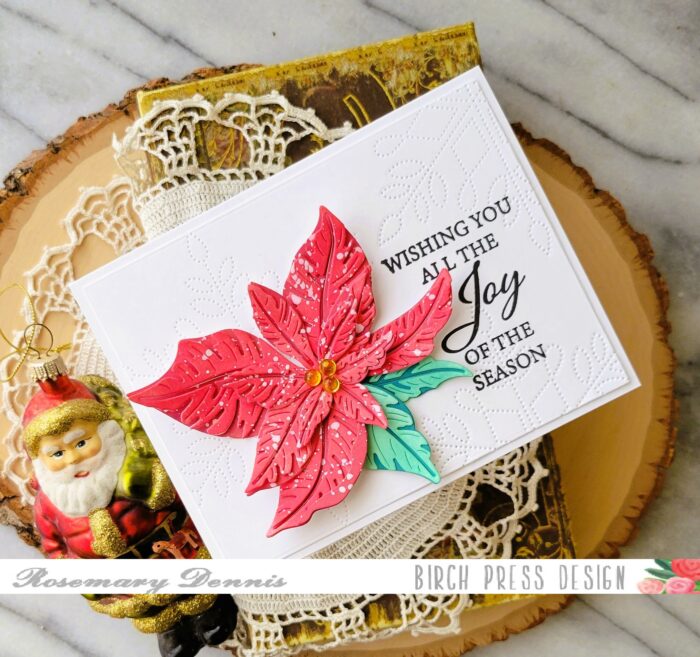
Hello, friends! Rosemary here on the blog today sharing a Christmas card I created using the new Splendid Poinsettia Contour Layers die set. I love poinsettias both real and paper crafted varieties! One of my favorite varieties of poinsettia is the one my local nursery calls “Jingle Bell”. The bright red leaves of this variety are splashed with white. Sometimes you get lots of white on the leaves and sometimes a little less. In case you are wondering why I am referring to them as leaves it is because that is in fact what they are… leaves or the more correct term bracts. The actual flowers on the poinsettia are very tiny and yellow. For my yellow “flowers” I used yellow Fairy Jewels.
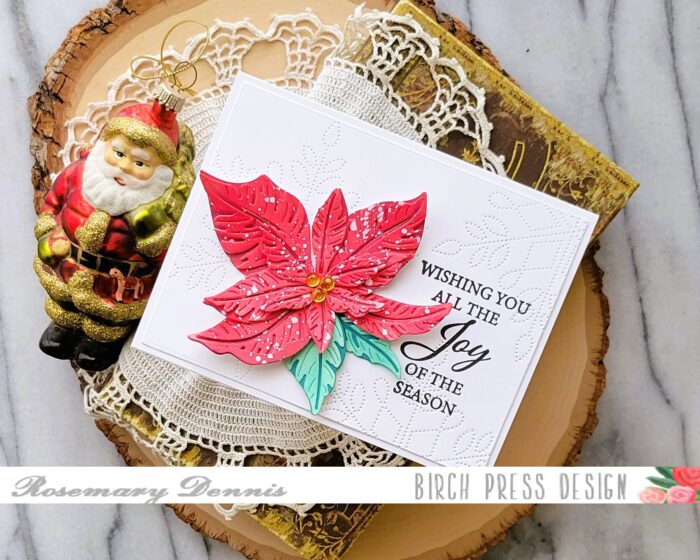
I die cut all the pieces from smooth bristol cardstock and then ink blended the red leaves with Lumberjack Plaid and Aged Mahogany distress oxides and the green leaves with Pine Needles distress oxide. I went with a heavier hand when applying the Pine Needles to the bottom layer of the leaf and a lighter hand for the top to get the variation I wanted.
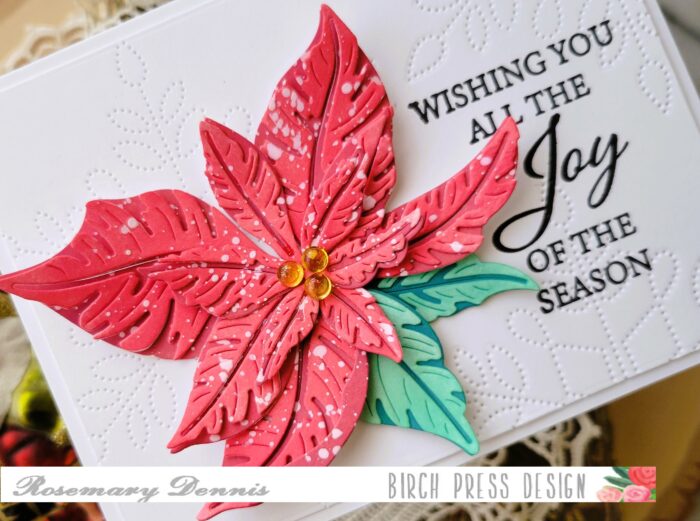
I let the red pieces dry for a little bit and then I placed them in my splatter box and splattered them with white gouache that I watered down a little bit. I think I should have used white acrylic paint because my white splatters turned a little pink, but that is okay as it still provides the look I was going for.

Once everything was dry I adhered all the pieces together using liquid adhesive. I did not glue the pieces together completely, but only at the base of each leaf so I could get a bit of extra dimension. Liquid adhesive was used to adhere all the layers together, as well. When the adhesive was set I used my fingers to give all the leaves a slight curve for even more dimension. Now it was time to create a background. I looked through my layering dies as I had thought I would use one for my background, but then I saw the Pinpoint Snowflake die set and thought that using the die portion that embosses the pinpoint snowflake would be perfect.
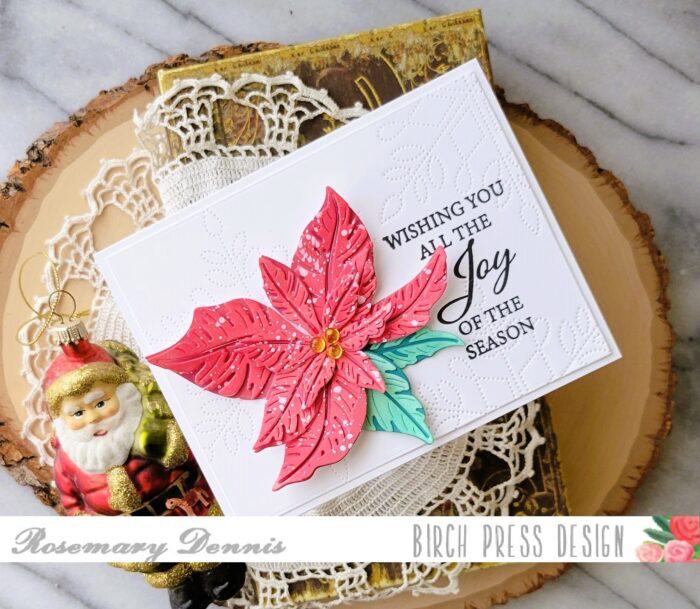
I die cut a piece of white cardstock with a Memory Box rectangle die and then placed the pinpoint snowflake on the left handside and ran it through my die cutting machine. I was going to stop there, but decided to add the snowflake in other areas. Before doing that I did stop to stamp the sentiment from the Glad Tiding stamp set on the white panel with black ink. I then added the additional embossing. I adhered the poinsettia to the panel, added the three fairy jewels and adhered the panel to my white card base with double sided tape.
I hope you enjoyed today’s card and learned a little something about poinsettias. Thanks for stopping by and have a wonderful day!

Supplies


Comments
4 responses to “Jingle Bell Poinsettia | by Rosemary Dennis”
A gorgeous card with the beautiful poinsettia Rosemary. x
You’ve created a perfectly pretty Jingle Bell poinsettia! I like your snowflakes in the background too. Fantastic card, Rosemary!
Such a fabulous poinsettia die set and you’ve featured it so beautifully here, Rosemary! Love the snowflake background too!!
Love everything about this card–gorgeous!