Hi there, it’s Seeka and I hope you’re having a nice week!
Today I’m using color cardstock for this die cut inlay card featuring the beautiful Kinsley Layer dies.
I started by cutting layers A and B out of white cardstock and gluing layer B to a white A2-sized panel. Next I cut three more layer Bs, out of pink, blue, and green cardstock, taking care to temporarily hold all of the fallout pieces in place with Post-it Tape. Using tweezers and glue, I adhered the little pink, blue, and green fallout pieces into the Layer B that I’d adhered to the panel.
I continued to fill in pieces until I completed the pattern. Because there are so many extra fallout pieces, I could easily have made two more cards.
Next I stamped the “hugs and kisses” sentiment from You Are Awesome stamp set in black ink onto a strip of white cardstock.
Then, I used the Big Love Sugar Script dies to cut the “love” out of the same pink cardstock, and the shadow layer out of white cardstock. I adhered the two layers together.
To assemble the card, I adhered the Kinsley Layer A die cut over my inlaid piece, and then adhered the two sentiments with foam tape. I trimmed 1/8″ off of each side of the panel and then used foam tape to adhere it to an A2-sized card base.
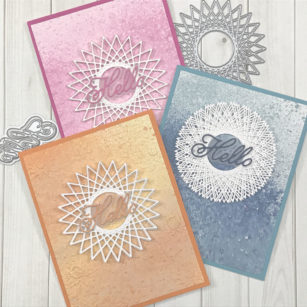
For today’s project I wanted to create some backgrounds for the String Art Circle Die! I used a combination of oxide sprays and embossing folders and played around to see what would happen to the pattern.
I used my mix media paper and my spray box to apply the color. For each color I chose two shades to obtain a variegated effect.
Once they were dry, I grabbed some embossing folders to add texture to the back ground for our focal point.
While they were drying, I grabbed my die and cut it out of white card stock multiple times for the different techniques I was going to complete.
I put the die together in three different ways. The first I simply layered three to each other. This creates a wonderful chip board that will hold up nicely through the mail.
The second I only used my liquid adhesive in the center ring of each of the circles. This allowed the tips of the string art to lift and give more texture to the image.
For the final card when applying each layer to each other I shifted the die over one section on itself. This gave a great effect of the die and really showed the string art!
As always, I hope you enjoyed today’s project… and if you want to see more details just click on the video below and see how these projects come together step by step!
Make sure you stay tuned for more wonderful projects coming soon! Have a great day and always remember… Be Creative!
Thanks for stopping by! Have you seen the newest release in the store? You’ll love the new layered dies and stamp sets. You can see them all here.
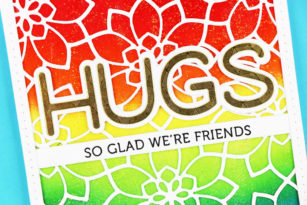
My card features the new Viola Plate Layer Set over a rainbow distress ink background. I used only the A Layer from the set because I wanted to show you the intricate and delicate design.
I inked the rainbow colors with a cosmetic brush. You can find different sizes at Amazon. The smaller brushes make coloring thinner areas easier.
Do you see the glittery sparkle in the distress inking? I mixed ultra fine glitter with Ranger Glossy Accents and spread it with a spatula over the inked background. While it was still wet I placed the Viola die cut over it. When it was dry I added a Pierced Rectangle Frame for a more finished look and a JUMBO Lingo Hugs die cut.
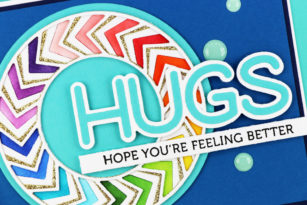
Hi Friends! I hope you’re having a great day! Now that many of us are having elective medical procedures again, I thought a get well card was in order.
I’m sending big hugs and a rainbow of colors for a quick recovery.
I cut the Roundabout Layer C from white card stock leaving the cut outs in place. If you put packing tape on the back of your card stock before you run it through your machine it will keep all the pieces in place. I colored the chevrons with Copic Markers – much faster than inlaying the pieces!
I cut the Layer B from gold glitter card stock – did you know Memory Box has added papers to their offerings? The glitter paper comes in a 6″ pad and lots of colors!
If you love the Lingo Hugs die you’ll NEED the JUMBO Lingo Hugs die! It’s a nice big size to make your message is clear!
Hi there, it’s Tracey back today with a little inspiration from Birch Press Design. I created two colourful cards from one die cut.
These cards were both made with the Grandiose Bevel Plate Layer A die. For the first card I cut one Grandiose Bevel Plate Layer A from 110# white cardstock and set it aside. I ink blended a 4 1/4″ x 5 1/2″ panel of Bristol Smooth cardstock with a rainbow of Distress Oxide ink to make a rainbow of pink, orange, yellow, green and blue.
I tapped a bit of water over the panel and picked up some colour with a paper towel. Once dry I die cut the Grandiose Bevel Plate Layer A die from the panel and because I am going to inlay the pieces into the white panel and use the outline for my second card. My die cut machine is a Gemini Jr, so the cut is facing up. A piece of 4 1/4″ x 5 1/2″ cardstock is placed over the back of the die and I flipped it over so I could see the coloured pieces. There are a LOT of pieces to inlay so this helps keep it organized.
I covered the back of the white die cut with strong double sided adhesive tape so the pieces would fully inlay. I used an embellishment wand to help me pick up the tiny pieces to inlay.
Once I was done inlaying the pieces I attached it to a white card base with foam tape for dimension. I finished it off with the Hello Honey Script die that I added with foam tape.
For the second card I used the frame cut from the first card. I cut two additional white Grandiose Bevel Layer A dies and glued them together, then put the coloured frame as the top layer. To finish it off I added the Thanks Honey Script die with foam tape.
Thank you so much for stopping in today. Come back tomorrow for more inspiration on the blog.
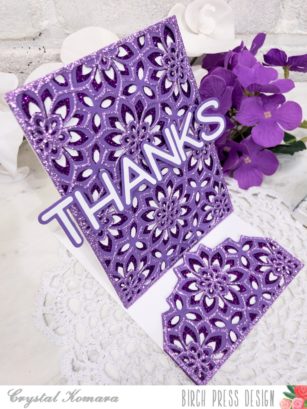
Hello and happy Thursday readers! This is Crystal Komara here with you today. I hope you have been enjoying some of the beautiful new release products that the Design Team has been sharing. I am always amazed by what each artist brings to the team and how we all create such unique and diverse cards using the same products. In full disclosure, I also look at something another team member has created and I say, “Well, duh, why didn’t I think of that!?” : )
Today I will be sharing this A2 sized easel card made using all three layers of the Viola Layering Plates and lots of purple jewel toned glitter cardstock. All supplies for today’s card will be listed at the end of this post.
The card base is made from 80 lb. Neenah Solar White Smooth cardstock. It is the only white cardstock I use and I love it’s quality both for card bases and for coloring with my Copic markers.
Here is a close-up of the card to show you the beautiful intricate layering dimensions and the various shades of glitter cardstock.
I always find things easier to understand when I can see the step-by-step creative process, so I have created this video for you showing how this card was made:
I hope you have enjoyed my card. Thank you for visiting and have a wonderfully creative day!
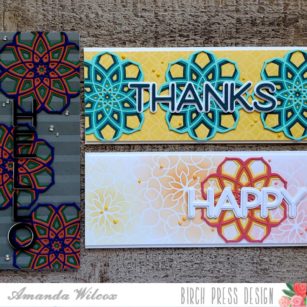
Hello everyone. It’s Amanda from Twiddler’s Nook joining you today for a trio of cards. I started with one in mind and just couldn’t stop creating! These were so fun to create!
We’re going to start with the process I used to create the Thanks card first and then I’ll touch on some differences with the other 2. Let’s dive in!
To create all of these cards, I chose my 3 colors and cut 3 of each of the Cora layers and assembled them with liquid glue.
For this first one, I used the Ring Tile stencil with a yellow dye in and blending brush. I just did half, then shifted the stencil and did the other half. It was super easy!
Then I glued the Cora layers to the stenciled panel, trimmed the excess off and adhered the panel to a white card base measuring 3.5×8.5. I die cut the letters from the Jumbo Lingo Thanks from white and the darkest teal and adhered them all together. Finishing off by adding them to the top of my card and adding some Nuvo Crystal Drops in dandelion yellow scattered about.
Here’s a look at the finished product. I absolutely love these colors together! And that sentiment is so bold and wonderful! I love it! Let’s keep going with the HAPPY card next.
I created my Cora layers the same way with different colors and moved on to stenciling a panel with the Midnight Mandala stencil this time. I started on one end with my blending brush and some melon dye ink, then moved the stencil and used peach ink and finally moved it one more time and ended with yellow so it all coordinated with my cardstock colors.
This time the sentiment is white on white with 3 layers of the letters on top for dimension.
Now for this design, although I created 3 of the Cora layers up front, I only used one because I love the stencil showing through. I adhered everything and popped the panel on a white card base. For finishing touches this time, I used Nuvo Crystal Drops in dandelion yellow, sugared almond and bubblegum blush.
Now, let’s check out that bold masculine version.
Again, I created the Cora layers with those awesome bold colors and set them aside to stencil my background.
For the sentiment this time, I decided not to use the shadow and try moving the letter vertical though. It looks so cool this way!
I adhered my stenciled panel to a card base and then adhered the Cora layers and trimmed the excess. For placement on the sentiment I used a T-ruler to keep it all straight. Notice how the “O” is funny because of the curve…I adhered all the other letters, removed the stencil and eyeballed centering the “O” under it all. It looks much more balanced.
Then I finished this one off with some cool bubble embellishments and it’s done.
I know this was a really long post and I appreciate you sticking with me. I hope you found some inspiration to create something wonderful. Have a fabulous day!
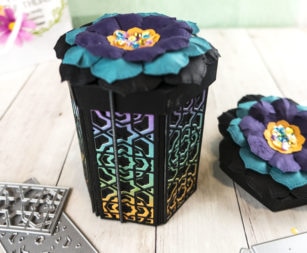
Hello! Part of the brand new release at Birch Press Design is this fabulous Hexagon Box Base. Such a festive box with lots of room inside, and the dies are unique because they allow for total customization of height.
Rather than design each side (which could be done in so many different ways with stamps or dies!) I used the Mini Grandiose Bevel Plate Layer Set – it fits perfectly! There are other designs also available, such as the Mini Honeycombs or the Mini Dazzle sets that also work.
I used the Hexagon Lid which is an add-on to the base set, along with the Vivid Bloom Stitched Layer Set to create a 3D flower to sit on top of the lid (The Vivid Bloom set also fits perfectly!)
I cut into the petals of the Vivid Blooms to separate them a little, wet the paper, and ran a stylus inside the petals for a fun, eclectic look. For the center, I poured on some glue, and let matching colors of sequins fall into place. The glue dried clear leaving a fun pile of sparkle! What a fun project!
I’ve created a video to show how I created this box and lid and that can be seen here, but these boxes can be made so many different ways! Enjoy the video, and have a great day!
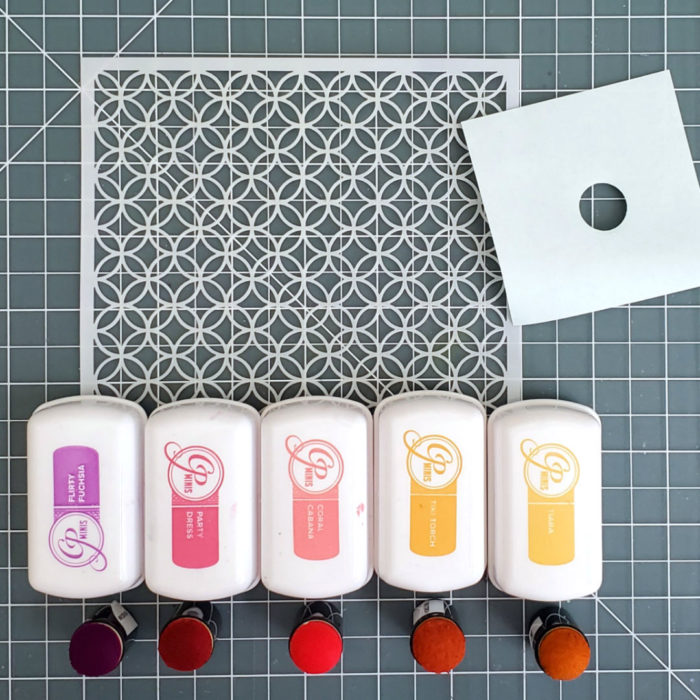
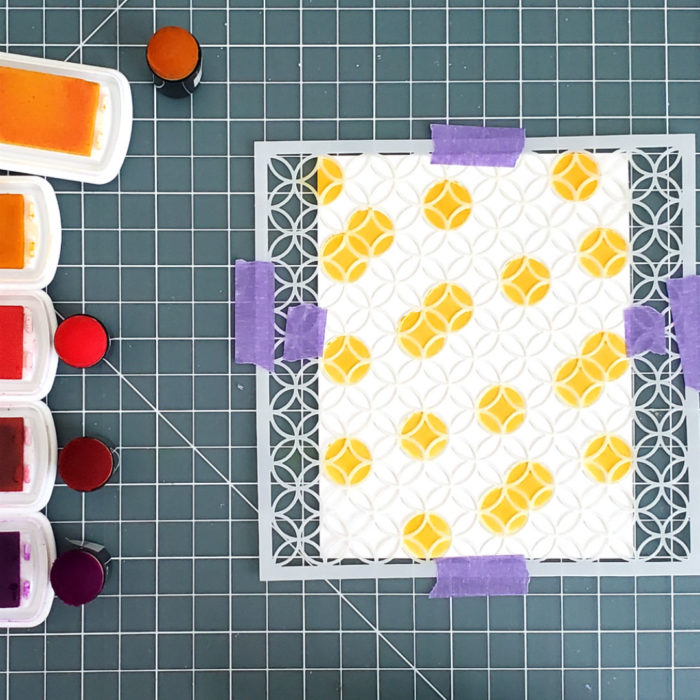
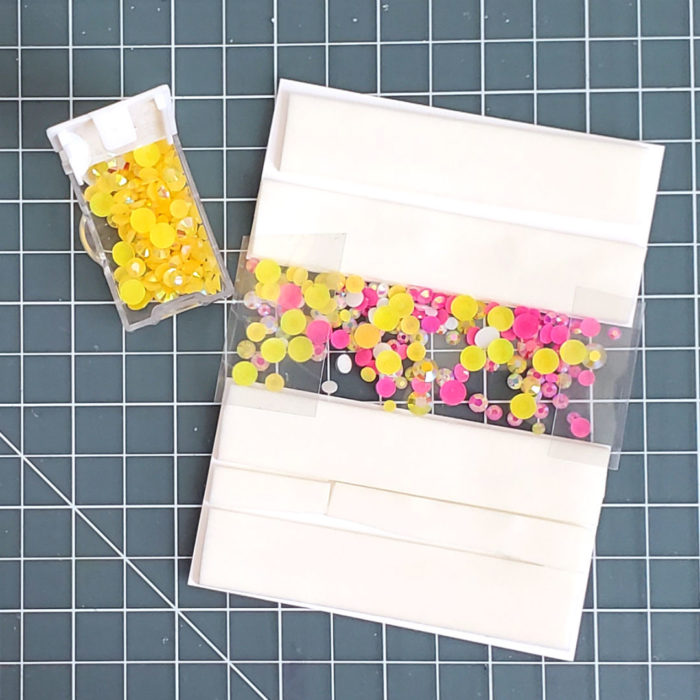
Good morning! Ardyth here with a fun, edgeless shaker card using the stencil.
I started by gathering my supplies: the stencil, 5 ink colours, and 5 circle masks cut from sticky notes (one for each colour).
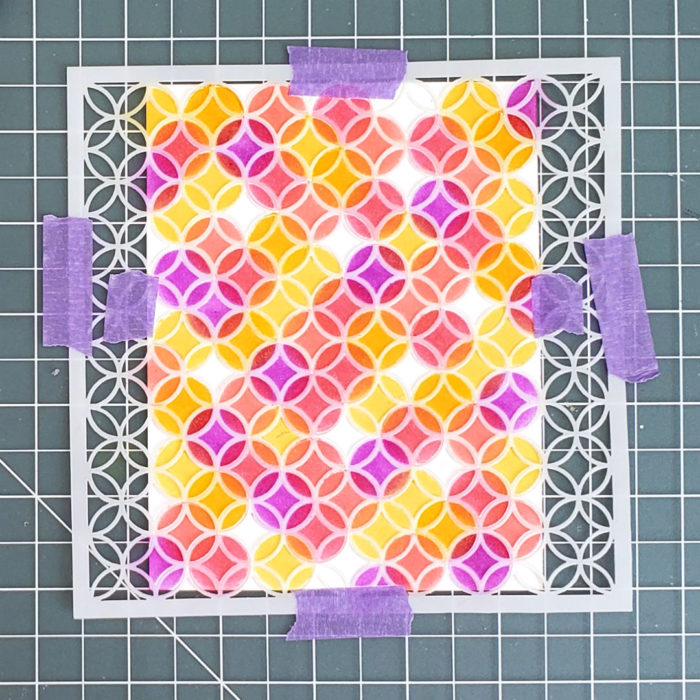
I used sponge daubers and the masks to blend ink into the circular shapes on the stencil. I tried to make sure that they were spaced out randomly over the panel of white cardstock.
I worked through all 5 colours, and left some areas white for some breathing space.
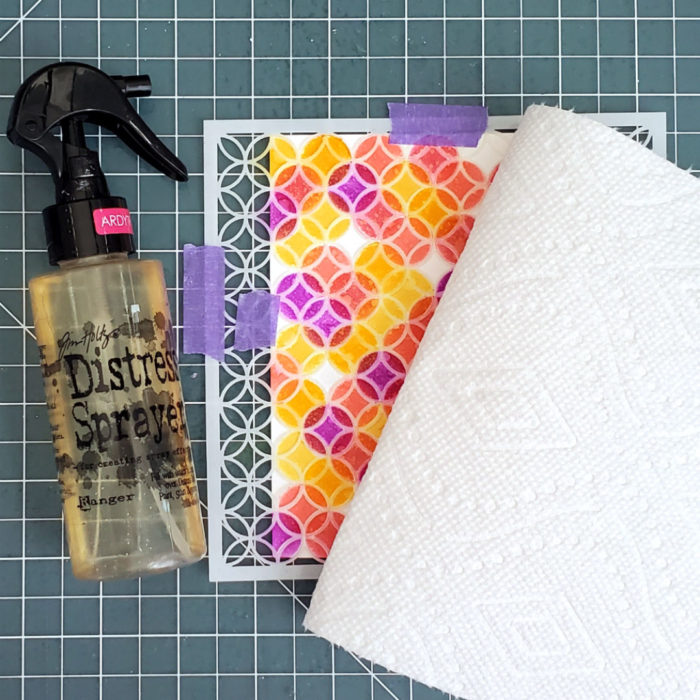
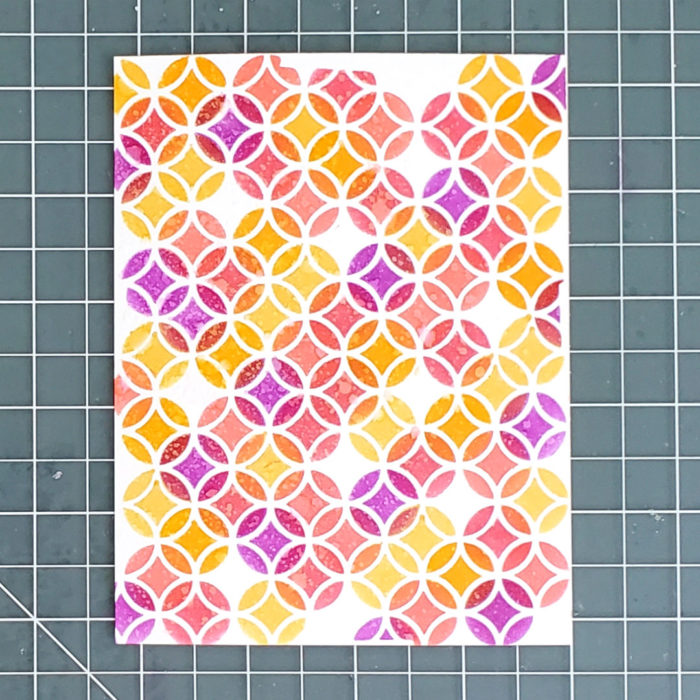
I added texture by spritzing the panel with water and lifting the colour with a paper towel.
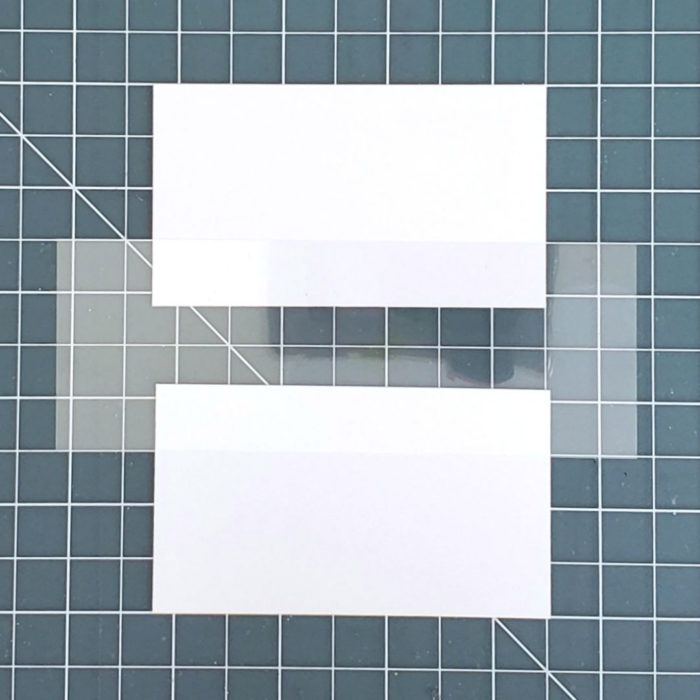
I trimmed the panel into 2 pieces and flipped it over on my work surface. I cut a piece of acetate so that it was wider than my panel so I can create flaps.
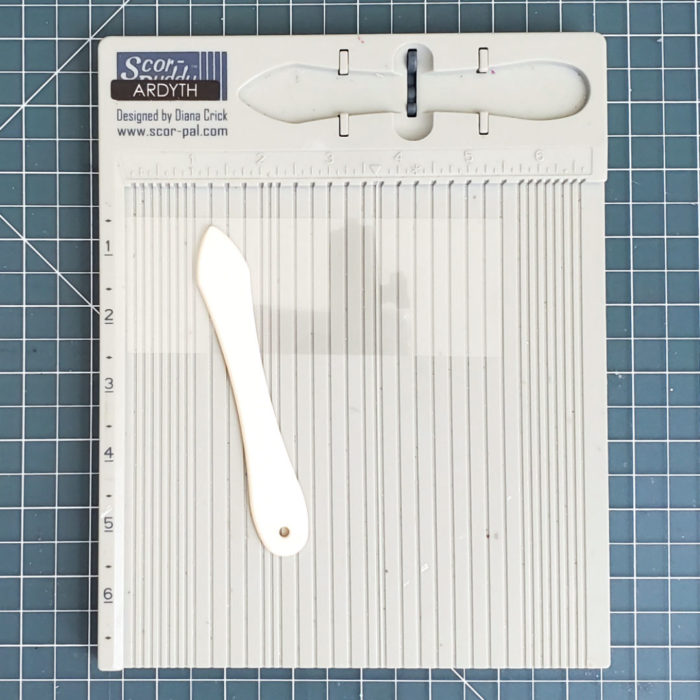
I scored the acetate twice on each end, about 1/8 inch apart, and about an inch from the end.
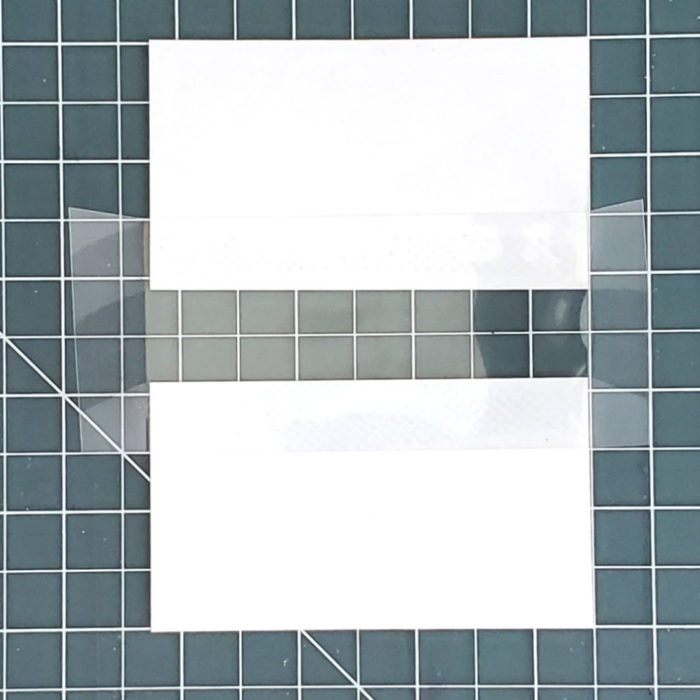
I glued the acetate to the panel pieces – here you can see the 1/8 inch ‘walls’ and the flaps.
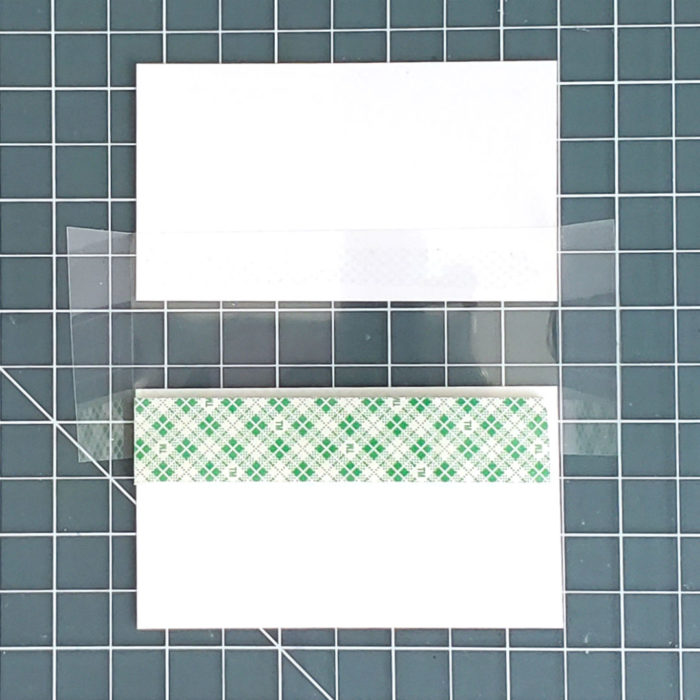
I added strips of doubled-up foam tape to create the rest of the walls, and to support the panel.
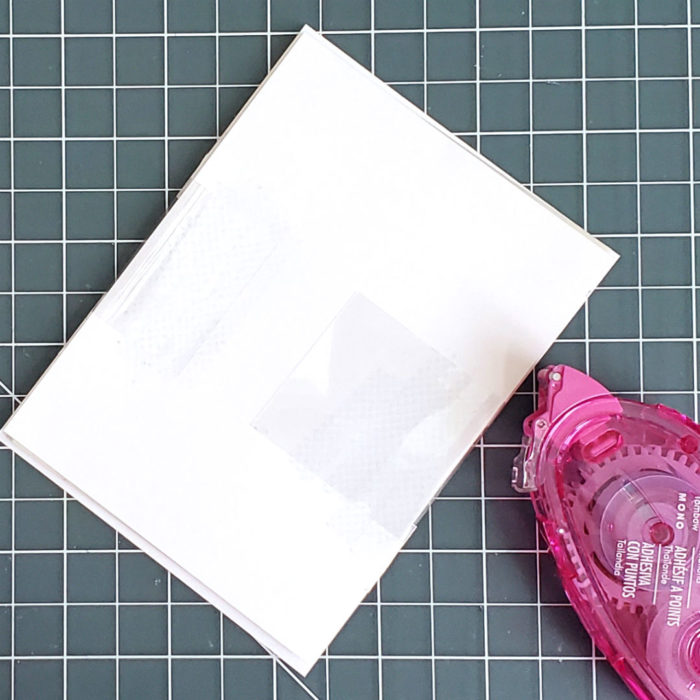
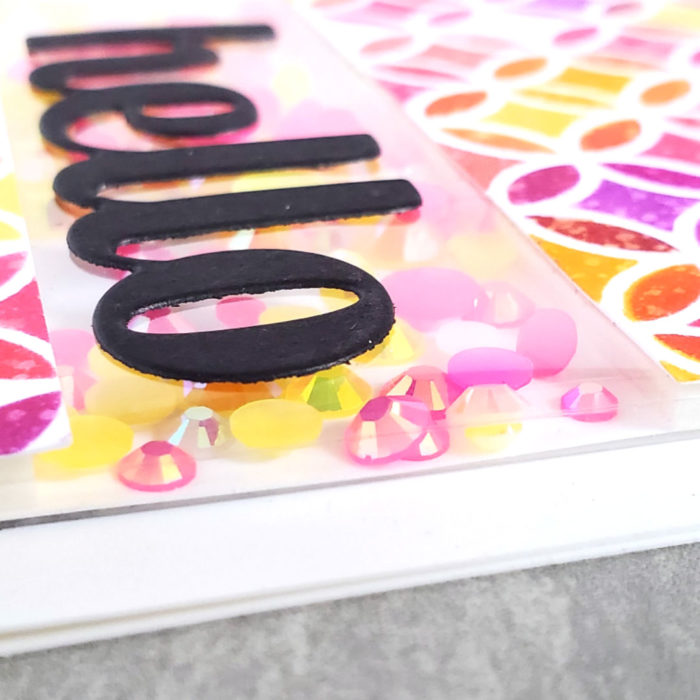
I filled the shaker area with gems and removed the release paper from the foam tape. I left the flaps standing up for the next step.
I placed a white panel of cardstock over the back, and then glued the acetate flaps down .
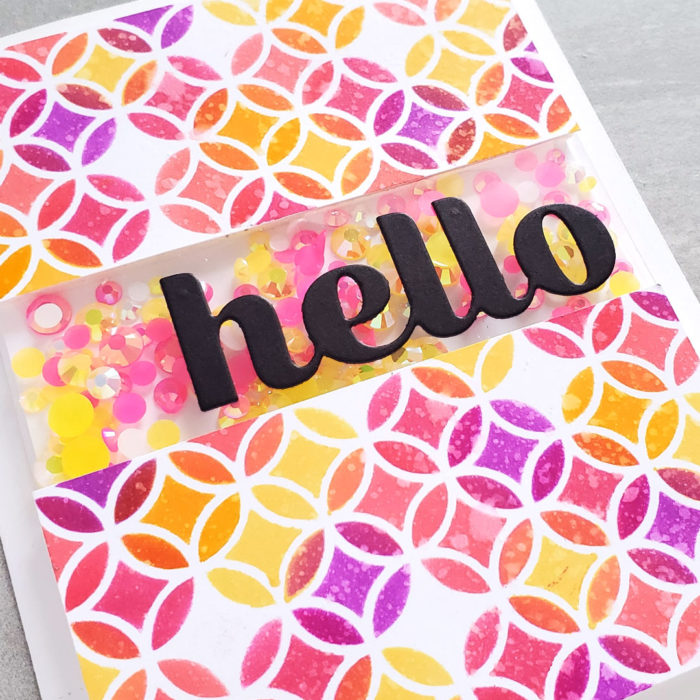
I attached the shaker panel to a white cardbase, and added the Big Sugar Script Hello die, cut from black cardstock.
Here’s how the edge of the shaker looks.
And of course, I made a second card using the leftover ink from the stencil.
An edgeless shaker has big wow factor, but it’s easier than it looks – I hope you’ll give it a try!
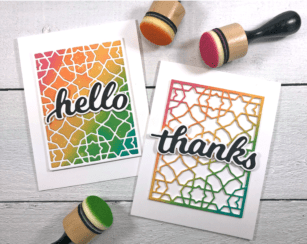
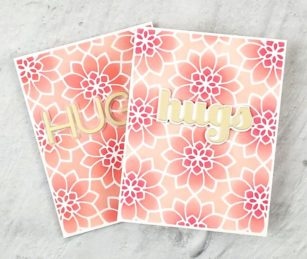
Hello there, it’s Seeka here and I hope you’re having a good day! Lately I’ve been doing a lot of ink blending. I find it to be soothing, and a quick way to create some beautifully inked backgrounds. One of the things I love about Birch Press Designs’ layered dies is that you can often take the top layer, usually the most intricate, and turn it into a stencil.
For my card today, I used the Viola Plate Layer A die to cut a piece of Avery Removable ID Labels. I use Avery 6465 but you can use any removeable adhesive sheet that is A2-size or larger.
I removed the backing from one end of the die cut piece and positioned it over an A2-sized piece of Strathmore Bristol smooth cardstock. Then I gently peeled away the rest of the backing as I smoothed my makeshift stencil down over the cardstock.
Using a foam blending tool, I blended Tattered Rose Distress Oxide ink over the entire panel. Then I blended Abandoned Coral over the centers of each bloom in the pattern. Next I used an ink dauber to blend Picked Raspberry over the very center of each bloom.
Once I had the three colors down, I gently peeled away the stencil.
For my sentiment, I used the Big Hugs Sugar Script die. I cut the word Hugs once out of some pearlescent ivory cardstock and twice out of heavy white cardstock. I adhered the three layers together with the ivory layer on top, and then adhered this piece to the shadow layer, which I’d cut out of vellum. I backed the sentiment with foam tape and adhered it to the card front which I in turn adhered to a card base.
I made a second card following the same steps, but substituted the Jumbo Lingo Hugs die for the sentiment.