Category: Amanda Wilcox

  • Sending Warm Wishes | By Amanda Wilcox

    Sending Warm Wishes | By Amanda Wilcox

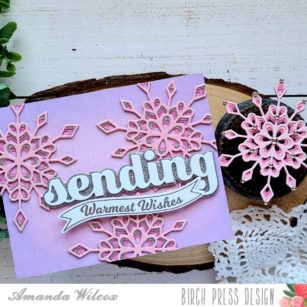
    Happy Friday everyone! It’s Amanda from Twiddler’s Nook joining you for a fun Christmas card and ornament combo today! Be aware though, this project is contagious and I can’t stop creating them in all the colors now!
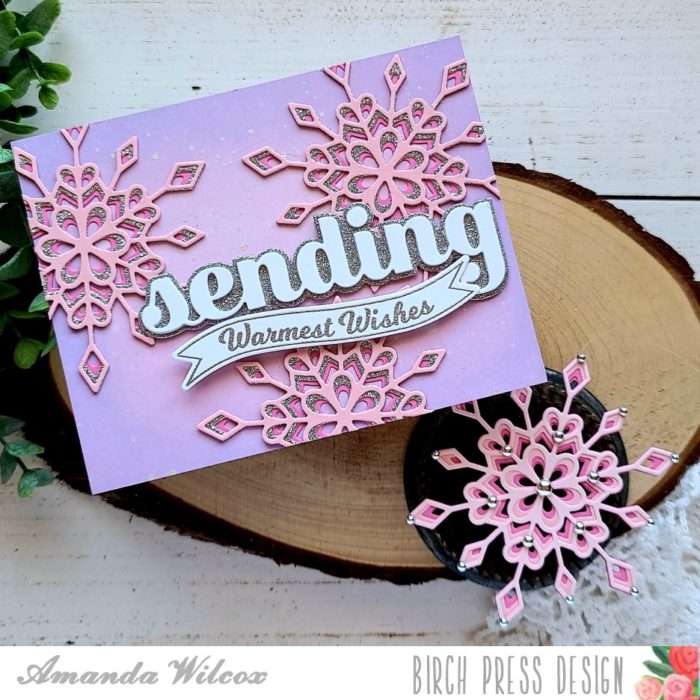
    Let’s get started with how I processed this fun project!

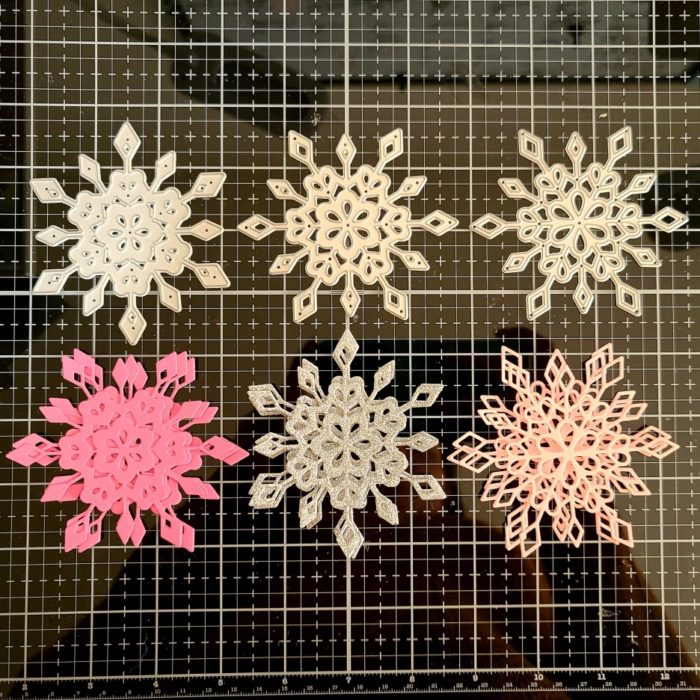
    I started by die cutting my snowflakes – 3 of each layer of Frosty Flake and glued them together. I did lay clear blocks on them to help the dry flat because they are a little delicate.
    While those were drying I worked on my background panel. I started with a 4.25×5.5 inch panel and inked it up with spun sugar and shaded lilac distress oxides.
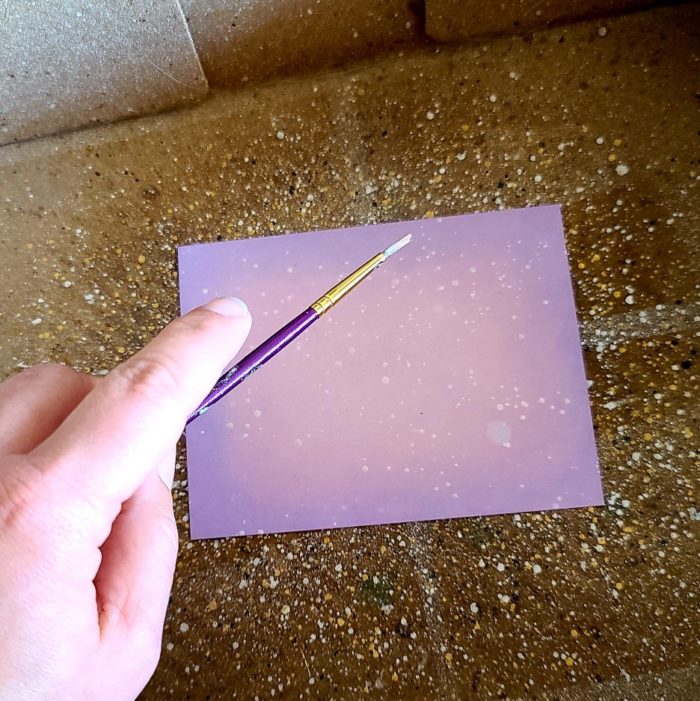
    I put it in my splatter box and spritzed it with water and flicked pearl watercolor on it for some shimmer too!
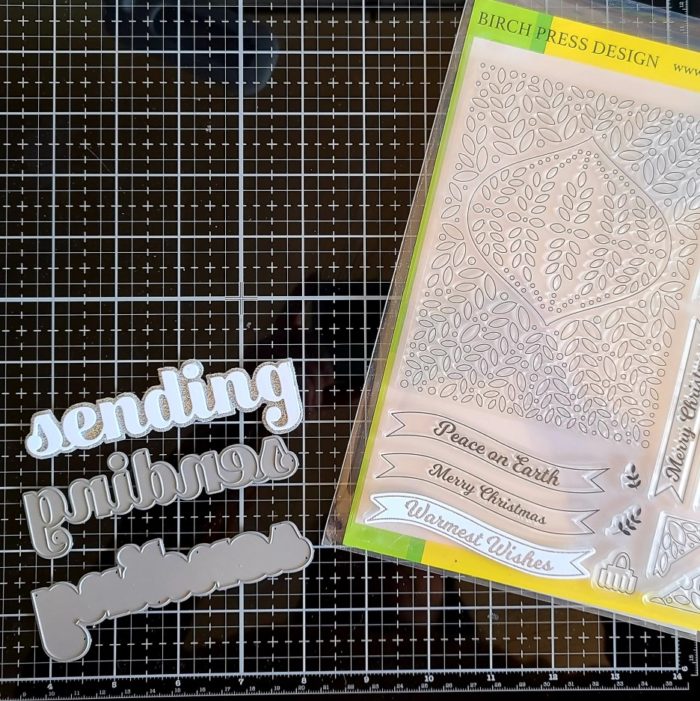
    While that dried, I moved on to my sentiments. I die cut the letters for sending from white cardstock 4 times and glued them together. Then I adhered them to the silver shadow. Next, I stamped and heat embossed the warmest wishes banner from Christmas Ornament and Labels in silver so it all tied together.
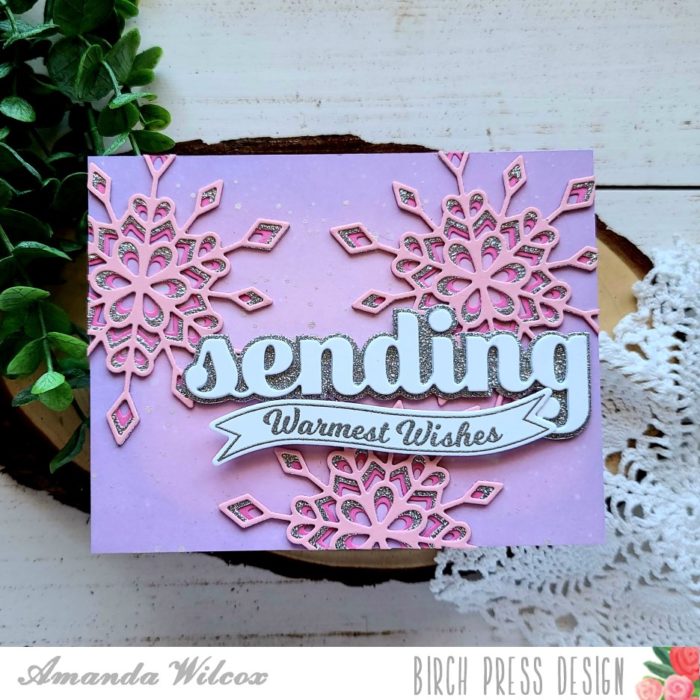
    Assembly was simple, I used liquid glue to adhere my snowflakes. I let them dry for a minute before trimming off what was hanging over the edge. Then I also used liquid glue to adhere the sending word die cut. I used foam squares to pop the banner in place and my card is all finished.
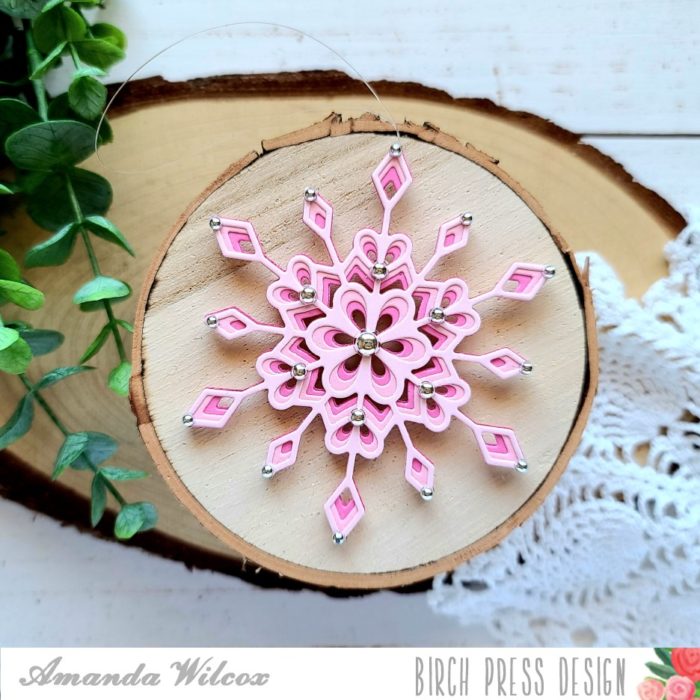
    For my snowflake, I die cut the layers 2 more times – so I had 6 pieces total making 2 snowflakes. I put them back-to-back and glued them together. I stuck some fishing line at the top of one point and held it together with tweezers while it dried. After a couple of minutes I glued some silver baubles to both sides so it doesn’t matter which way the ornament hangs, it’s beautiful.
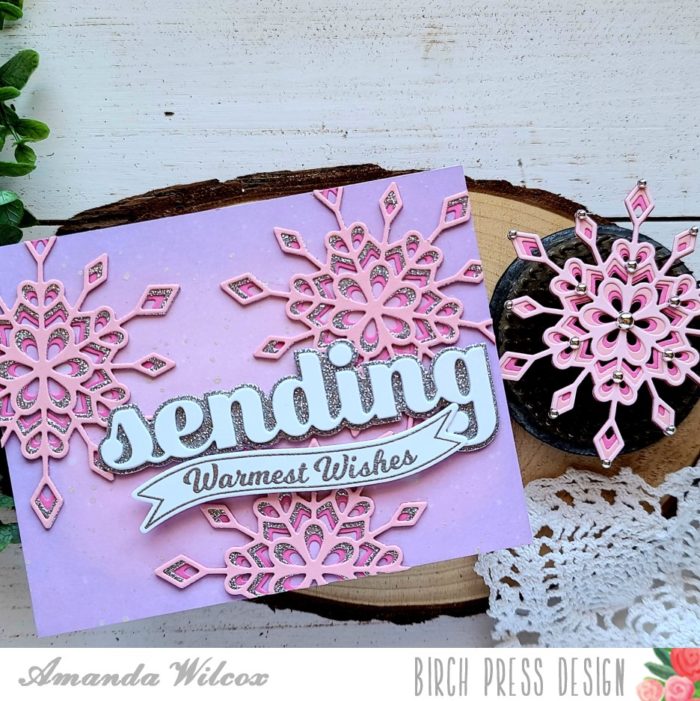
    I am truly making a rainbow set of these snowflake ornaments. They were so much fun to create! I think they would be a wonderful gift. Don’t you?

    I appreciate you sharing your time with me. Have a fabulous day!

    Supplies
  • Christmas Shaker Trio | By Amanda Wilcox

    Christmas Shaker Trio | By Amanda Wilcox

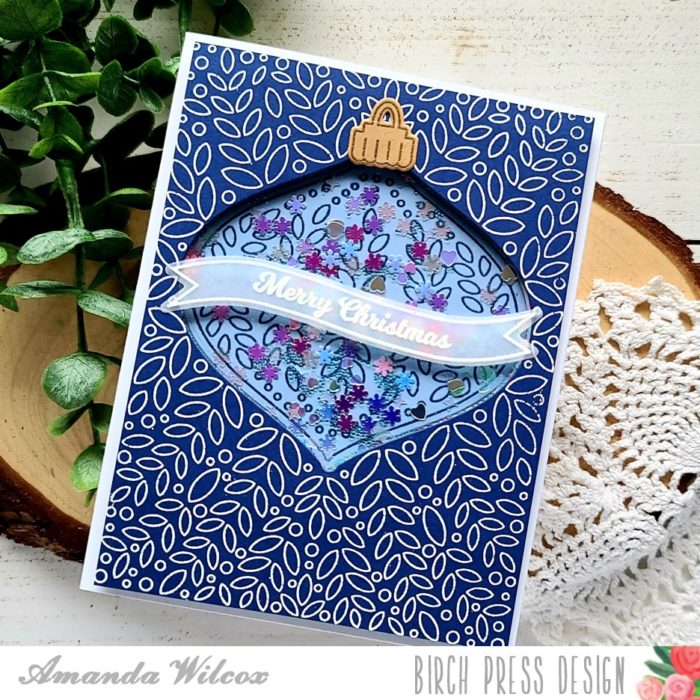
    Hello everyone, thanks for stopping by. It’s Amanda from Twiddler’s Nook today sharing a trio of Christmas shaker cards.

    These were really quick to put together and would be super fun to make in larger batches to mail to friends and family this Christmas. Let’s get started with how I did it.

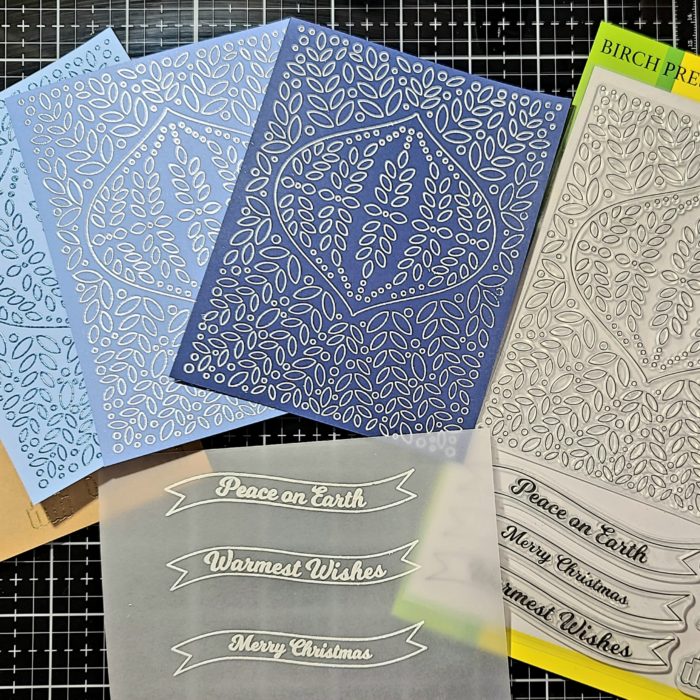
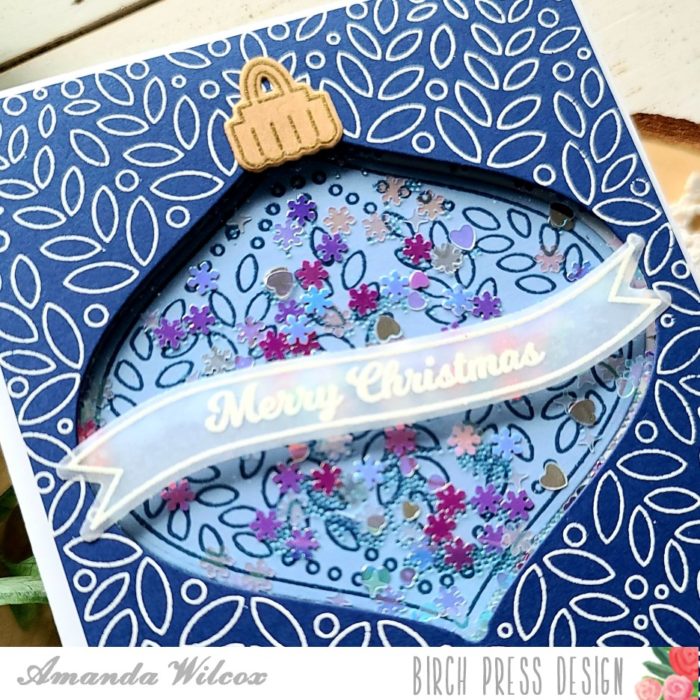
    I chose 3 shades of blue that I liked together, pulled out a scrap of kraft and vellum; stamped and heat embossed my images. For the card front I chose silver, white and blue embossing powder. For the ornament tops I chose gold and the sentiment banners are white.

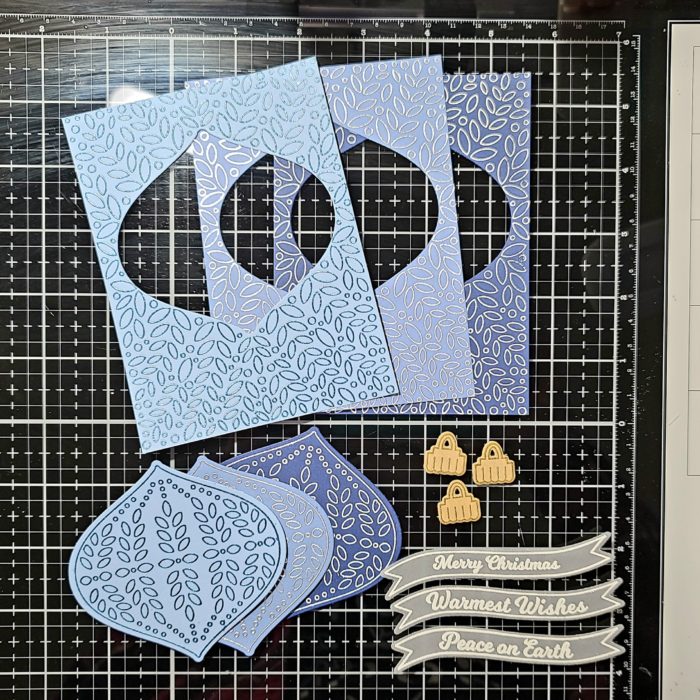
    Next, I used the coordinating dies to cut everything out and trimmed the card front panels down to about 4×5.25.

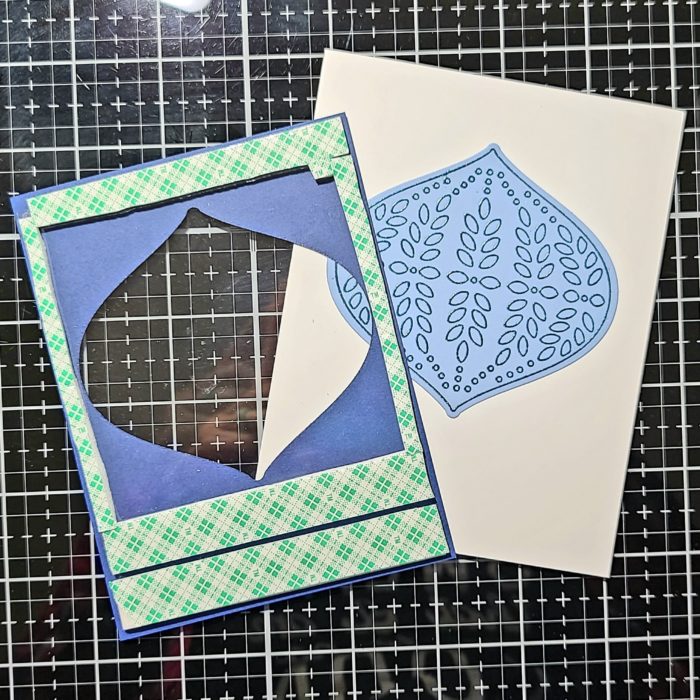
    I lined the back of each card front panel with adhesive and added acetate. Then I put removable tape runner on the ornament fronts and lined them up in the window, then added tape runner to the back of just the ornament that I wanted to stick to the card front. That way, when I laid my panel down centered just the ornament would stick and I could rub off the removable adhesive.

    Next, I lined the back of the card fronts with foam tape, piled my shaker bits in the center of the ornament, removed the backing tape and adhered the window panel to the card base.

    With those stuck down, I used liquid glue to add the ornament tops. A little secret I use with vellum pieces like this is to run it through my Xyron sticker maker to add adhesive to the entire back. This way you don’t have dots of adhesive showing through at all.

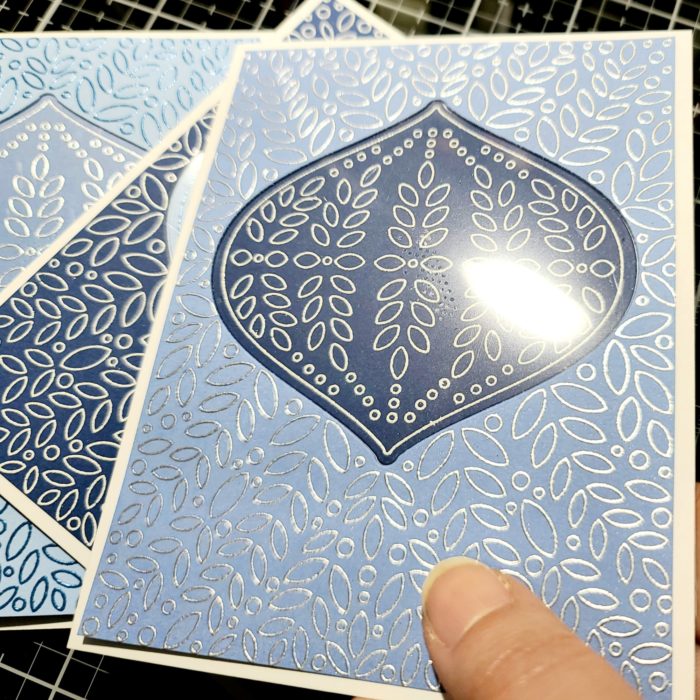
    I love how these turned out! I think I’ll go back and make some traditional colored combinations as well.

    I appreciate you sharing your time with me. Have a fabulous day!

    Supplies

  • Thank You Hexagon Box | By Amanda Wilcox

    Thank You Hexagon Box | By Amanda Wilcox

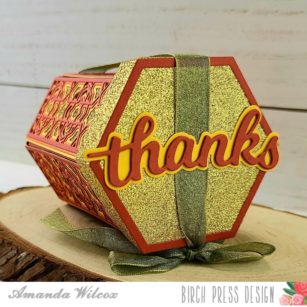
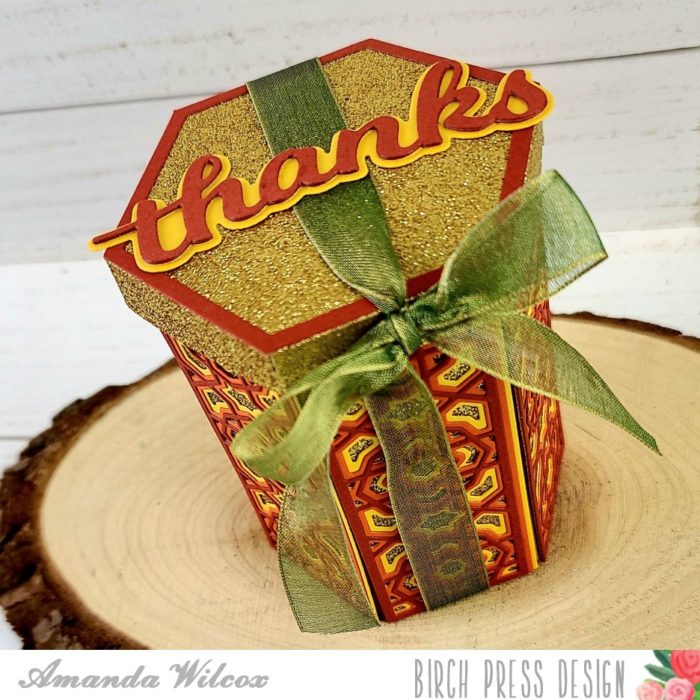
    Hello everyone, it’s Amanda from Twiddler’s Nook bringing you a beautiful gift box tutorial today.

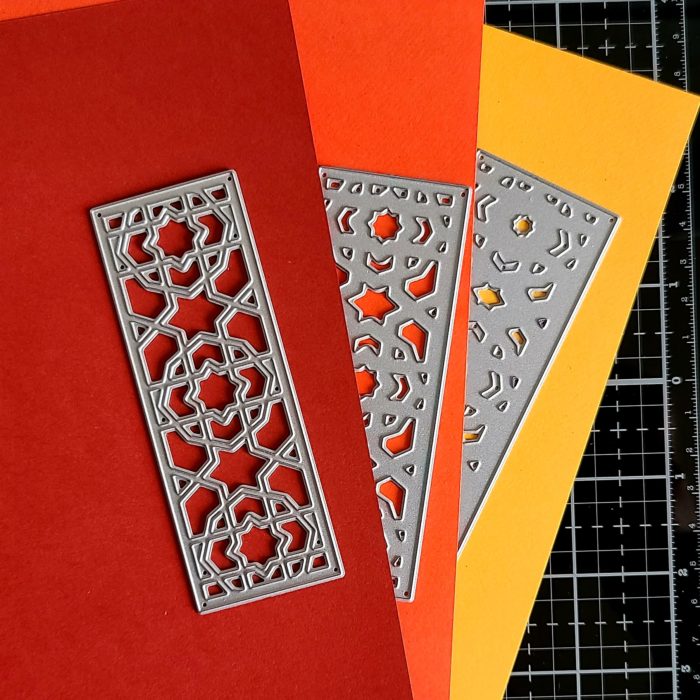
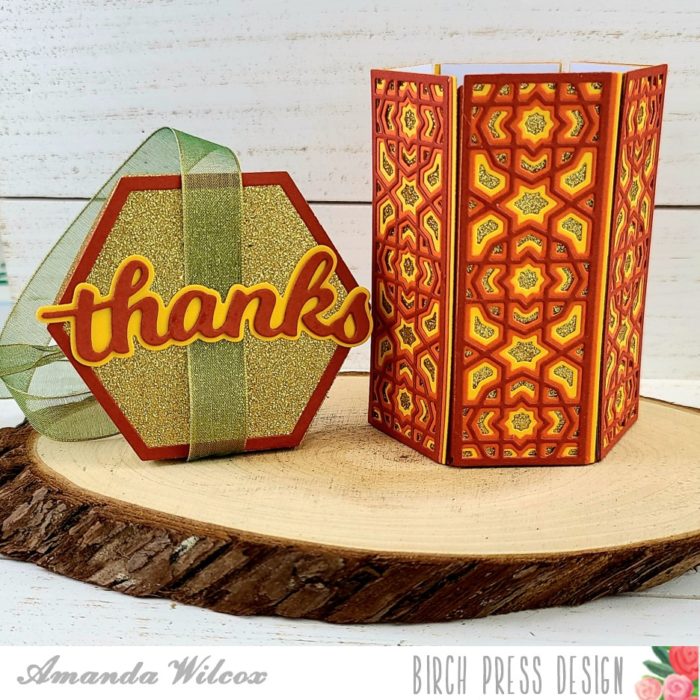
    I paired the newer hexagon box lid and base with the mini grandoise bevel plates for a bold autumn feeling gift box.

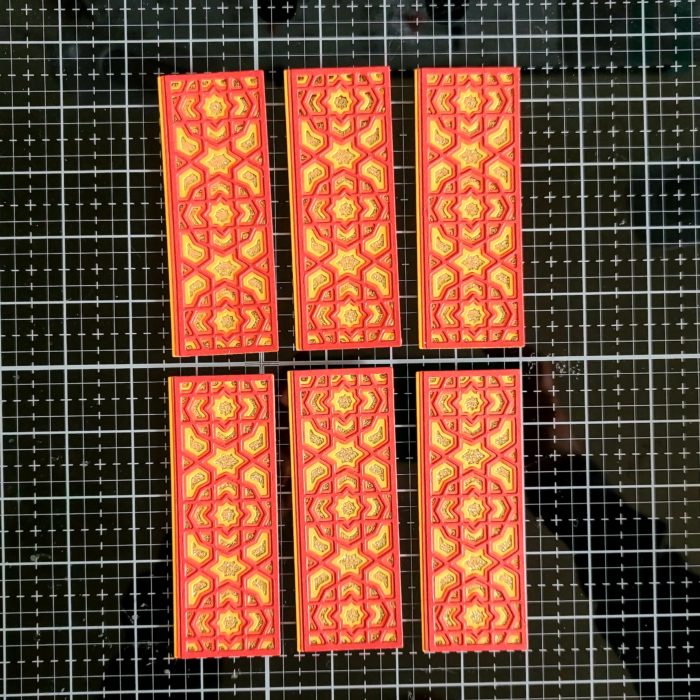
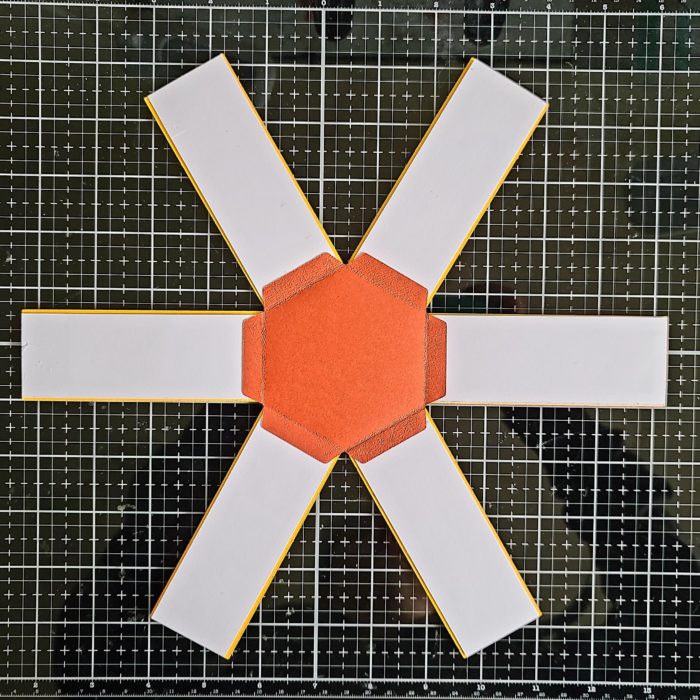
    I chose the colors of paper I wanted to use and die cut each layer 6 times.

    I used liquid glue to adhere all the layers and put acrylic blocks on top while they dried to be sure the layers really stuck together. While those were drying I moved on to the lid and base.

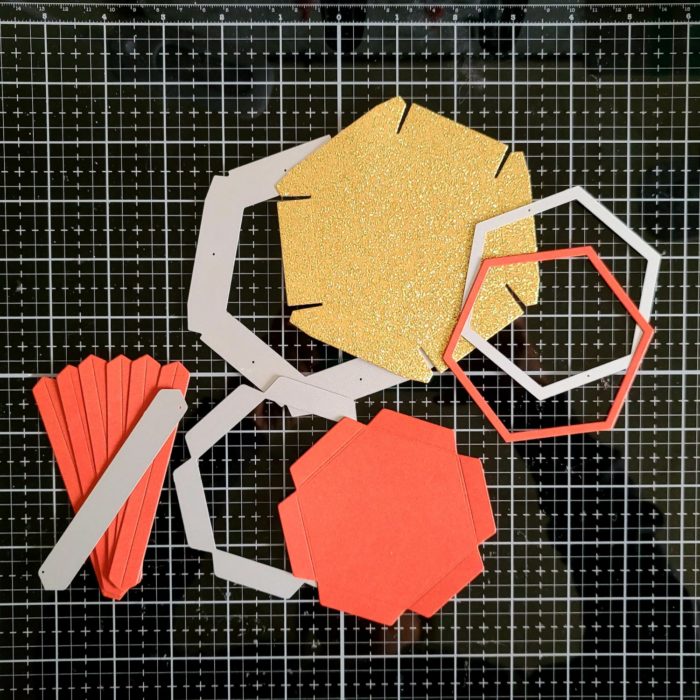
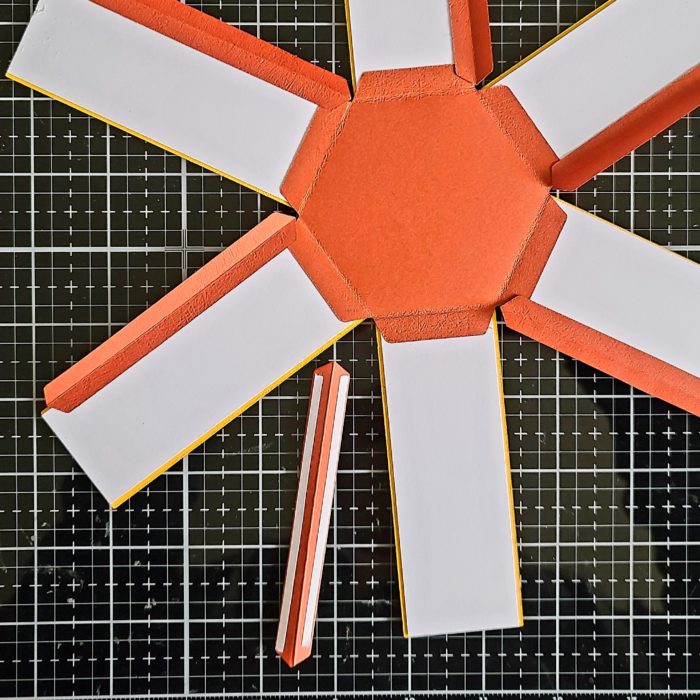
    I die cut all the pieces needed and set the base and corners aside while I adhered my lid together.

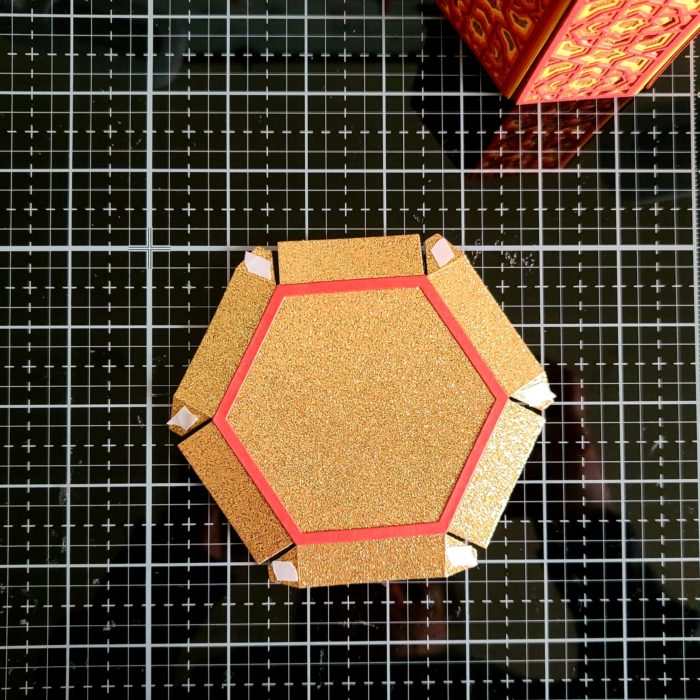
    I used liquid glue to adhere the frame on top and tear tape for the tabs on the side. ***Disclaimer: Learn from my mistake and take your time with this piece. Use liquid glue and tweezers on tab at a time. The tear tape didn’t stick to the glitter paper and I ended up fixing it the next day.***

    Finally, I adhered my layered sides to the tabs on the base with tear tape. This worked because it was sticking regular cardstock to regular cardstock, no glitter.

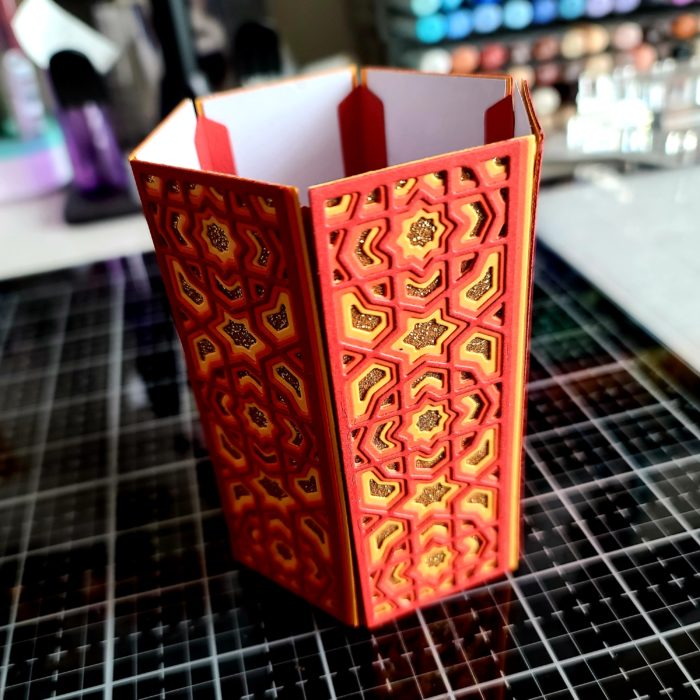
    Finally, I added tear tape to the corner pieces and adhered them to the layered panels one at a time. Then I removed the second piece of release paper and formed my box, one side at a time.

    Here’s a look at it all glued together before I put the lid on it and finished things off. It’s just beautiful and the options are endless with colors!

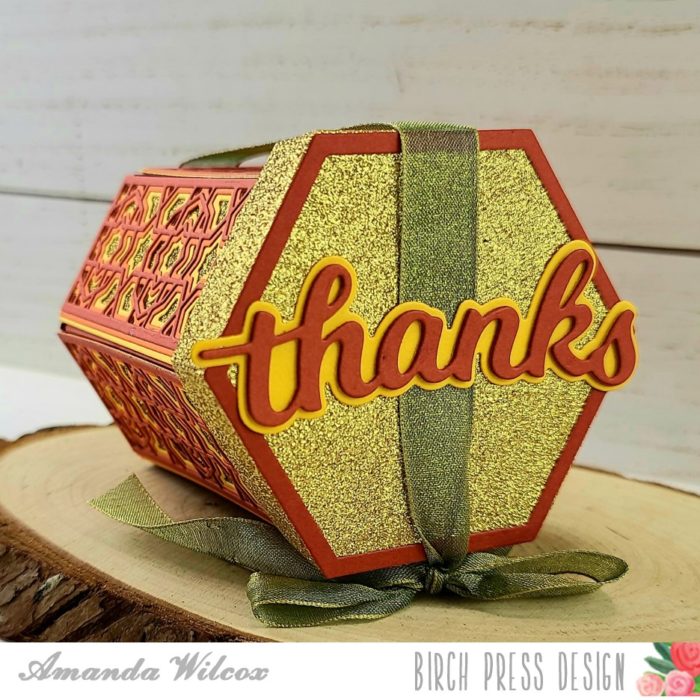
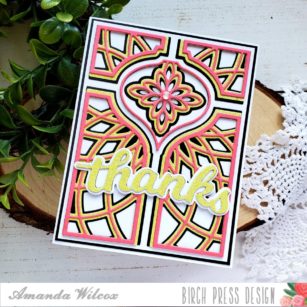
    To finish things off, I cut an extra long piece of green organza ribbon and tied it around my box. Then I die cut the word “thanks” and it’s shadow and glued them together. I did layer 4 sets of the actual word together for a little dimension. Then I used liquid glue and adhered the word and ribbon to the box lid.

    I’m blown away at how regal this looks and how fun it was to build. They would be amazing party favors or great for special gifts too.

    What would you put inside a box like this? I’d love to know!

    I appreciate you sharing your time with me. Have a fabulous day!

    Supplies


  • Fall is in the Air | By Amanda Wilcox

    Fall is in the Air | By Amanda Wilcox

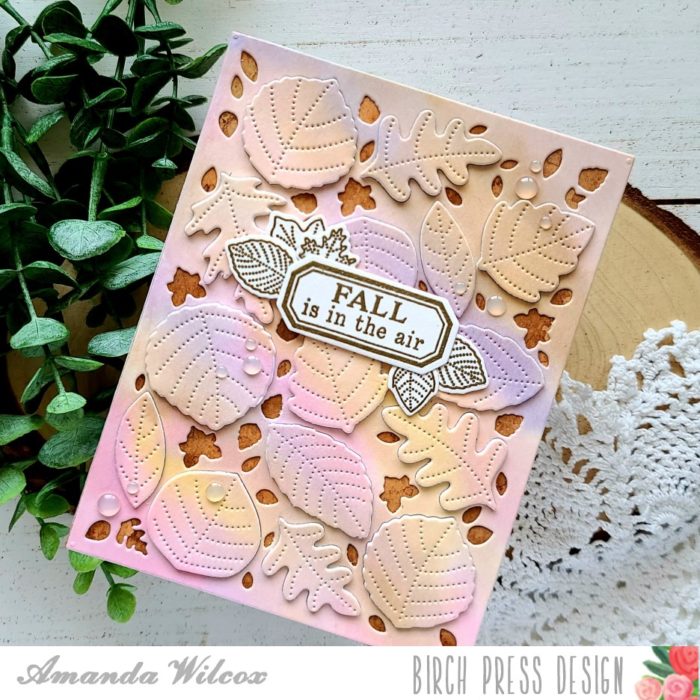
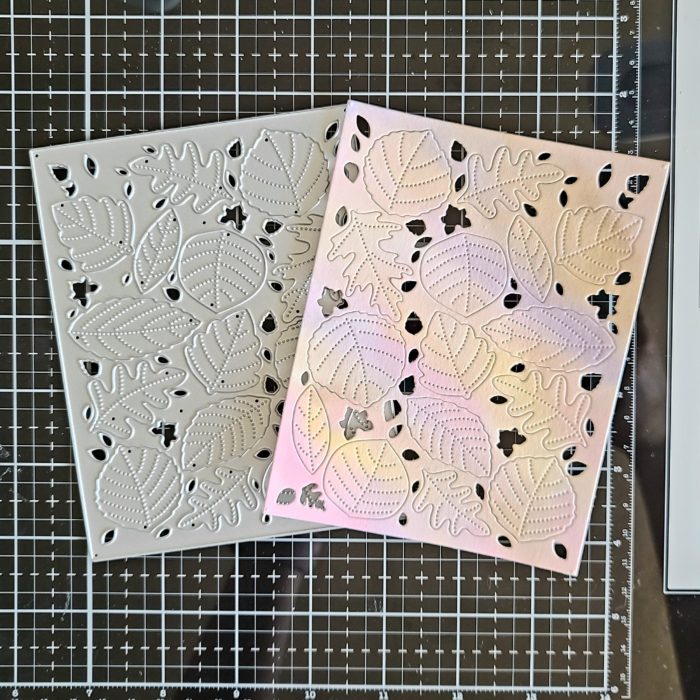
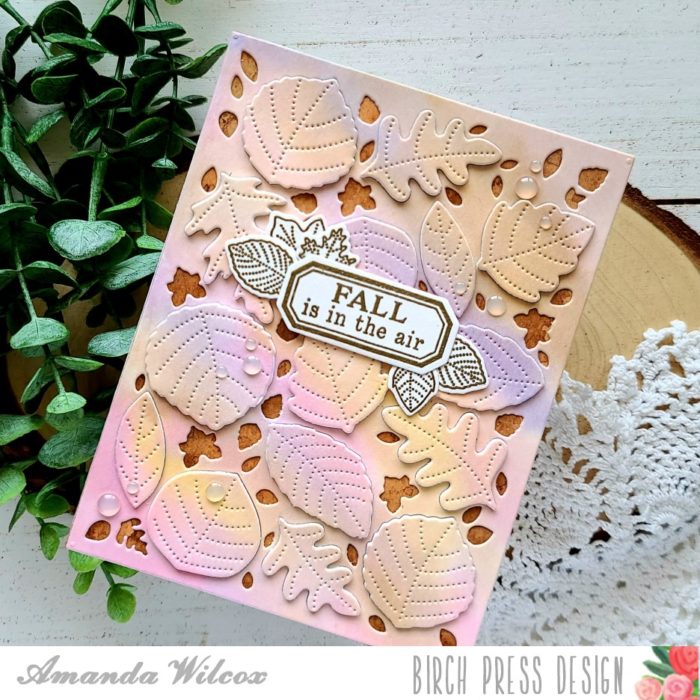
    Hello everyone. It’s Amanda from Twiddler’s Nook sharing a little fall watercolor with you using one of the layers from the new Autumn Breeze cover plates.

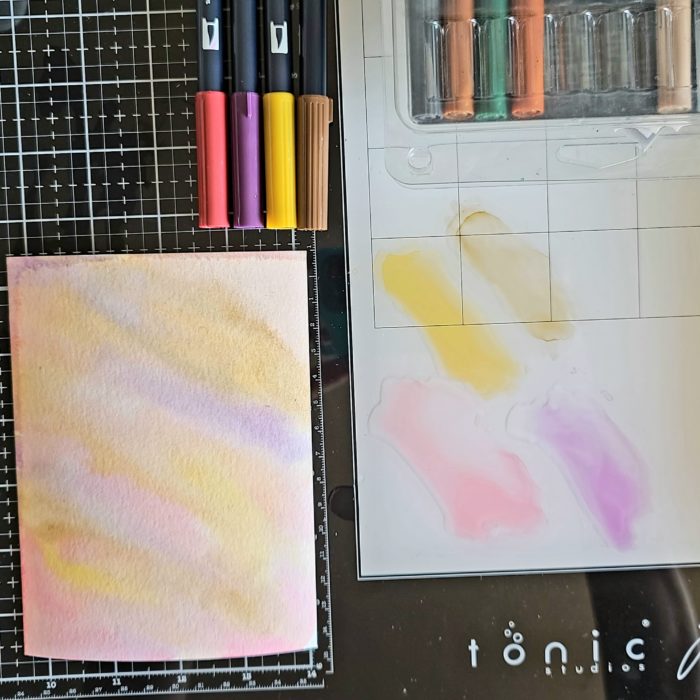
    To start things off I pulled out a piece of watercolor paper and chose some Tombow waterbrush markers to watercolor with. I scribbled them on my glass mat, grabbed a cup of water and a paintbrush and started painting all over my panel.

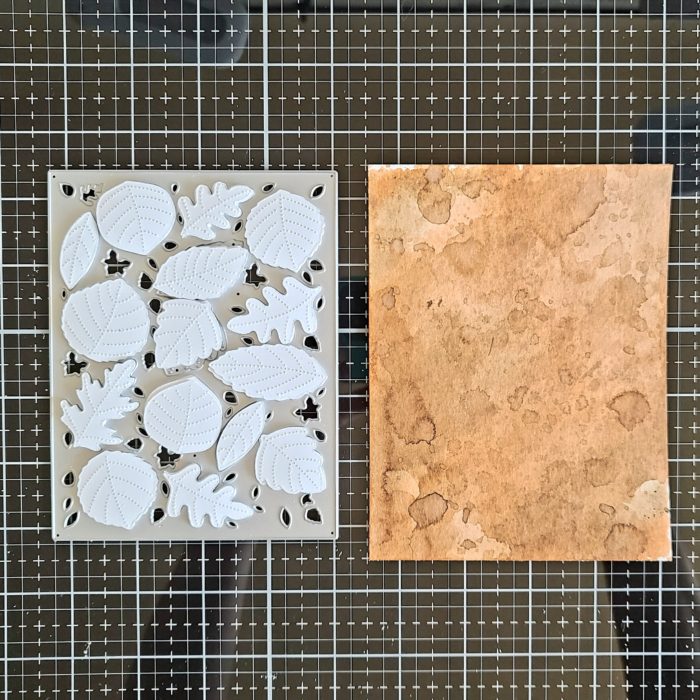
    Once it was dry, I die cut it with Autumn Breeze layer B. Then I die cut the same layer from white cardstock 4 more times, keeping track of which leaves go in which spots.

    Then I moved on to my background panel. I took some brown Tombow markers and another piece of watercolor paper and did some ink smooshing. Drying in between each layer, I did it about 3 times to get my background how I wanted it.

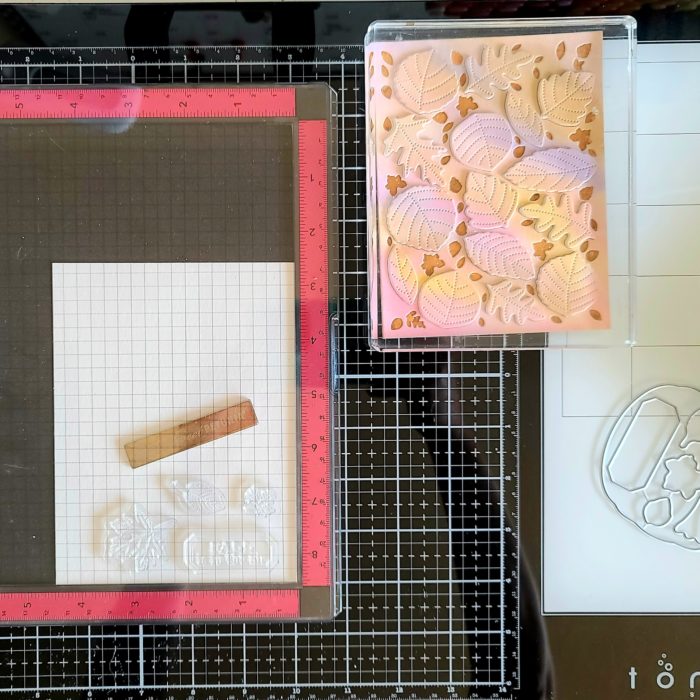
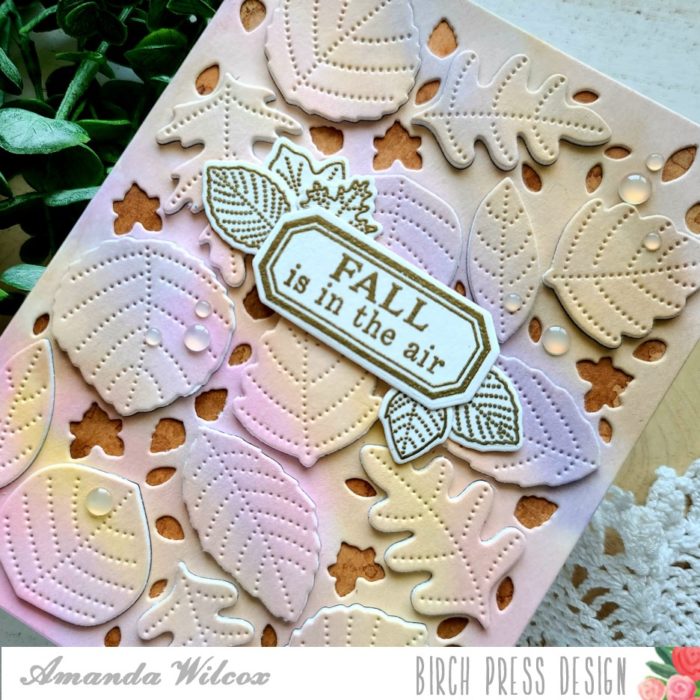
    I sorted the leaves onto the die cut and glued each layer together with the watercolor layer on top. I adhered the watercolor panel to the brown panel and then added the dimensional leaves to their spots. I laid a heavy acrylic block on top while they dried and moved on to my sentiment.

    I chose a sentiment and some leaves from the new Pumpkin Lacework stamp set, stamped and heat embossed them in gold. Then I used the coordinating dies to cut them all out.

    After I cut these out, I realized that I wanted more so I went back to stamp and heat emboss another round. Then I glued them together and then glued them to the front of my card.

    I finished off the design with some iridescent bubbles from my stash and voila, it’s complete. I think this is so beautiful and the coverplate is so versatile to be able to use it as is or even take the leaves and use them on their own too.

    Fall is my favorite season and it makes my heart happy to create fall themed cards as soon as I can.

    I appreciate you sharing your time with me. Have a fabulous day.

    Supplies

  • Quick and Easy Stenciled Cards | By Amanda Wilcox

    Quick and Easy Stenciled Cards | By Amanda Wilcox

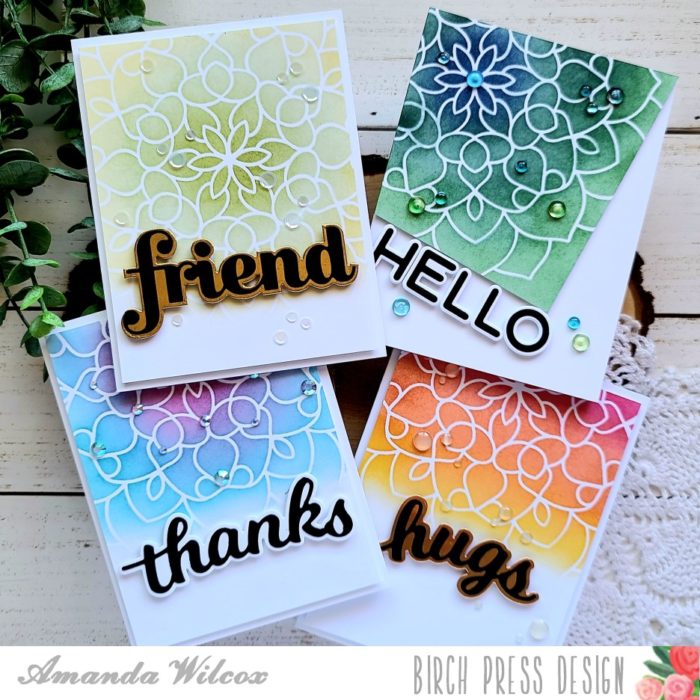
    Hello everyone. It’s Amanda from Twiddler’s Nook joining you again. Today I’ve got a set of 4 cards that I made fairly quickly and would be a great design to mass produce or pull together if you needed something in a flash.

    Here’s a peek at all of them. But let’s back things up and I’ll show you how I created them.

    I used removable adhesive on the back of my panel and stuck it to my glass mat. Then I used post-it tape to tape my stencil in place.

    Then I used blending brushes and dye inks to ink up my panels one at a time. I did them all back-to-back, assembly line style.

    Here is a look at all of the panels before I trim them down at all.

    I trimmed the 3 panels down to 4×5.25 and trimmed the one along the stencil lines. Then I backed them all with foam tape. Next, I grabbed my sentiment dies and cut the shadow and words from various cardstock and adhered them together with liquid glue. Then I added foam tape to the back of these as well.

    At this point I popped all the panels on white card bases and also added the sentiments that I chose.

    I went through my stash of embellishments and chose a different one for each card, adhering them differently for each design.

    This card is my absolute favorite from today. Something about those colors together and the simple confetti bits adding interest here and there.

    And I love how different this one turned out as well. So many possibilities with this simple design. Did you have a favorite?

    I appreciate you sharing your time with me. I hope you have been inspired to create something wonderful. Have a fabulous day!

    Supplies

  • Ornament Tag Trio | By Amanda Wilcox

    Ornament Tag Trio | By Amanda Wilcox

    Welcome everyone! This is Amanda from Twiddler’s Nook today to share a trio of Christmas tags I made with the new ornament sets.

    Let’s start with making the tag bases. I took a regular sheet of cardstock and folded it down the middle length-wise.

    Then I place my base ornament die hanging off the folded edge about 1/4 inch and ran it through my die cutter. I got 3 tag bases out of 1 sheet of cardstock.

    Then I moved on to creating the ornament fronts. I die cut the layers from different colors of cardstock and adhered them with liquid glue. Here are the layers to the Marisol ornament.

    Then I moved on to the components from the original ornament basics set and created one from just those.

    And lastly, I decided to create a twinkle ornament today too. These are so fun I really could have kept going.

    As I mentioned earlier, I used liquid glue and adhered all of these layers together to create the fronts to my tags. Then I added the tag bases to the back of them. I die cut the ornament topper from the basics set and attached those to the tops. Let’s look at the finished product of each ornament.

    This is the one using just the ornament basics dies. Once it was finished I thought the middle was empty so I added the word “friend” across the middle. I love how this turned out!

    Here is the marisol ornament all finished with some baubles added for extra texture and interest. I think this one is just gorgeous! Definitely my favorite.

    And the twinkle ornament with some gems added to it to finish everything off as well. Isn’t it just so pretty? I can’t wait to try this one in silver and blue.

    I hope you enjoyed these ornament tags today and find some inspiration to create something wonderful.

    Have a fabulous day.

    Supplies

  • Jumbo Lingo Trio | By Amanda Wilcox

    Jumbo Lingo Trio | By Amanda Wilcox

    Hello everyone. It’s Amanda from Twiddler’s Nook joining you today for a trio of cards. I started with one in mind and just couldn’t stop creating! These were so fun to create!

    We’re going to start with the process I used to create the Thanks card first and then I’ll touch on some differences with the other 2. Let’s dive in!

    To create all of these cards, I chose my 3 colors and cut 3 of each of the Cora layers and assembled them with liquid glue.

    For this first one, I used the Ring Tile stencil with a yellow dye in and blending brush. I just did half, then shifted the stencil and did the other half. It was super easy!

    Then I glued the Cora layers to the stenciled panel, trimmed the excess off and adhered the panel to a white card base measuring 3.5×8.5. I die cut the letters from the Jumbo Lingo Thanks from white and the darkest teal and adhered them all together. Finishing off by adding them to the top of my card and adding some Nuvo Crystal Drops in dandelion yellow scattered about.

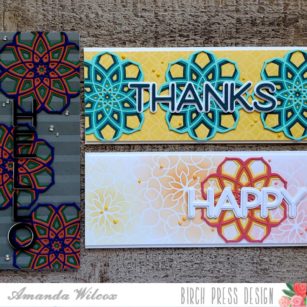
    Here’s a look at the finished product. I absolutely love these colors together! And that sentiment is so bold and wonderful! I love it! Let’s keep going with the HAPPY card next.

    I created my Cora layers the same way with different colors and moved on to stenciling a panel with the Midnight Mandala stencil this time. I started on one end with my blending brush and some melon dye ink, then moved the stencil and used peach ink and finally moved it one more time and ended with yellow so it all coordinated with my cardstock colors.

    This time the sentiment is white on white with 3 layers of the letters on top for dimension.

    Now for this design, although I created 3 of the Cora layers up front, I only used one because I love the stencil showing through. I adhered everything and popped the panel on a white card base. For finishing touches this time, I used Nuvo Crystal Drops in dandelion yellow, sugared almond and bubblegum blush.

    Now, let’s check out that bold masculine version.

    Again, I created the Cora layers with those awesome bold colors and set them aside to stencil my background.

    For the sentiment this time, I decided not to use the shadow and try moving the letter vertical though. It looks so cool this way!

    I adhered my stenciled panel to a card base and then adhered the Cora layers and trimmed the excess. For placement on the sentiment I used a T-ruler to keep it all straight. Notice how the “O” is funny because of the curve…I adhered all the other letters, removed the stencil and eyeballed centering the “O” under it all. It looks much more balanced.

    Then I finished this one off with some cool bubble embellishments and it’s done.

    I know this was a really long post and I appreciate you sticking with me. I hope you found some inspiration to create something wonderful. Have a fabulous day!

    Supplies

  • Rainbow Happy | By Amanda Wilcox

    Rainbow Happy | By Amanda Wilcox

    Hello everyone. It’s Amanda from Twiddler’s Nook sharing a card using some new goodies that are available in the shop!

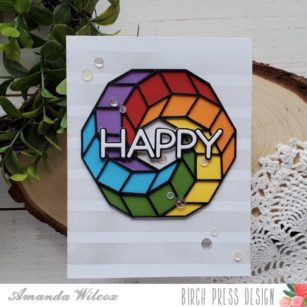
    As soon as I saw this new Torus Ring, I just had to try it in rainbow before anything else. So I pulled out some cardstock and started cutting!

    I cut the frame 3 times from black cardstock and the filler piece from 6 different rainbow colors of cardstock. I used my liquid glue to adhere all the frames together and put some clear blocks on top while it dried.

    Then I took a white card base and the bold stripes stencil. I used a blending brush with some light gray ink for a subtle background.

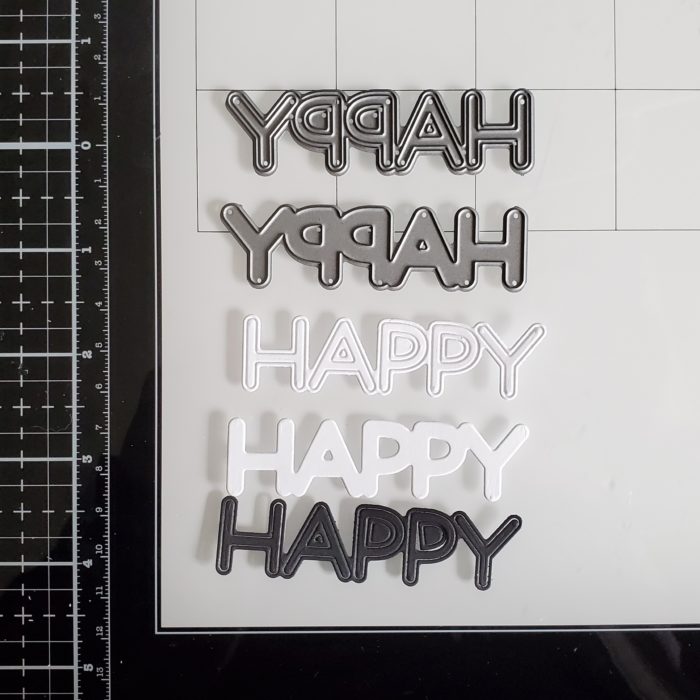
    Next, I chose the Big Lingo Happy dies for a sentiment. I cut the shadow from white and then letters from white and black and used liquid glue to adhere all the pieces. I used the outline from the black and the actual letter pieces from the white.

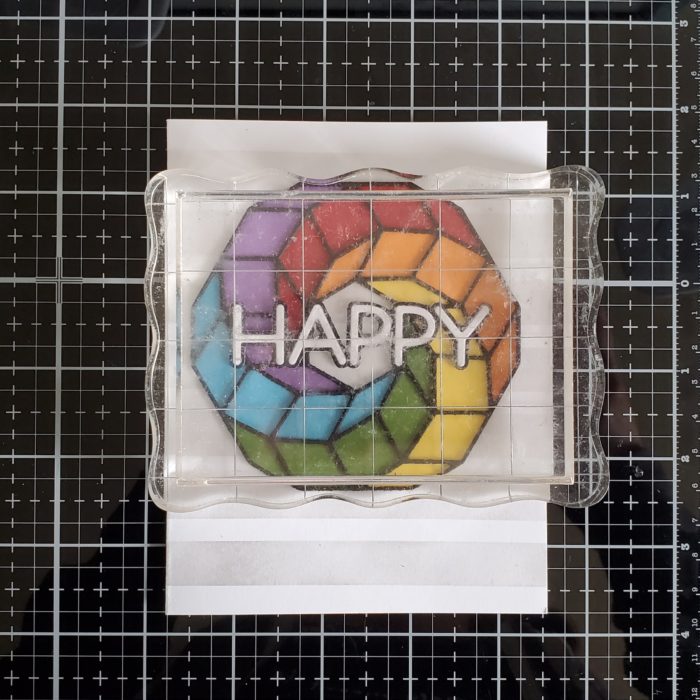
    I adhered the colored pieces of the Torus Ring to the back of the frames and glued the whole thing to my card front. Then I added HAPPY on top and put clear blocks on it all while it dried.

    Finally I moved on to finishing touches for my card. I added some flat confetti pieces scattered across and Wink of Stella glitter brush pen to the HAPPY.

    I feel like this card is great for any occasion. It’s just waiting for you to write what there is to be happy about on the inside.

    Happy Everything! Happy Birthday! Happy Day! Happy You! The possibilities are endless. I always need cards like this in my stash because it’s fun to celebrate all kind of things at the drop of a hat.

    I appreciate you sharing your time with me. Have a fabulous day!


    Supplies

  • Stretch Your Holiday Dies | By Amanda Wilcox

    Stretch Your Holiday Dies | By Amanda Wilcox

    Happy Tuesday everyone! It’s Amanda from Twiddler’s Nook joining you for a bright and summery card using some holiday dies, but you’d never know because of the paper colors and sentiment I chose.

    I started by die cutting all 3 layers to the Nobilia Ornament set from different cardstocks – black, yellow glitter and melon.

    I used liquid glue to adhere all of the layers and put an acrylic block on them all to help them dry flat.

    While those were drying I cut my cardstock layers. I have an A2 size white card base, then a black layer that measures 5 3/8×4 1/8 and finally a white layer that measures 5 1/4×4. I adhered all of these together with tape runner and set it aside.

    For my sentiment I pulled out the Thanks Sugar Script set. I cut the shadow from white and the word from black and the same yellow glitter. I layered these together with liquid glue and put an acrylic block on them while they dried as well.

    Finally, I adhered all of my layers to the card front with liquid glue and then the sentiment on top of that.

    I didn’t do much for finishing touches because I didn’t want to detract from the awesome glittler layer. So I added one simply gem to the center of the ornament portion.

    I appreciate you sharing your time with me. Have a fabulous day!

    Supplies
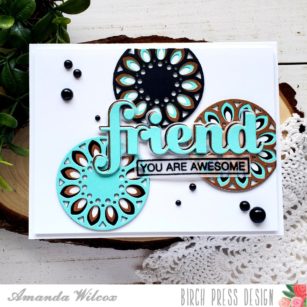
  • Friend, You Are Awesome | By Amanda Wilcox

    Friend, You Are Awesome | By Amanda Wilcox

    Thanks for stopping by today. This is Amanda from Twiddler’s Nook visiting with this fun card and a new way to look at some of your full cover plate dies.

    I started with all 3 Grace cover plates and a stack of 2 1/4 inch square pieces of cardstock in teal, gold and black. I used them to die cut just the center circle from each layer. I cut each layer out of each color one time. This gives me 3 completed circles.

    I arranged the completed circles on my card front and used the sugar script big friends die to help my decide on placement.

    I die cut the shadow from vellum and the word friend from each of the 3 colors I used on the circles.

    I glued the black word to the vellum and then followed it by the gold shifted just a bit and finally the teal on top shifted just a bit more so you can see all of the colors. I love this look! I also stamped and heat embossed a sentiment from Awesome Ticker Tape Messages and cut it out. I ran this strip through my Xyron sticker maker. Coating the back of vellum with adhesive makes so the adhesive doesn’t show because it’s all the same.

    I adhered everything to a white panel that measured 4×5.25 and added some black flat-back baubles for a little extra interest. I trimmed anything hanging off the side and popped the panel up with foam tape on a white card base.

    This fabulous card is all finished. I hope you enjoyed it and found some inspiration to look at your dies a little differently and create something beautiful.

    I appreciate you sharing your time with me. Have a fabulous day.
    Supplies